Information
I’m using a Mac, Ghostty for the terminal, and Zed as my code editor. The sample project used in this post is astro-blog-example.
Someone asked me how I set up this blog. They were not familiar with Astro, GitHub, Vercel, or the other tools involved, so I wanted to explain the whole process from the beginning.
I used GitHub to keep the website’s source code, and connected that repository to Vercel. Astro turns my Markdown files into web pages, and Vercel publishes those pages whenever I push a change to GitHub.
This post is a rough, reproducible guide to that setup. It is written for someone who may be opening a terminal for the first time, but it also contains enough explicit information for an AI coding agent to perform the setup.
The four pieces
There are four pieces to understand before we start.
Astro
Astro turns my writing into web pages.
I write a post in Markdown. Markdown is a simple way to write text with headings, links, pictures, and lists. Astro reads the Markdown and makes an HTML page that a browser can understand.
You can think of Astro as a helpful robot:
- I give it my writing.
- It puts the writing into the blog design.
- It makes pages that browsers can show.
Astro also makes the home page, post list, tag pages, RSS feed, sitemap, and search files.
AstroPaper
Astro has ready-made themes that we can use to design a blog. A theme already has many things that a blog needs:
- a home page
- a page that lists posts
- dark and light themes
- tags
- mobile-friendly design
- an RSS feed
- a sitemap
- draft posts
- search support
You can change the design to feel like yours later. I’m using AstroPaper.
GitHub
GitHub is a website that stores code and other project files.
It is also like a time machine. When I save a group of changes, GitHub can remember what the project looked like at that time. The project stored on GitHub is called a repository, or repo for short.
GitHub is not where this website is shown to visitors. It is where to keep a safe copy of the website’s files.
Vercel
Vercel takes the files from GitHub, runs Astro, and puts the finished pages on the internet.
When I connect GitHub and Vercel, Vercel watches the repo. When I push new files to GitHub, Vercel builds the website again.
That means this:
write a post
    ↓
save the file
    ↓
send the change to GitHub
    ↓
Vercel builds the site
    ↓
the new post appears online
What you need before starting
You need:
- A GitHub account.
- A Vercel account. Signing in with GitHub is the simplest option.
- Node.js and npm installed on your computer.
- A text editor. VS Code is a practical choice, but any editor will work.
- (Optional) A domain name if you want an address such as
myname.com. Vercel provides a temporary deployment address while you are setting things up, such asmyname-vercel.vercel.app.
What are Node.js and npm?
Node.js is a program that lets JavaScript run on a computer.
JavaScript is a programming language. A web browser can run JavaScript inside a web page. Node.js lets other JavaScript programs run outside the browser too.
Astro is one of those JavaScript programs. The Astro development server and the Astro build tool need Node.js to run.
Think of Node.js as the engine in a car:
- Astro is the car that does the work.
- Node.js is the engine that makes Astro move.
- Without Node.js, the Astro commands cannot start.
You do not need to write Node.js code for this blog. You only need to install Node.js so the other tools can use it.
npm means Node Package Manager. It is installed together with Node.js.
A package is a small piece of ready-made code. Astro and other tools are packages.
npm helps in two important ways:
- It downloads the packages that the project needs.
- It starts commands written in the project’s
package.jsonfile.
Think of npm as a helper who brings the right tools from a toolbox.
How they work together
When I type these commands:
npm install
npm run dev
npm run build
this is what happens:
npm installreads the project’s shopping list and downloads Astro and the other packages.npm run devasks npm to start Astro. Node.js runs Astro, and I can practice the website on my computer.npm run buildasks npm to start Astro’s build job. Node.js runs Astro, and Astro makes the finished website files.
The project has three important places:
package.jsonis the list of tools the project needs.package-lock.jsonremembers the exact versions installed.node_modules/is the local folder where npm puts those tools.
You normally do not edit node_modules/ or upload it to GitHub. If it disappears, npm install can make it again.
Check that they are installed
Open Terminal on macOS or Linux, or PowerShell on Windows. A terminal is a text box where you can give instructions to your computer.
Type:
node --version
npm --version
The computer should print two version numbers.
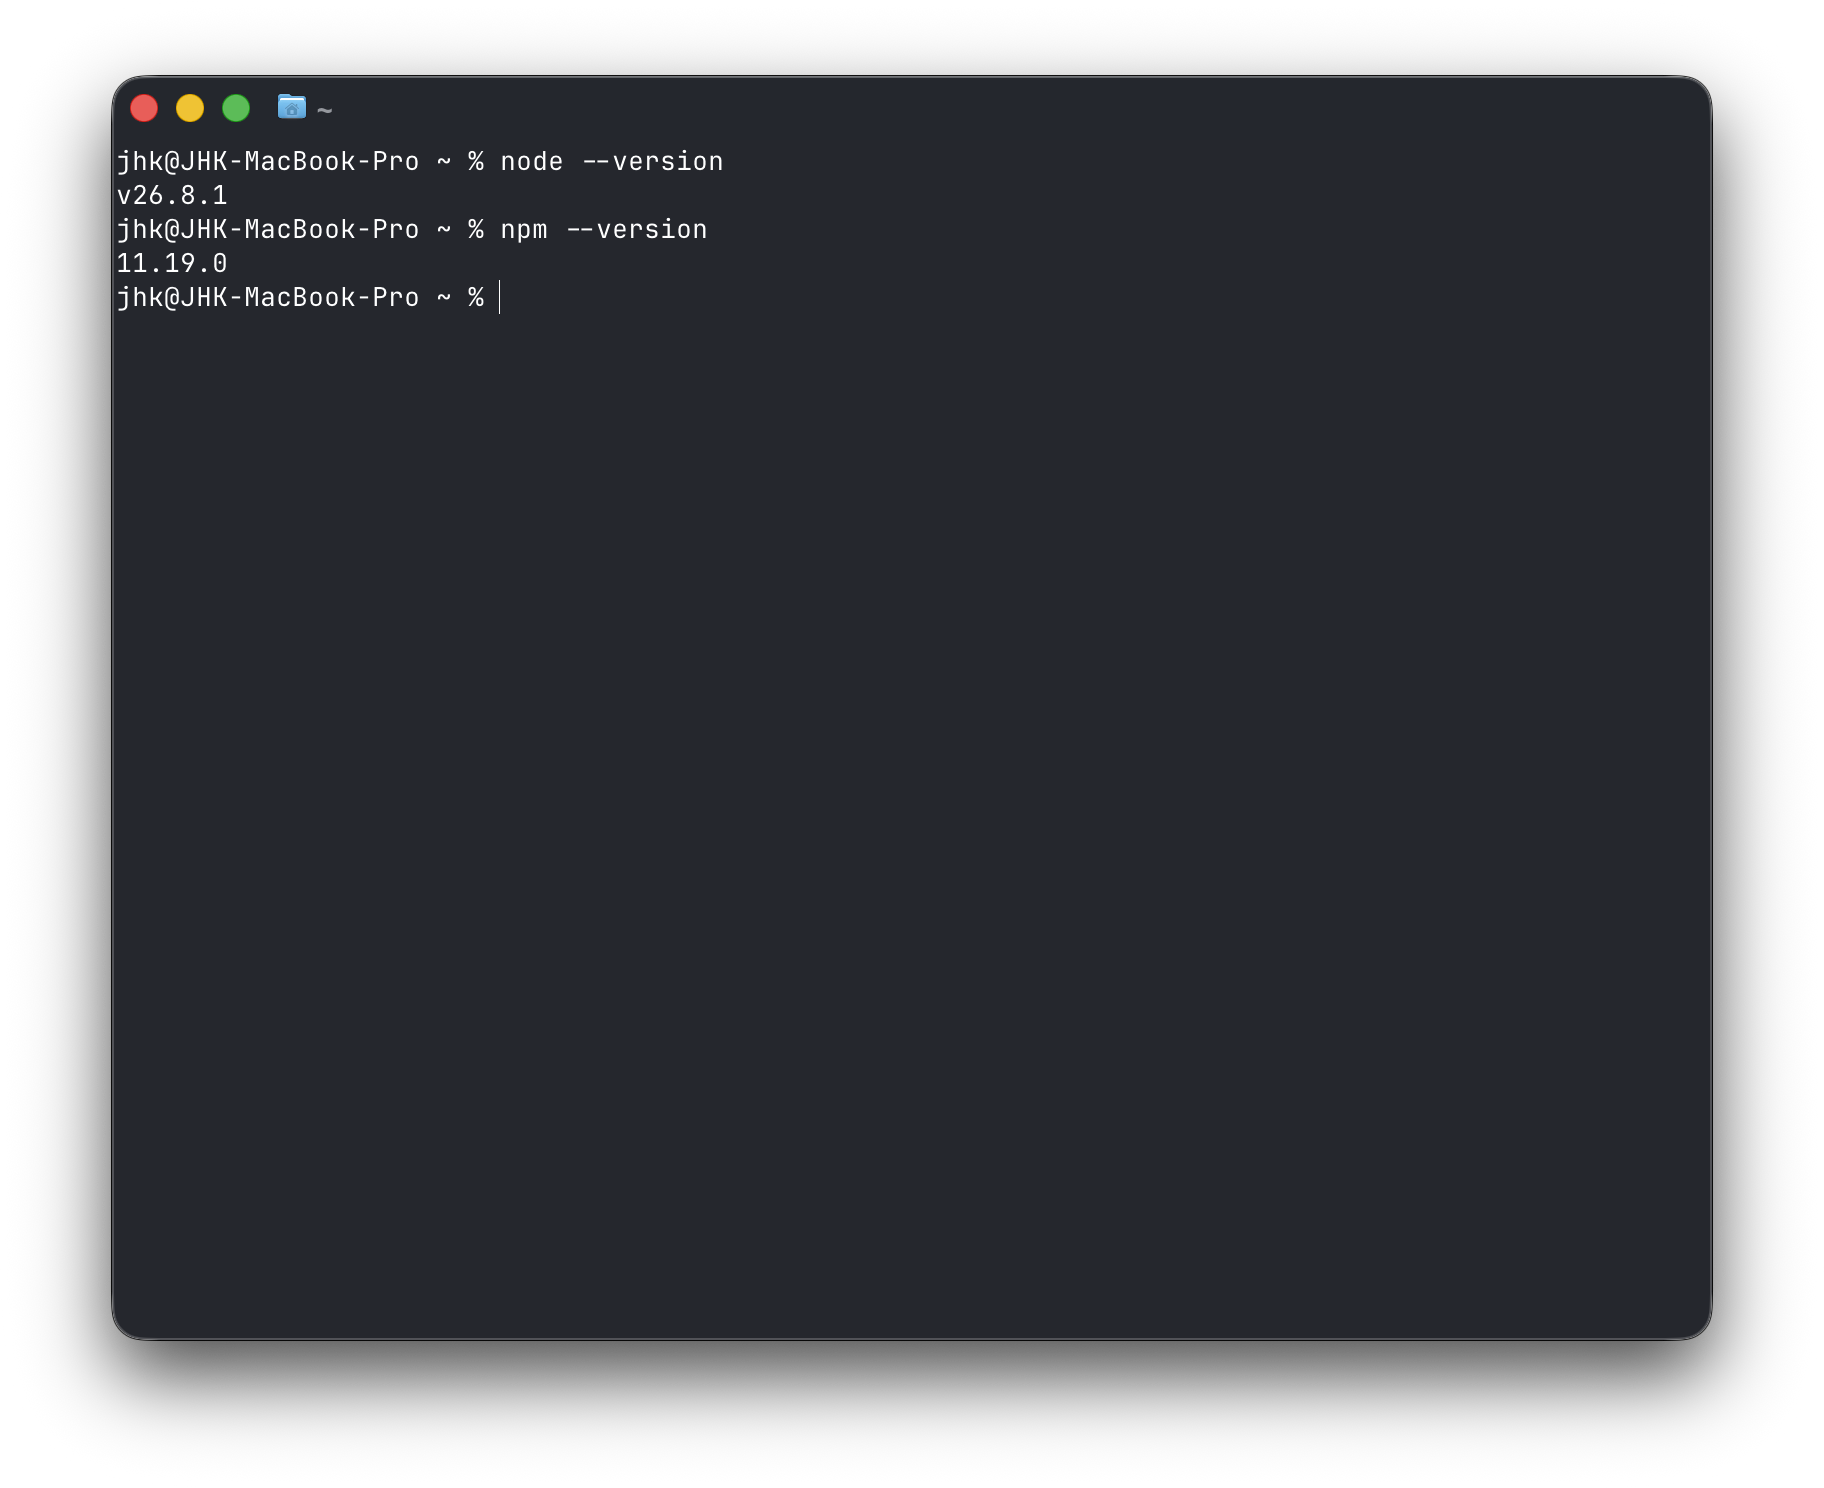
Astro’s current installation guide asks for Node.js v22.12.0 or newer. If the computer says that node or npm cannot be found, install the current LTS version from nodejs.org, open a new terminal, and try again.
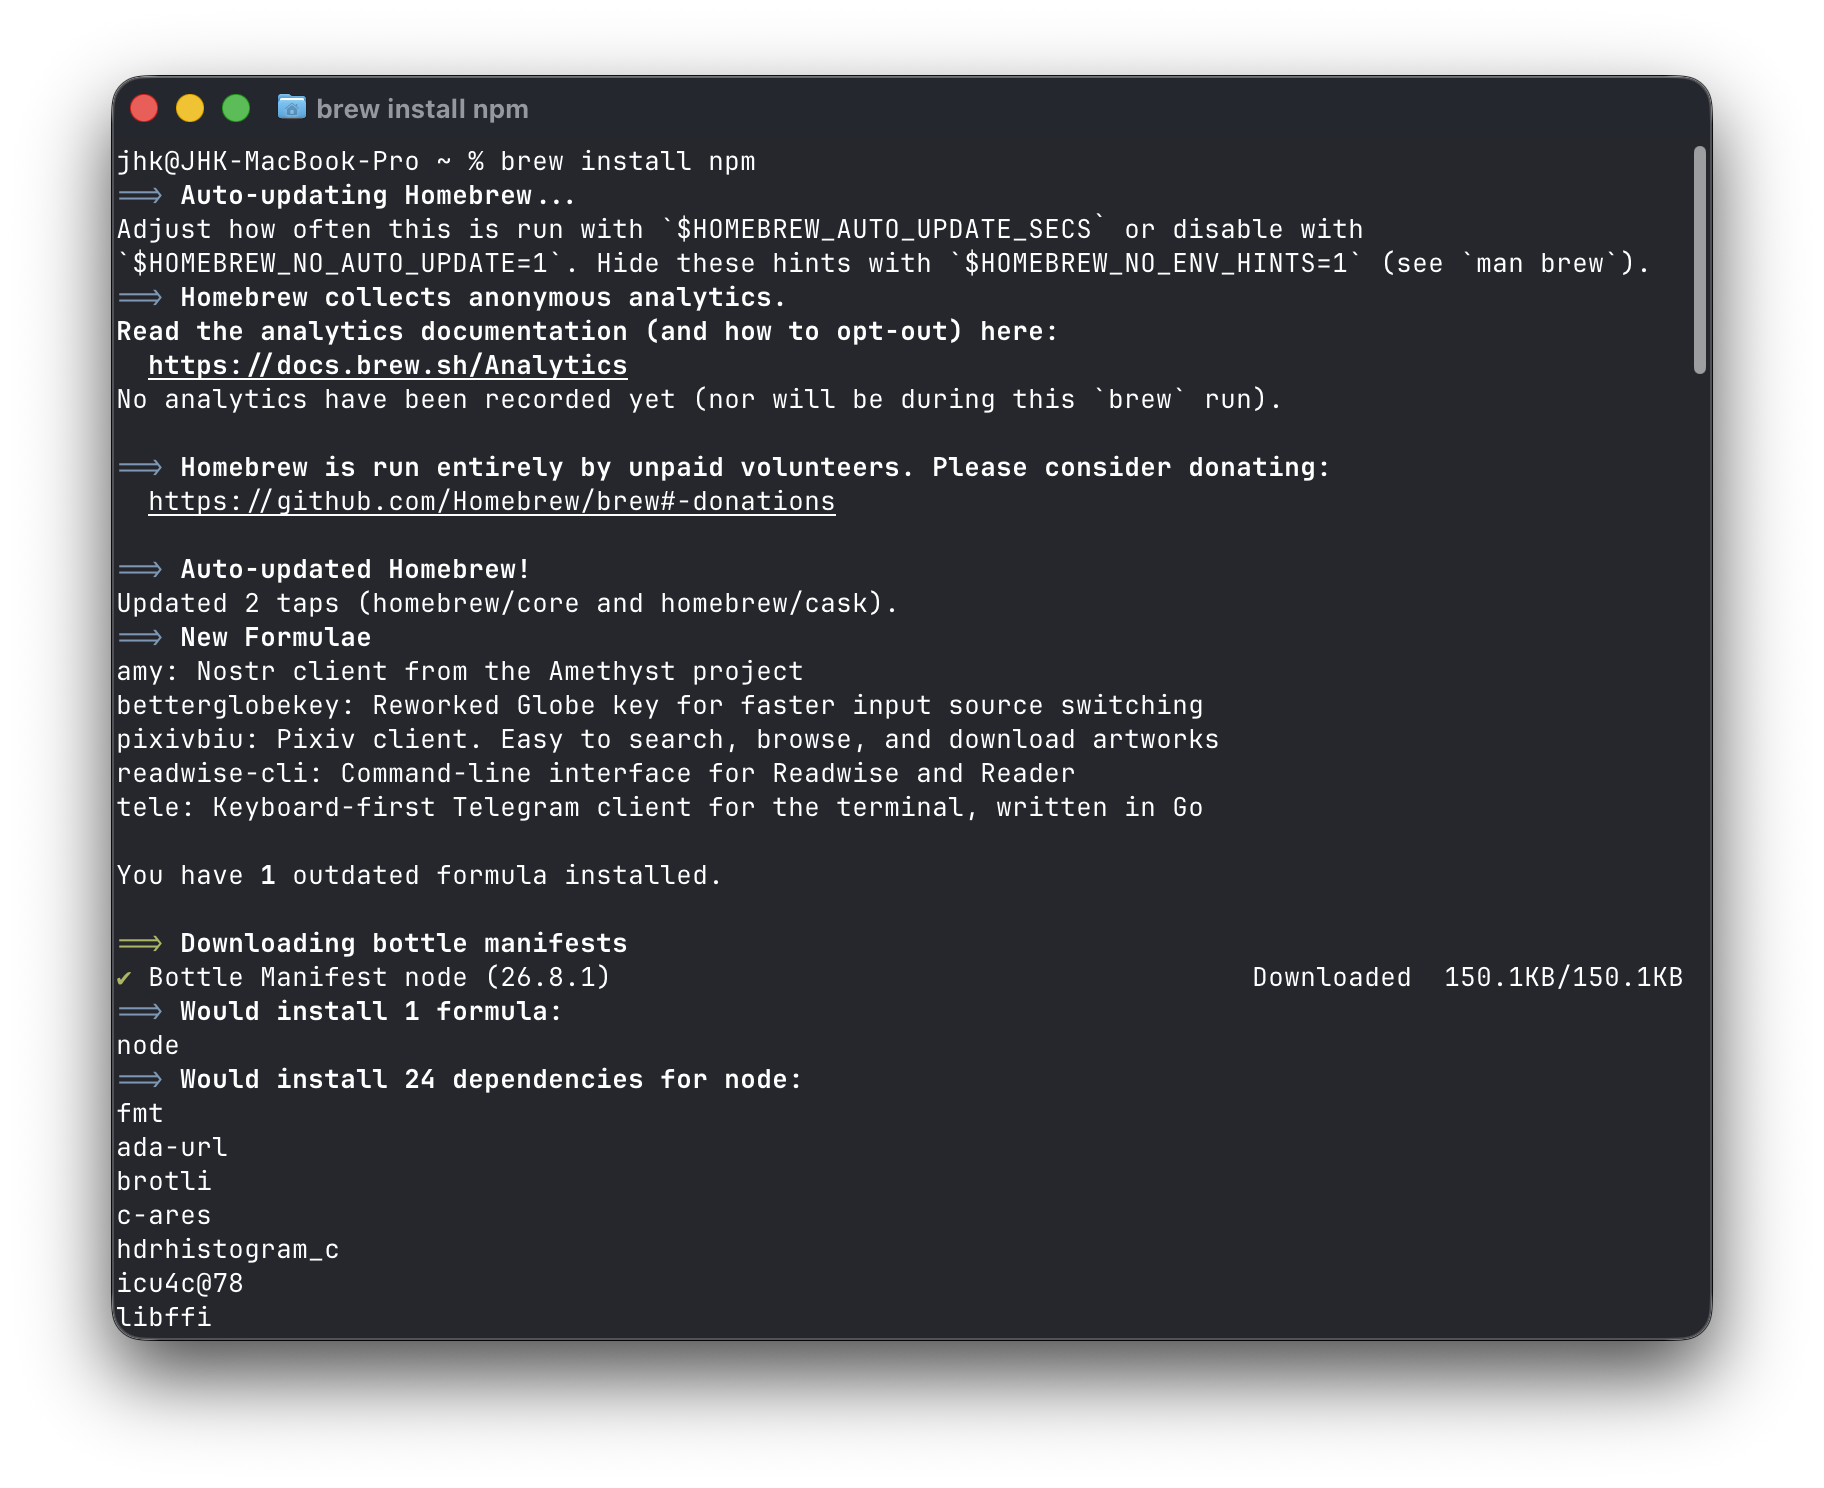
For me, I already have Homebrew installed, so I used brew install npm to install npm.
Start with a clean AstroPaper project
We will start with a brand-new project. This is like getting an empty notebook with a nice cover. It gives you the blog design, but none of my personal writing or pictures.
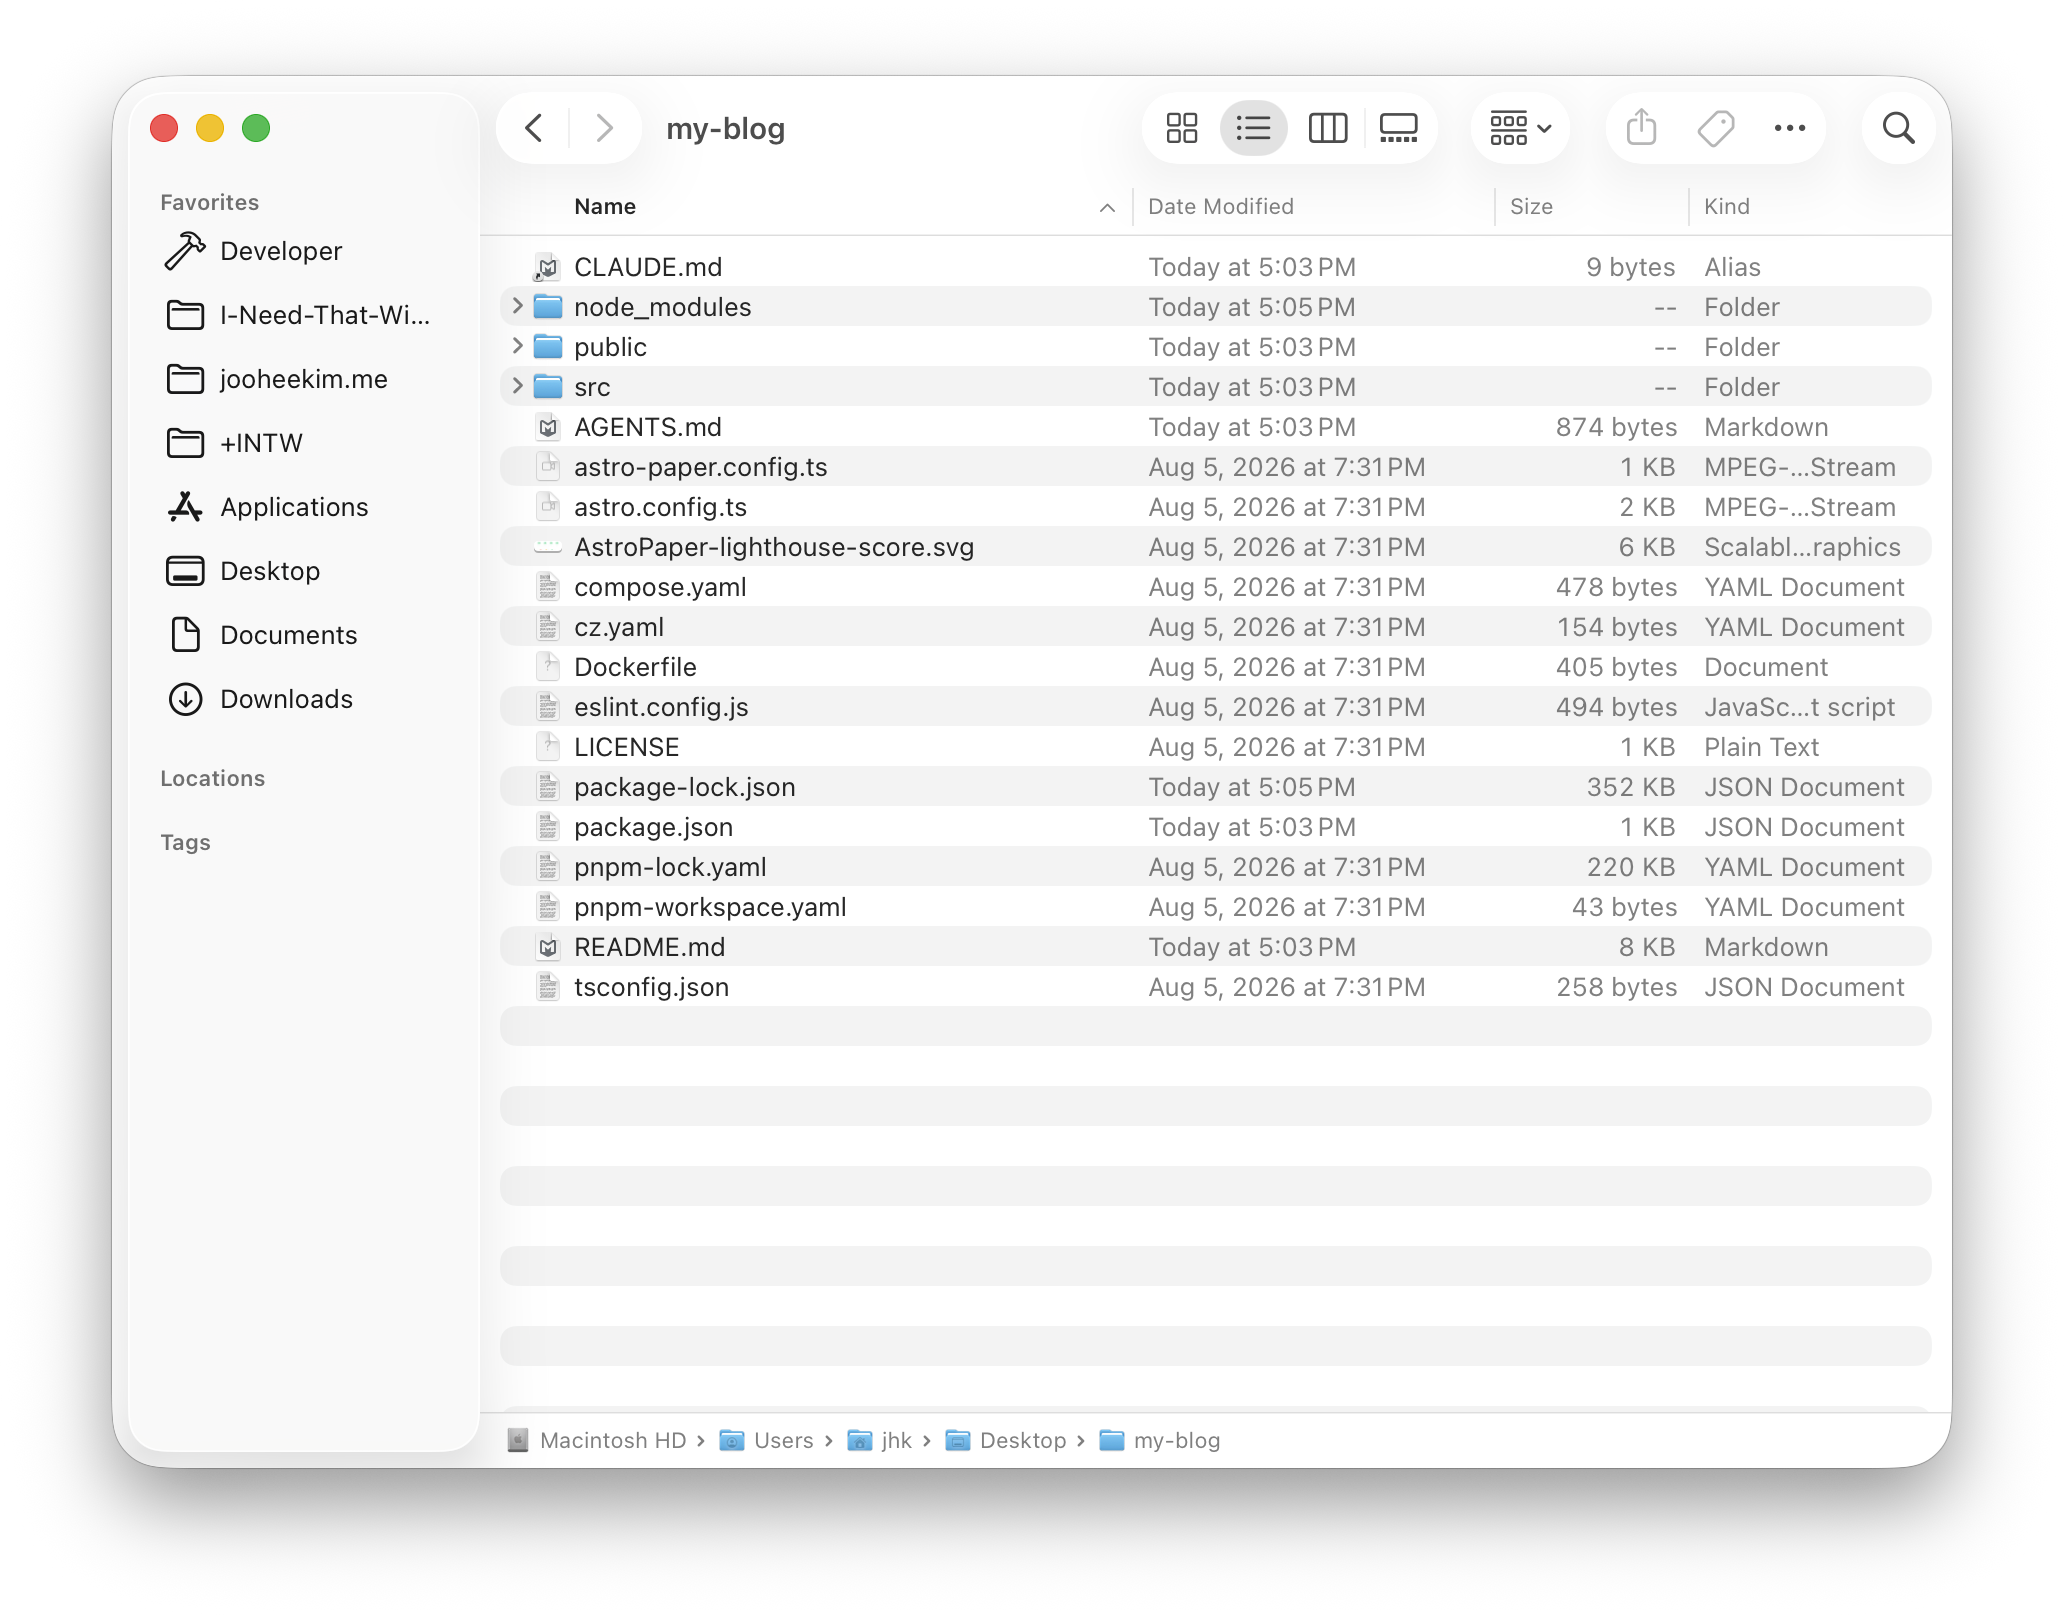
Run this command:
npm create astro@latest -- --template satnaing/astro-paperA setup wizard will ask questions. Tell it:
- which folder should hold the project, such as
my-blog. For me, I usedDesktop/my-blogfor the example. - yes, install the packages
- yes, start Git if the wizard asks
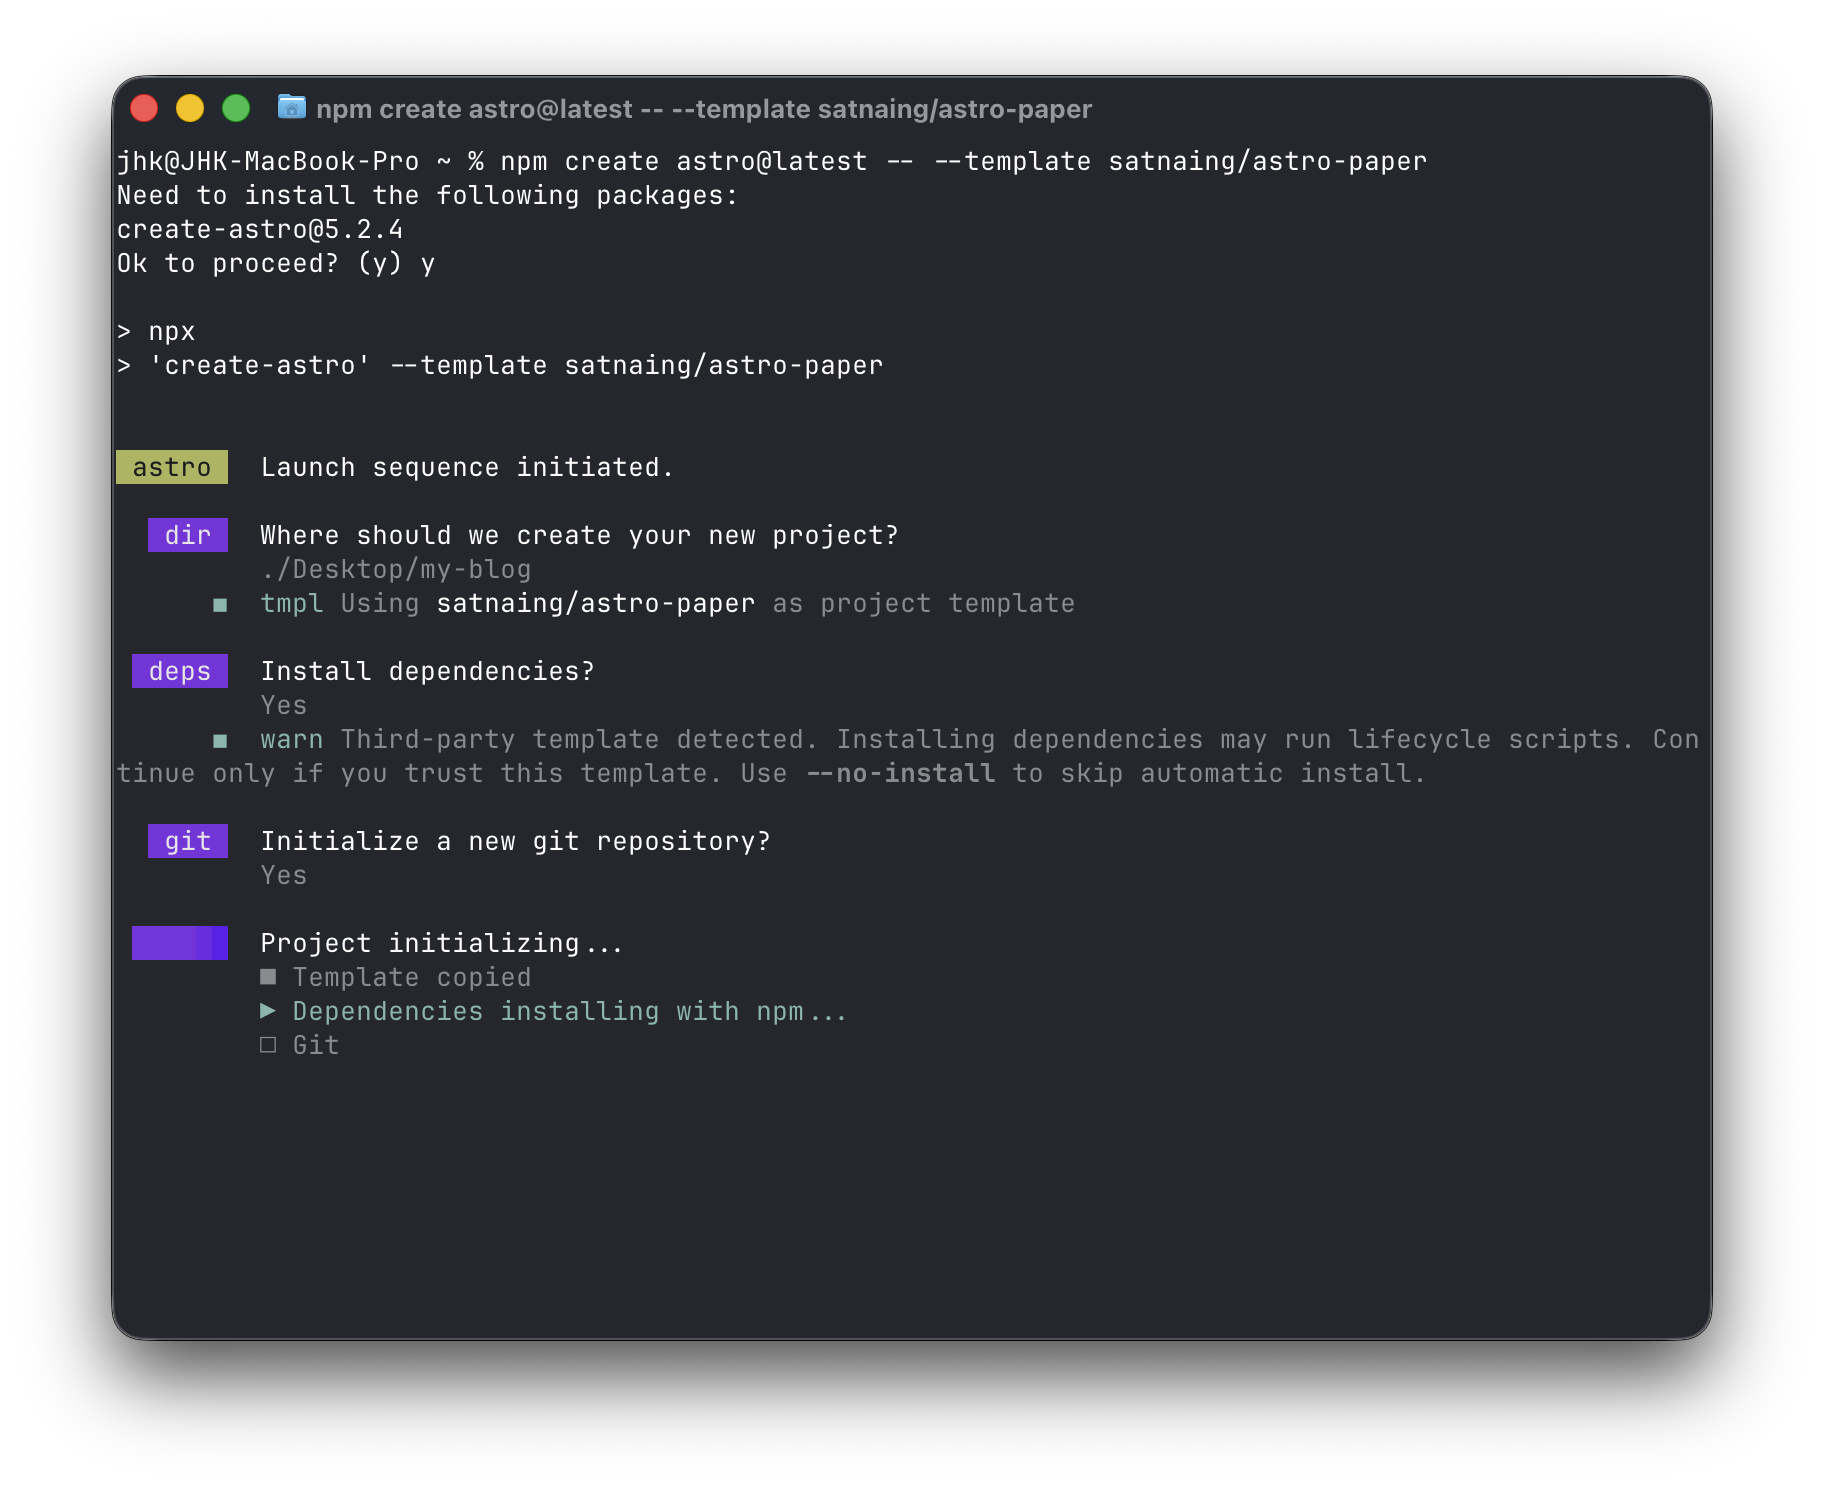
Then go into the new folder:
cd my-blog
npm install
npm run dev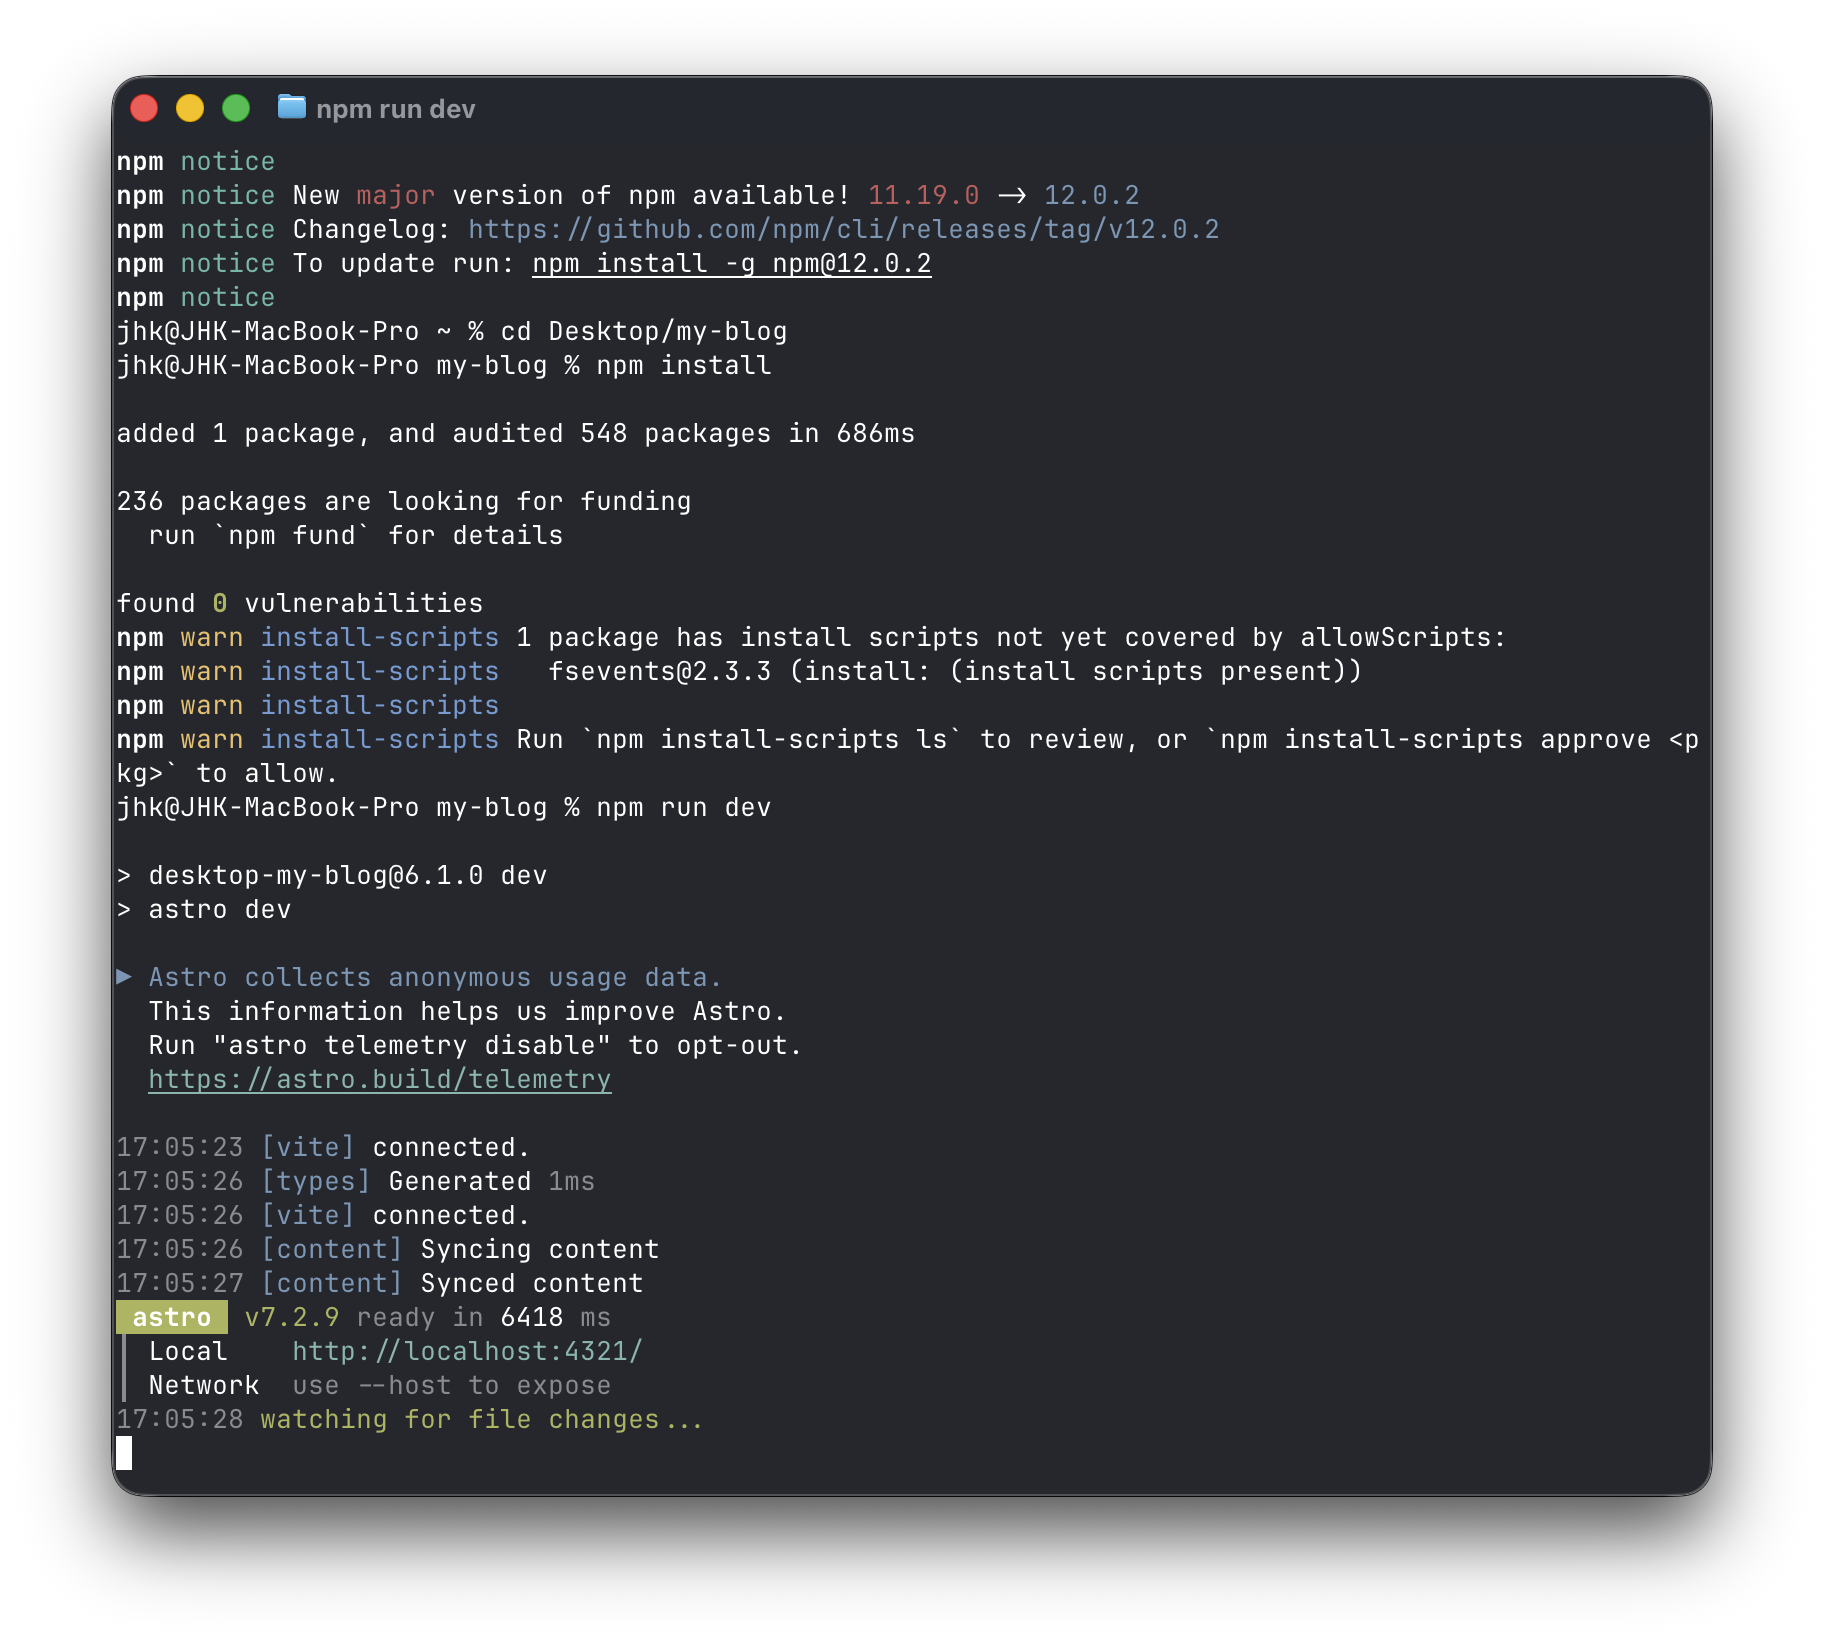
The terminal will show a local address, usually http://localhost:4321/. Open that address in your browser.
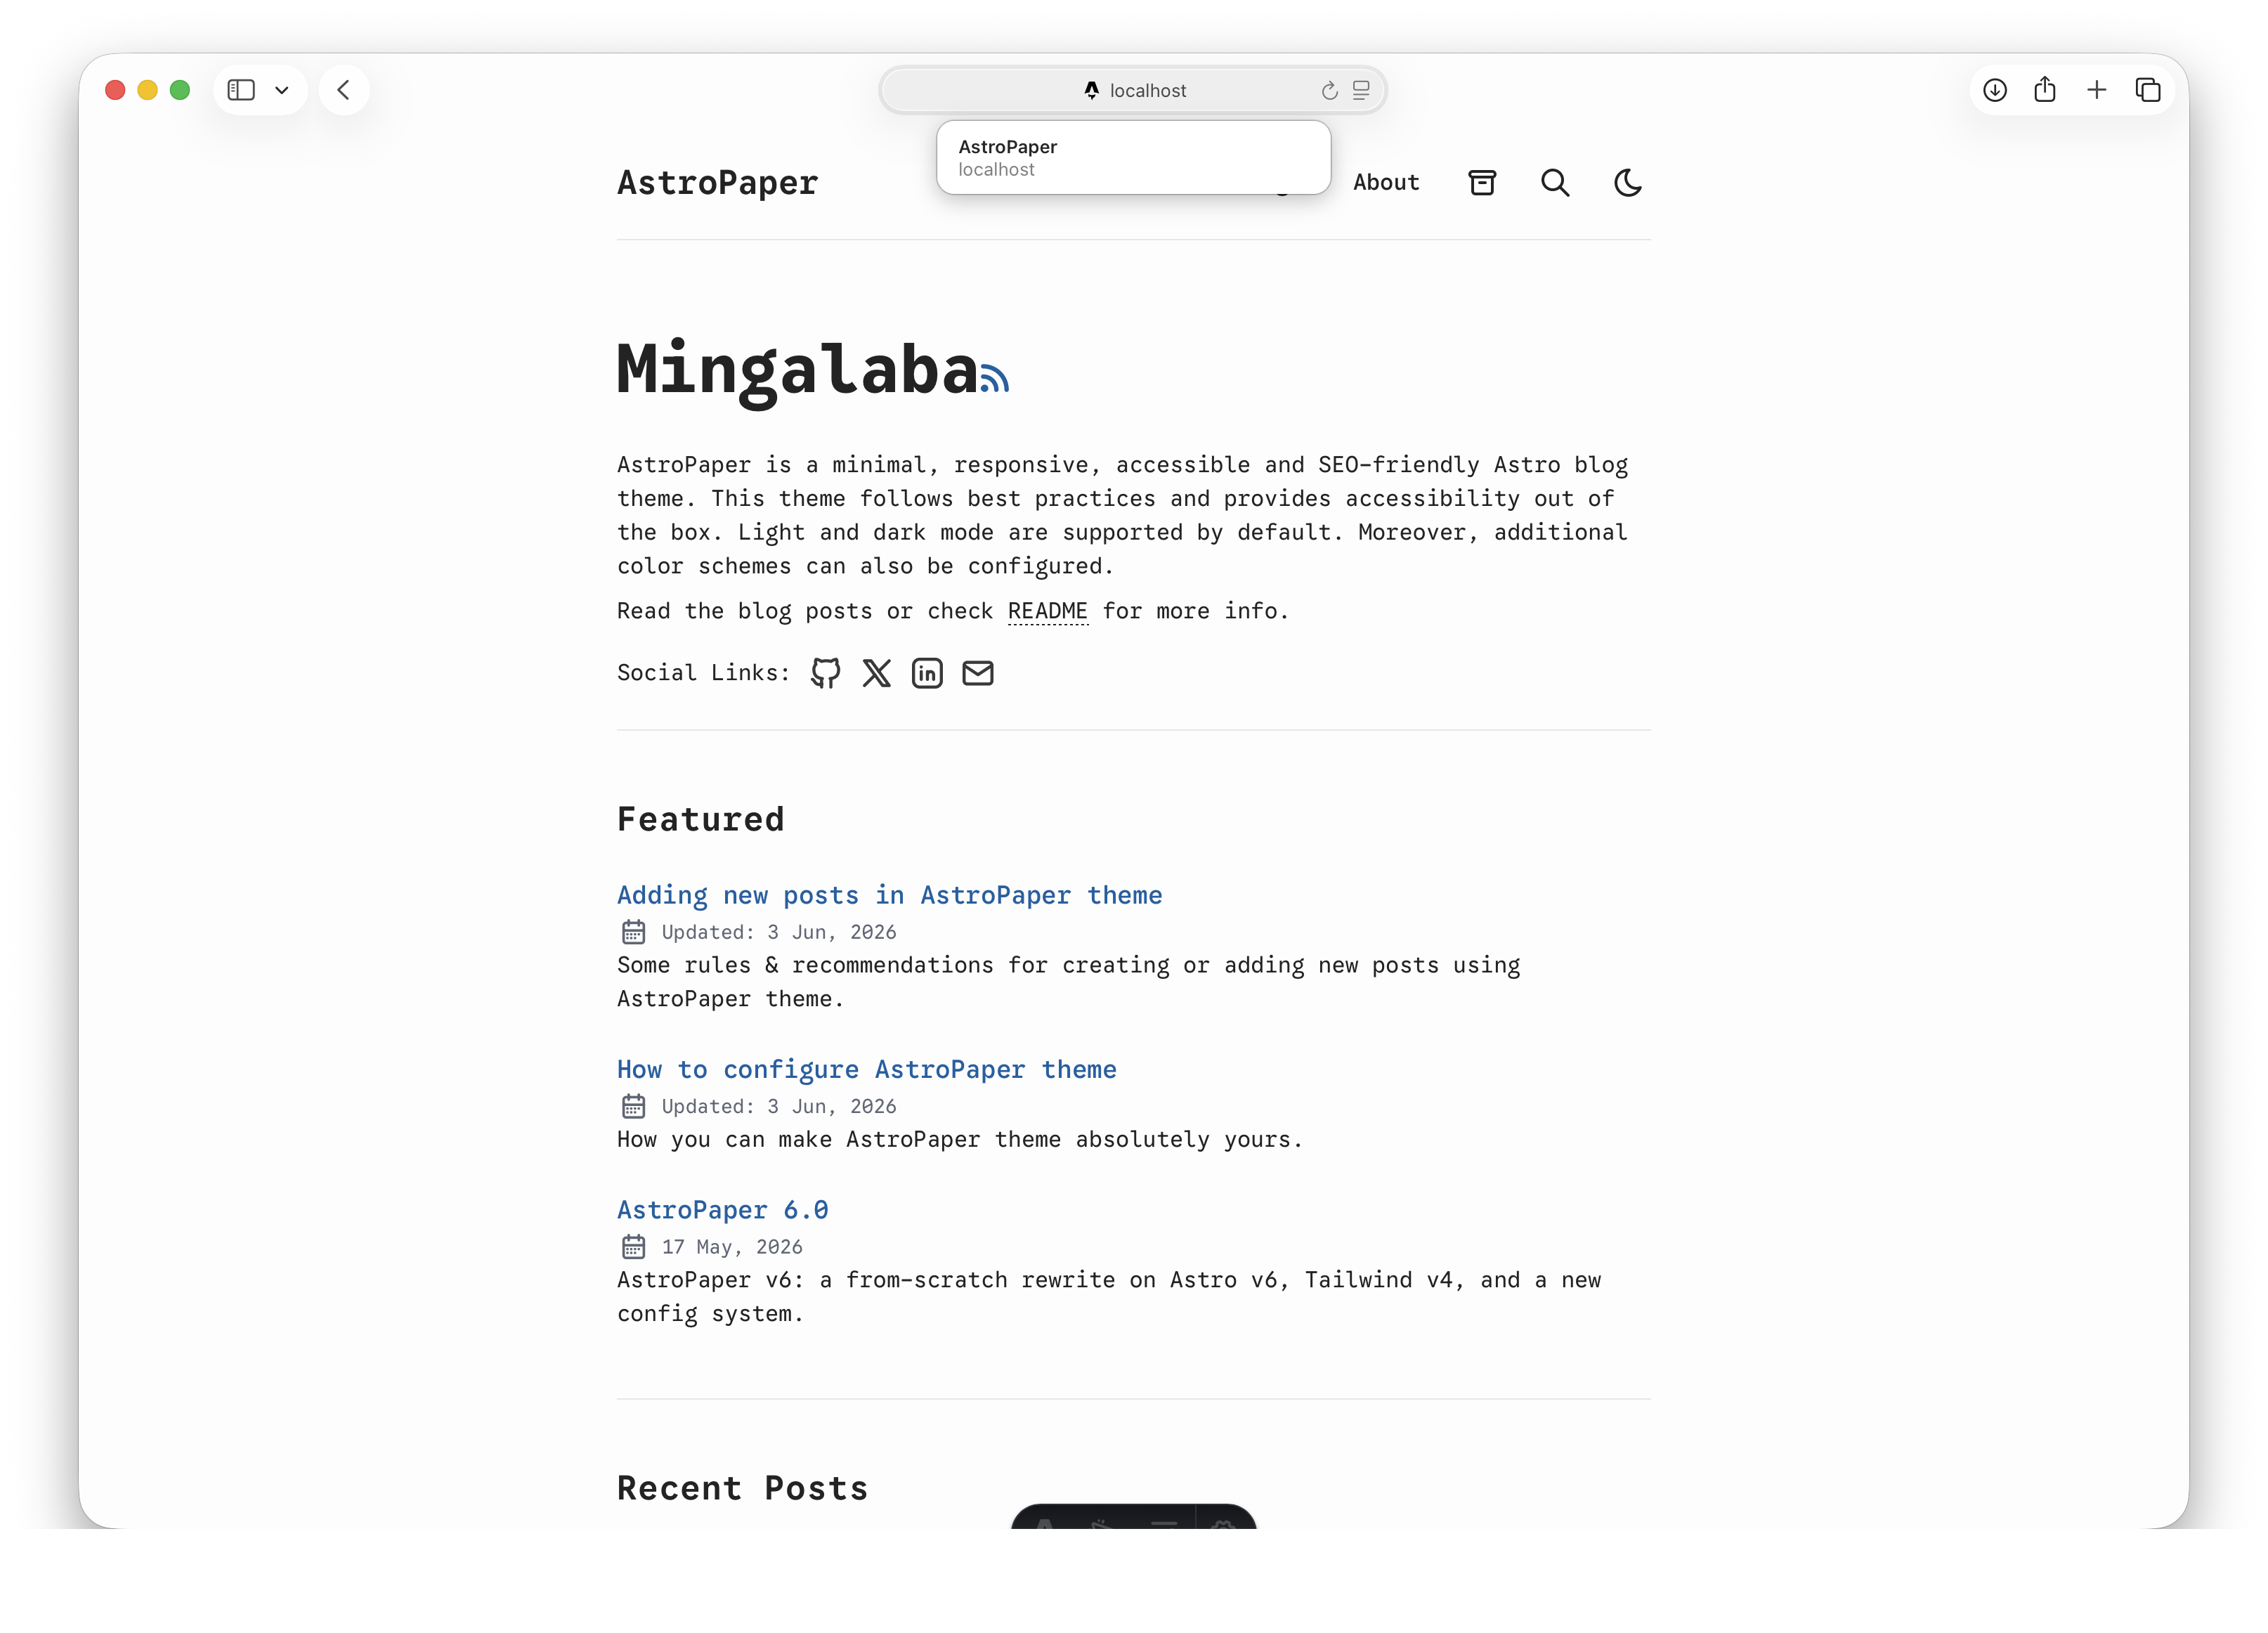
The word local means “only on your computer.” At this point, other people cannot see your site yet.
Tell Astro where the blog posts live
The clean AstroPaper project looks for posts in src/content/posts/. My blog uses a different folder: src/data/blog/. Make this small configuration change before creating your first post.
Open src/content.config.ts and find:
export const BLOG_PATH = "src/content/posts";Change it to:
export const BLOG_PATH = "src/data/blog";The file also has a loader whose base uses BLOG_PATH. Leave that part connected to BLOG_PATH. This tells Astro to read Markdown files from the same src/data/blog/ folder described in this guide.
Give the website your name
The main settings are in astro-paper.config.ts in the project root. A setting is a value that tells the website what to say or do. Open the file in any code editor; for me, I’m using Zed.
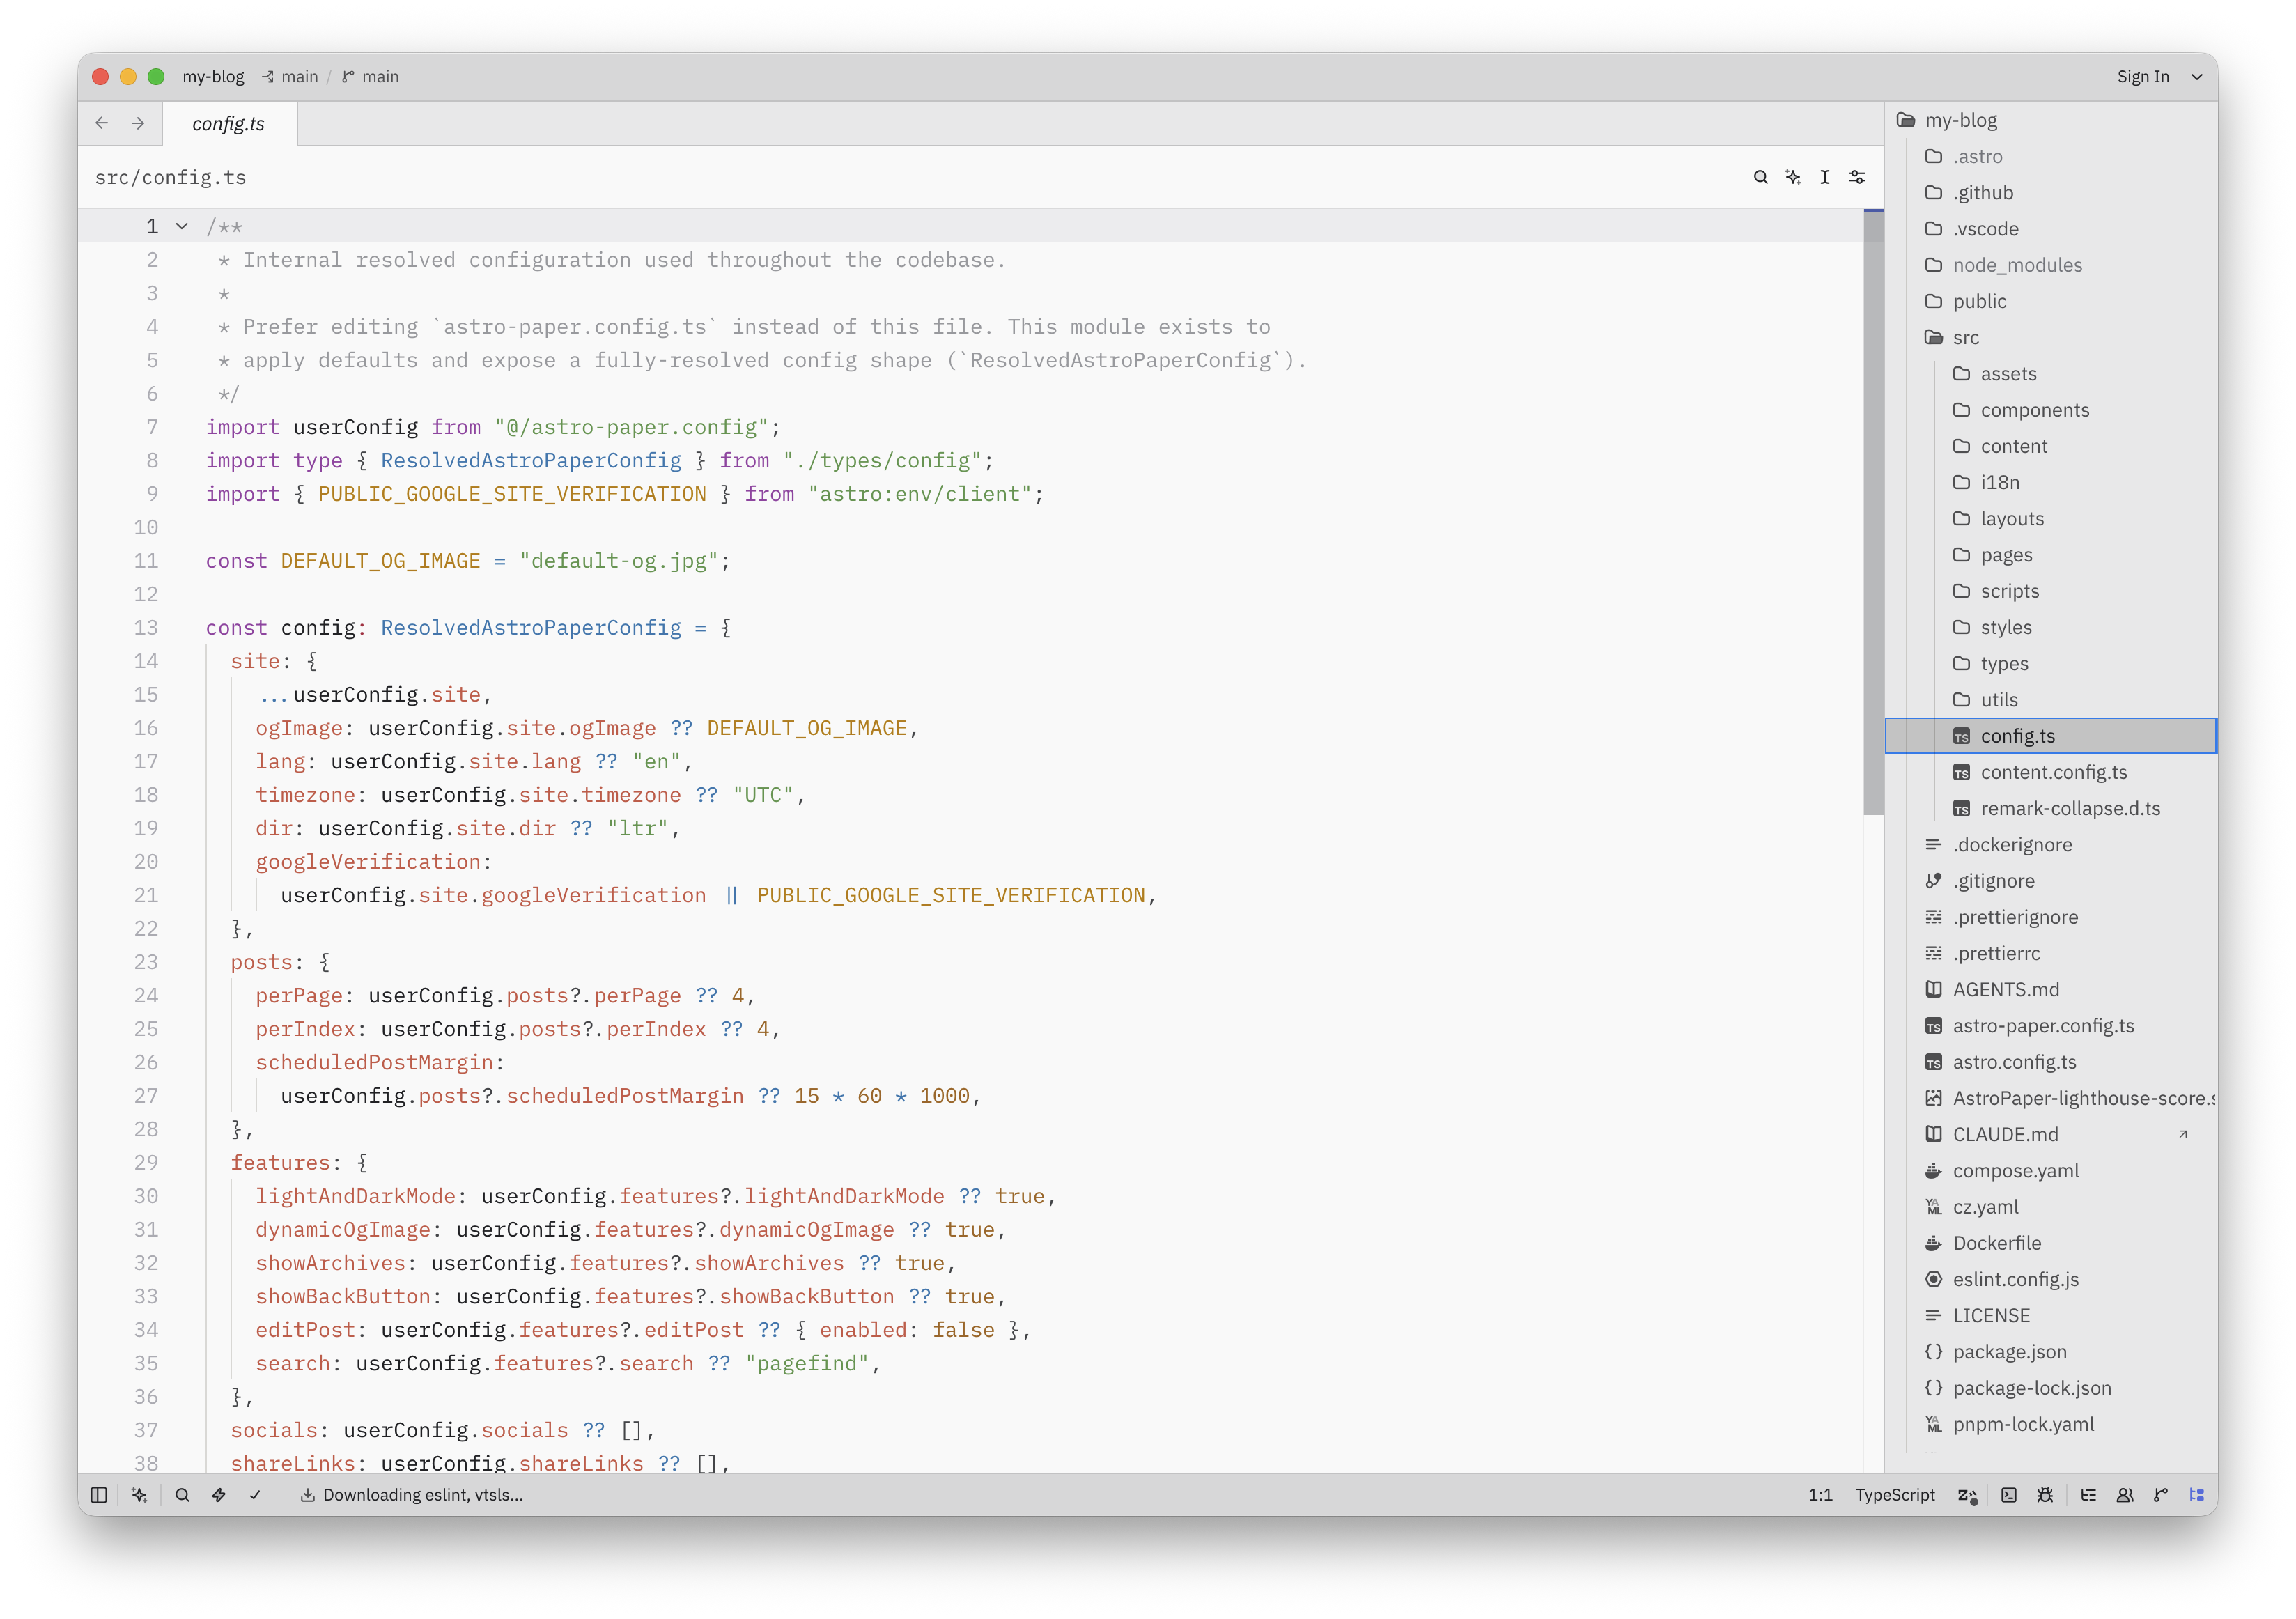
The important settings look like this:
import { defineAstroPaperConfig } from "./src/types/config";

export default defineAstroPaperConfig({
  site: {
    url: "https://your-project.vercel.app/",
    title: "Your Name",
    description: "A short description of my blog",
    author: "Your Name",
    profile: "https://example.com/",
    ogImage: "default-og.jpg",
    lang: "en",
    timezone: "Asia/Seoul",
  },
});
Change the example values:
titleis the site name.urlis the public website address. If you do not own a domain, use the Vercel address you receive after deployment, such ashttps://your-project.vercel.app/. You can replace it with a custom domain later.descriptionis a short explanation of the site.authoris your name.profileis the author’s profile address.ogImageis the picture shown when a page is shared on social media.langis the main language of the site. This guide usesenfor English.timezonetells the site how to show dates.
If ogImage is "profile.jpg", the picture should be at public/profile.jpg. The sample project already includes public/default-og.jpg.
This project has this line in astro.config.ts:
site: config.site.url,It tells Astro which real address belongs to the website. This helps Astro make the correct links, sitemap, RSS feed, and social media information.
If a different Astro project has a full address written directly in astro.config.ts, update that address too.
Find the important folders
You do not need to understand every folder. These are the ones to remember:
my-blog/
├── public/            # pictures and files visitors can use
├── src/
│   ├── components/    # small reusable pieces of the design
│   ├── data/blog/     # blog posts
│   ├── layouts/       # page shapes
│   ├── pages/         # website addresses
│   ├── styles/        # colors and other visual rules
│   └── utils/         # helper code
├── astro-paper.config.ts # your AstroPaper settings
├── astro.config.ts       # Astro's instructions
├── package.json          # list of tools
└── package-lock.json     # exact tool versions
The most important folder for writing is src/data/blog/. The clean project may not have this folder yet, so create it under src.
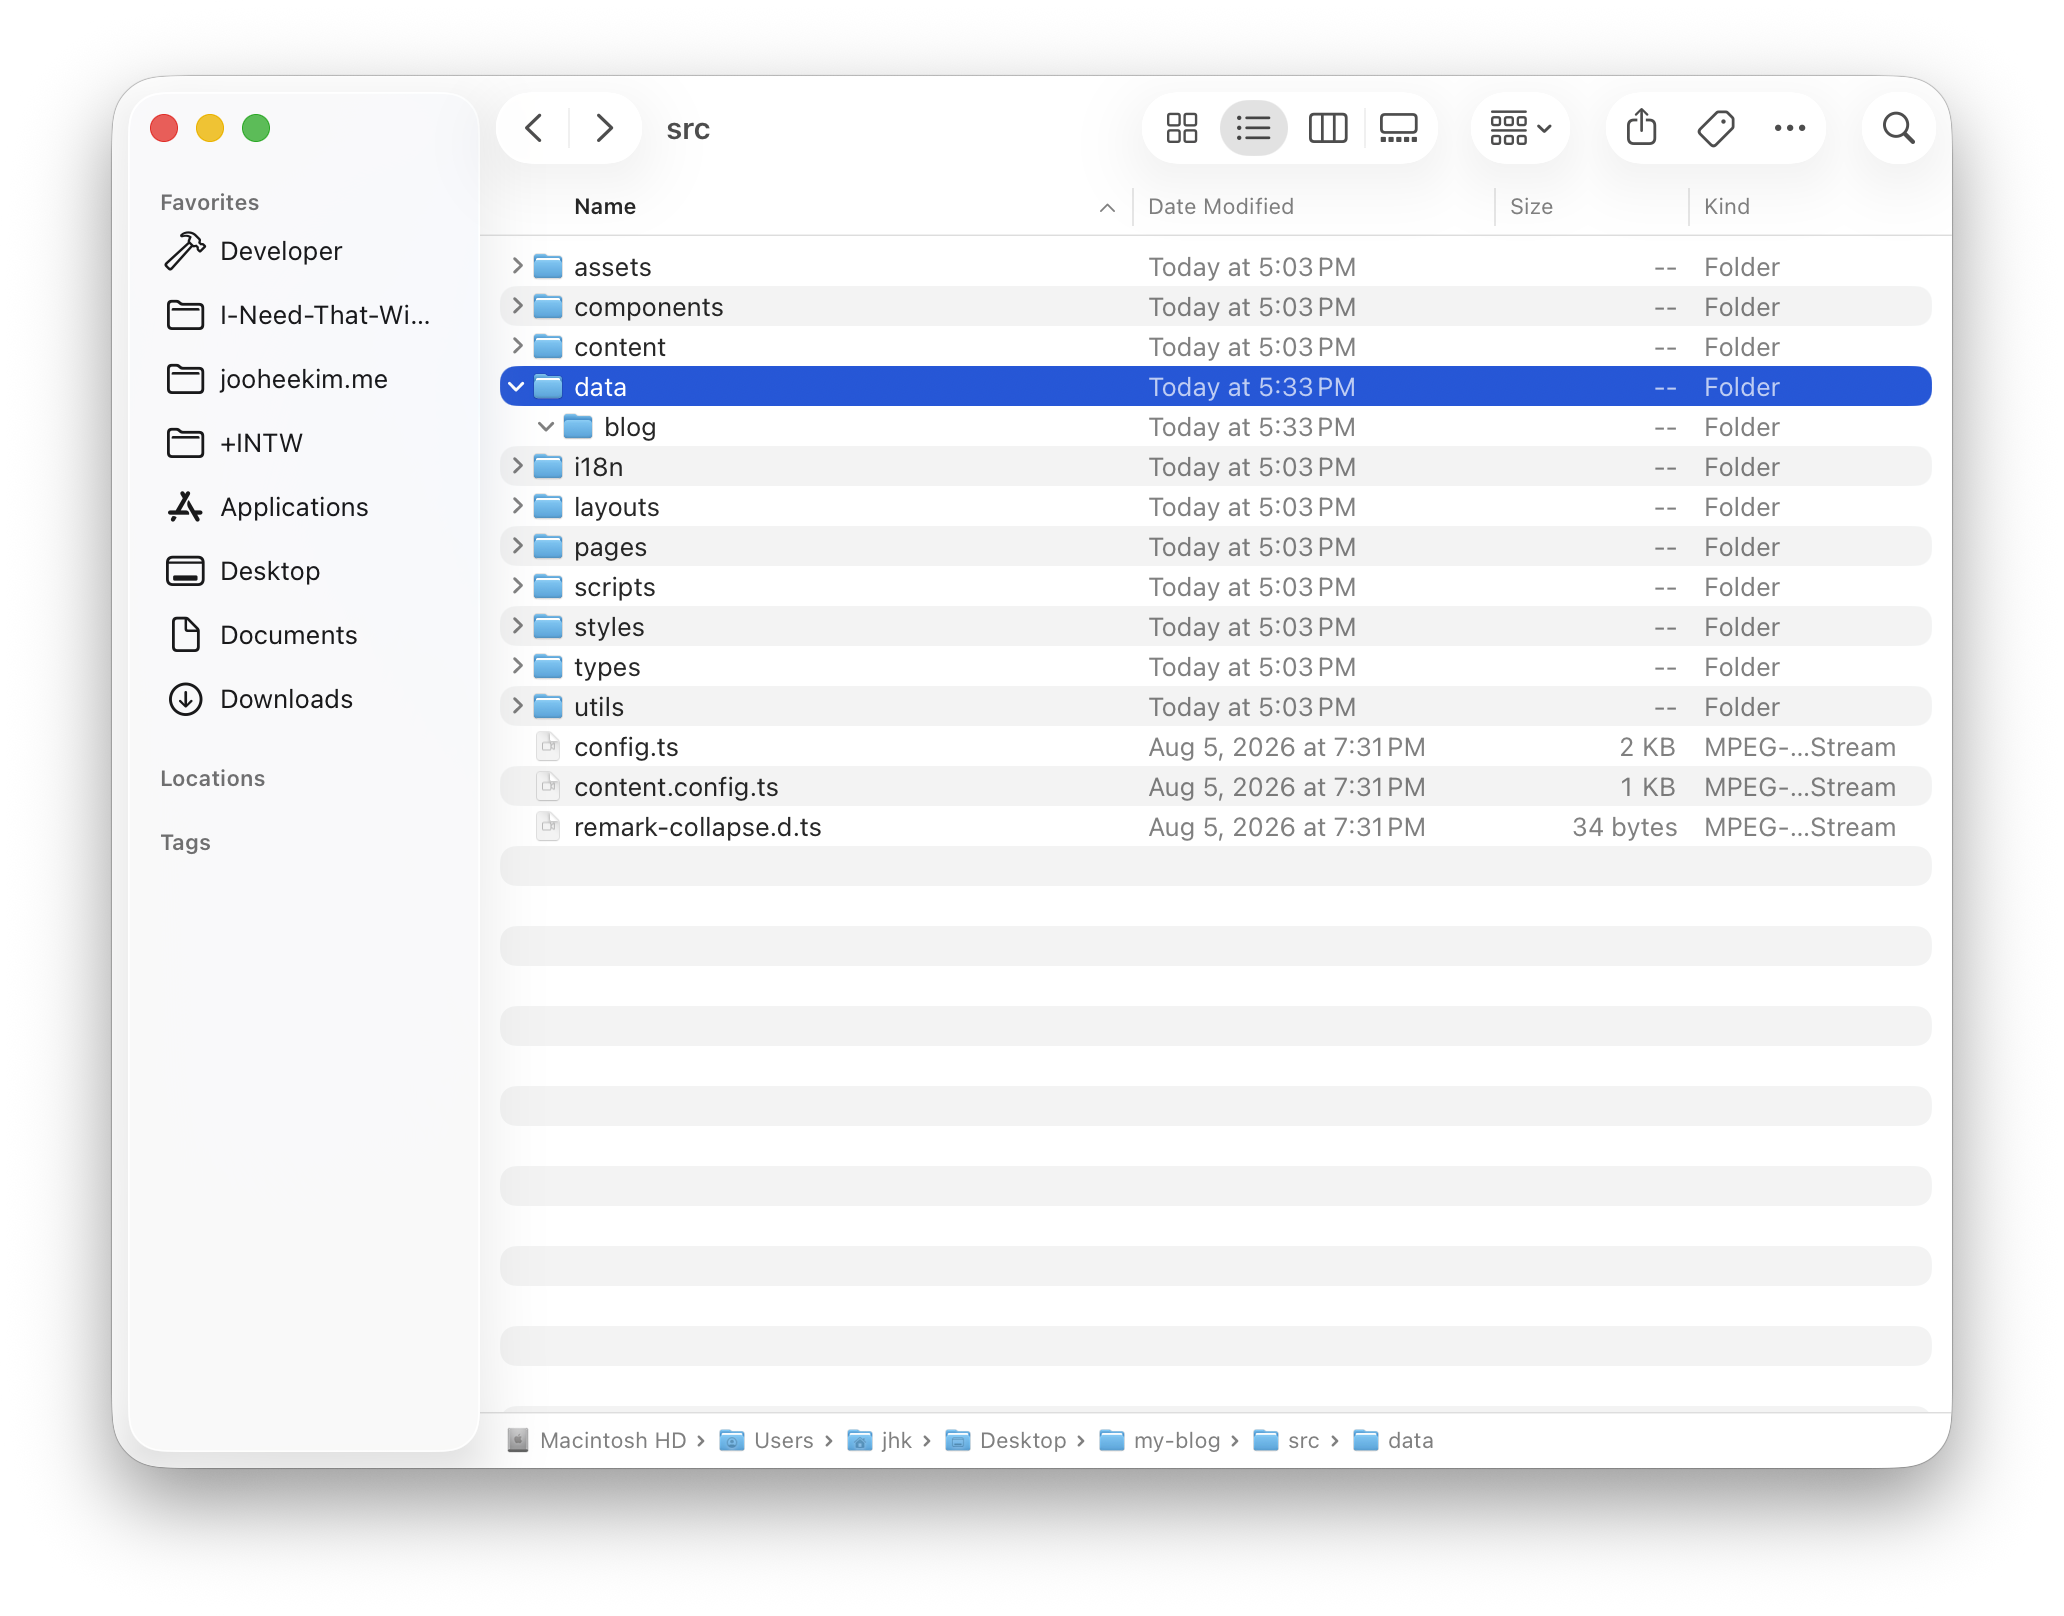
Write your first post
Make a folder for the year, such as src/data/blog/2026/.
Then create a file such as:
src/data/blog/2026/2026-08-30-my-first-post.md
The ending .md means the file is Markdown.
At the top of the file, write a small information card called frontmatter:
---
title: "My First Post"
description: "A short sentence about this post."
pubDatetime: 2026-08-30T12:00:00+09:00
tags: [blog]
draft: true
---

This is the first paragraph of my post.

## My first heading

This is more writing.
Frontmatter tells the blog important facts:
titleis the post’s title.descriptionis a short sentence used in lists and search.pubDatetimeis the date and time. The+09:00part is the timezone.tagshelps group similar posts.draft: truemeans “I am still working on this.”
When the post is ready, change draft: true to draft: false. A draft is not shown in the normal public post lists.
A filename also helps make the web address. The example file becomes a page under:
/posts/2026/2026-08-30-my-first-post
Add a picture
Put a picture in public/images/2026/08/30/photo.jpg. Then write this in the post:
The words inside the square brackets help people who cannot see the picture understand it.
Practice and check the website
While writing, use the development server:
npm run devThen open the local address in your browser. The development server reads your source files while you work and is the easiest way to see changes.
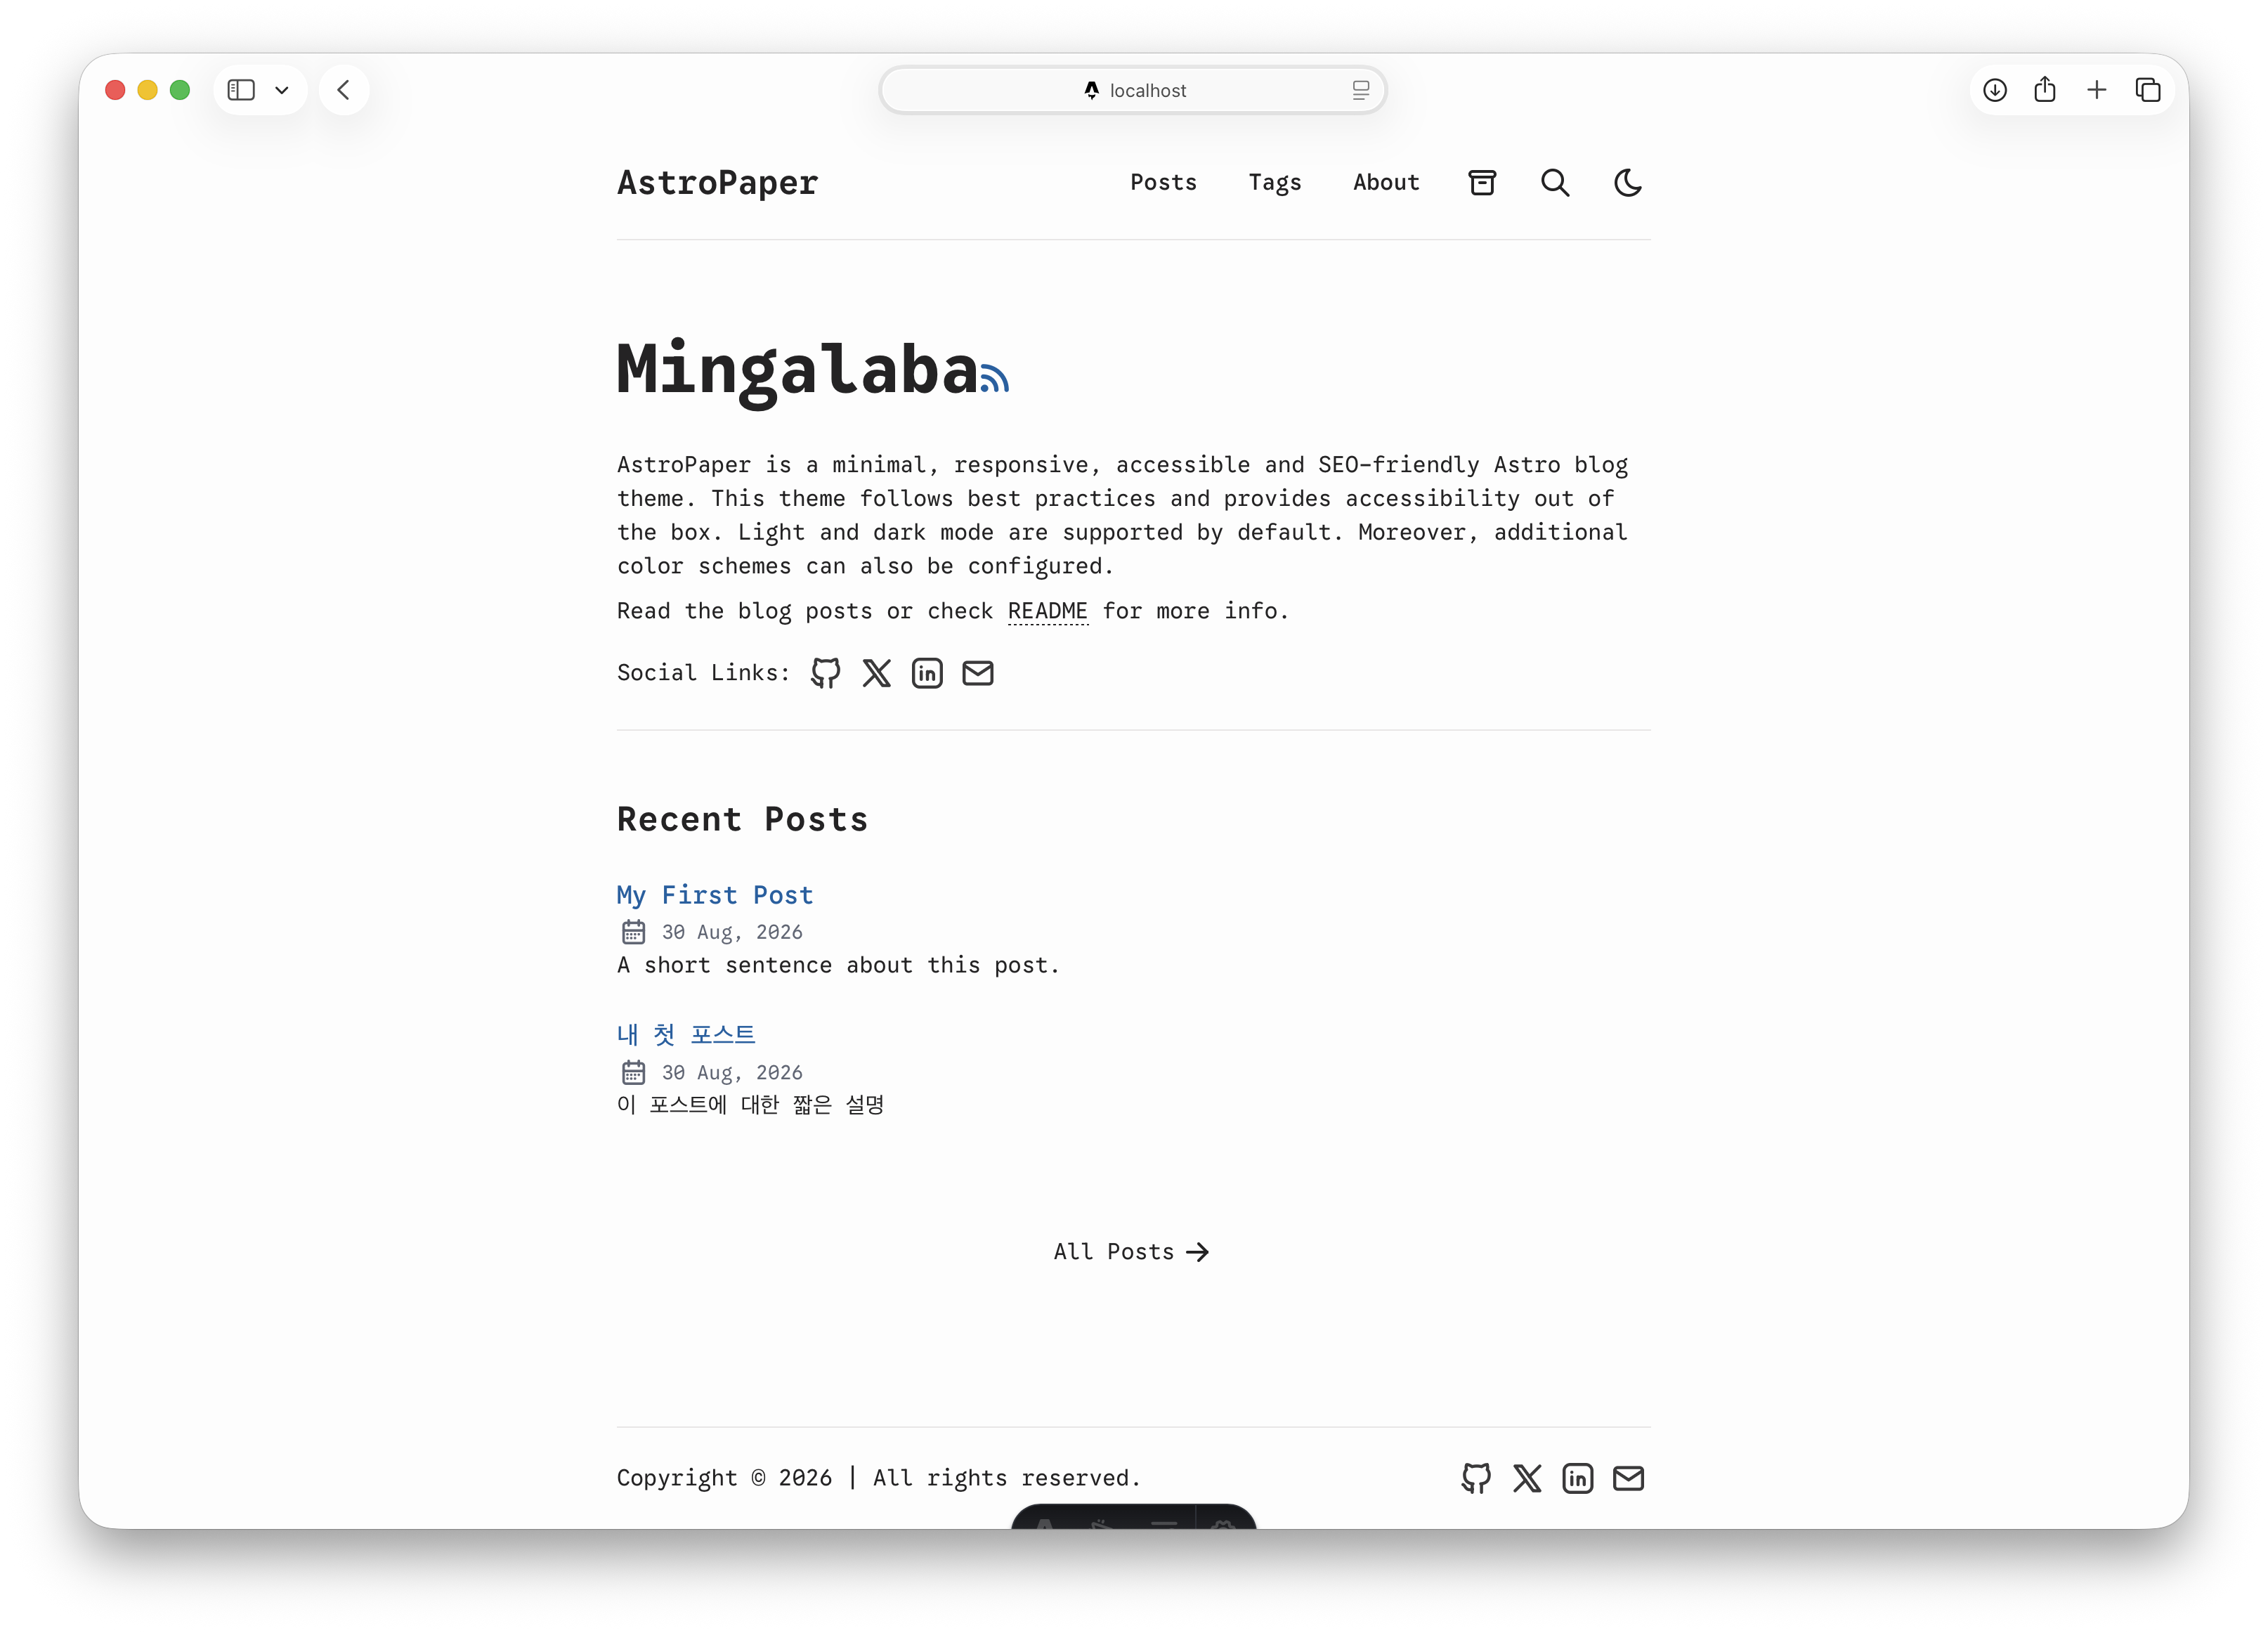
To stop the development server, press Control + C (hold the Control key, then press C).
When you want to check the finished production version, run:
npm run build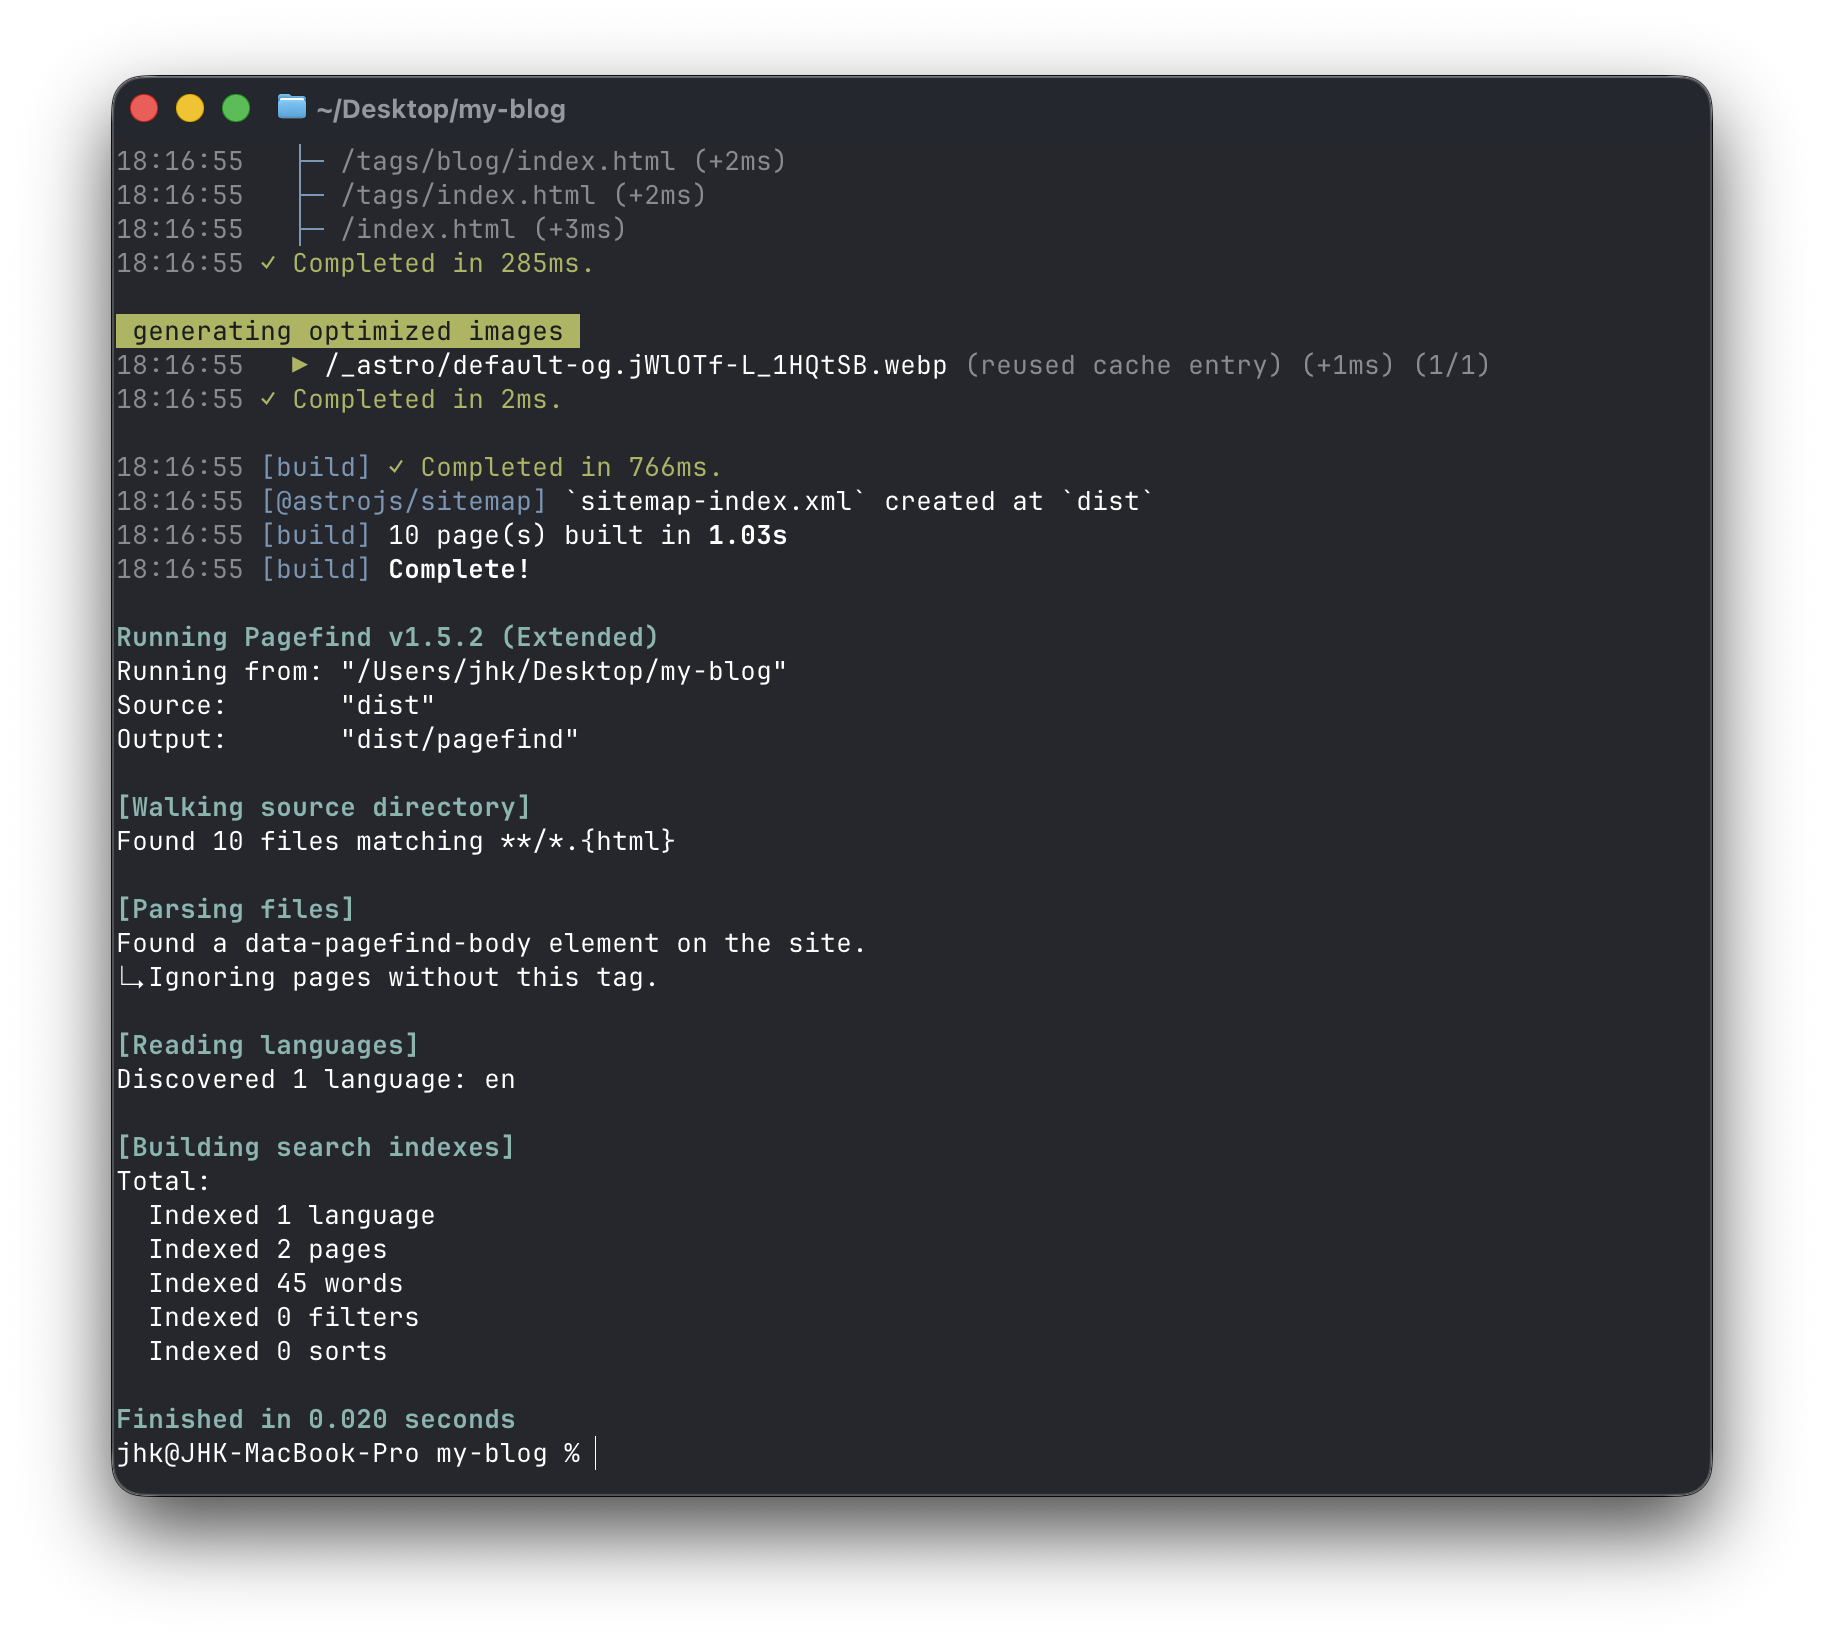 A build is the moment when Astro turns the project into the finished files that can be published. It also refreshes the
 dist/ folder.
In this project, the build:
- checks Astro and TypeScript files;
- makes the website files inside
dist/; - makes the Pagefind search index.
Pagefind is the tool that helps visitors search the blog.
You can look at the finished build on your computer with:
npm run preview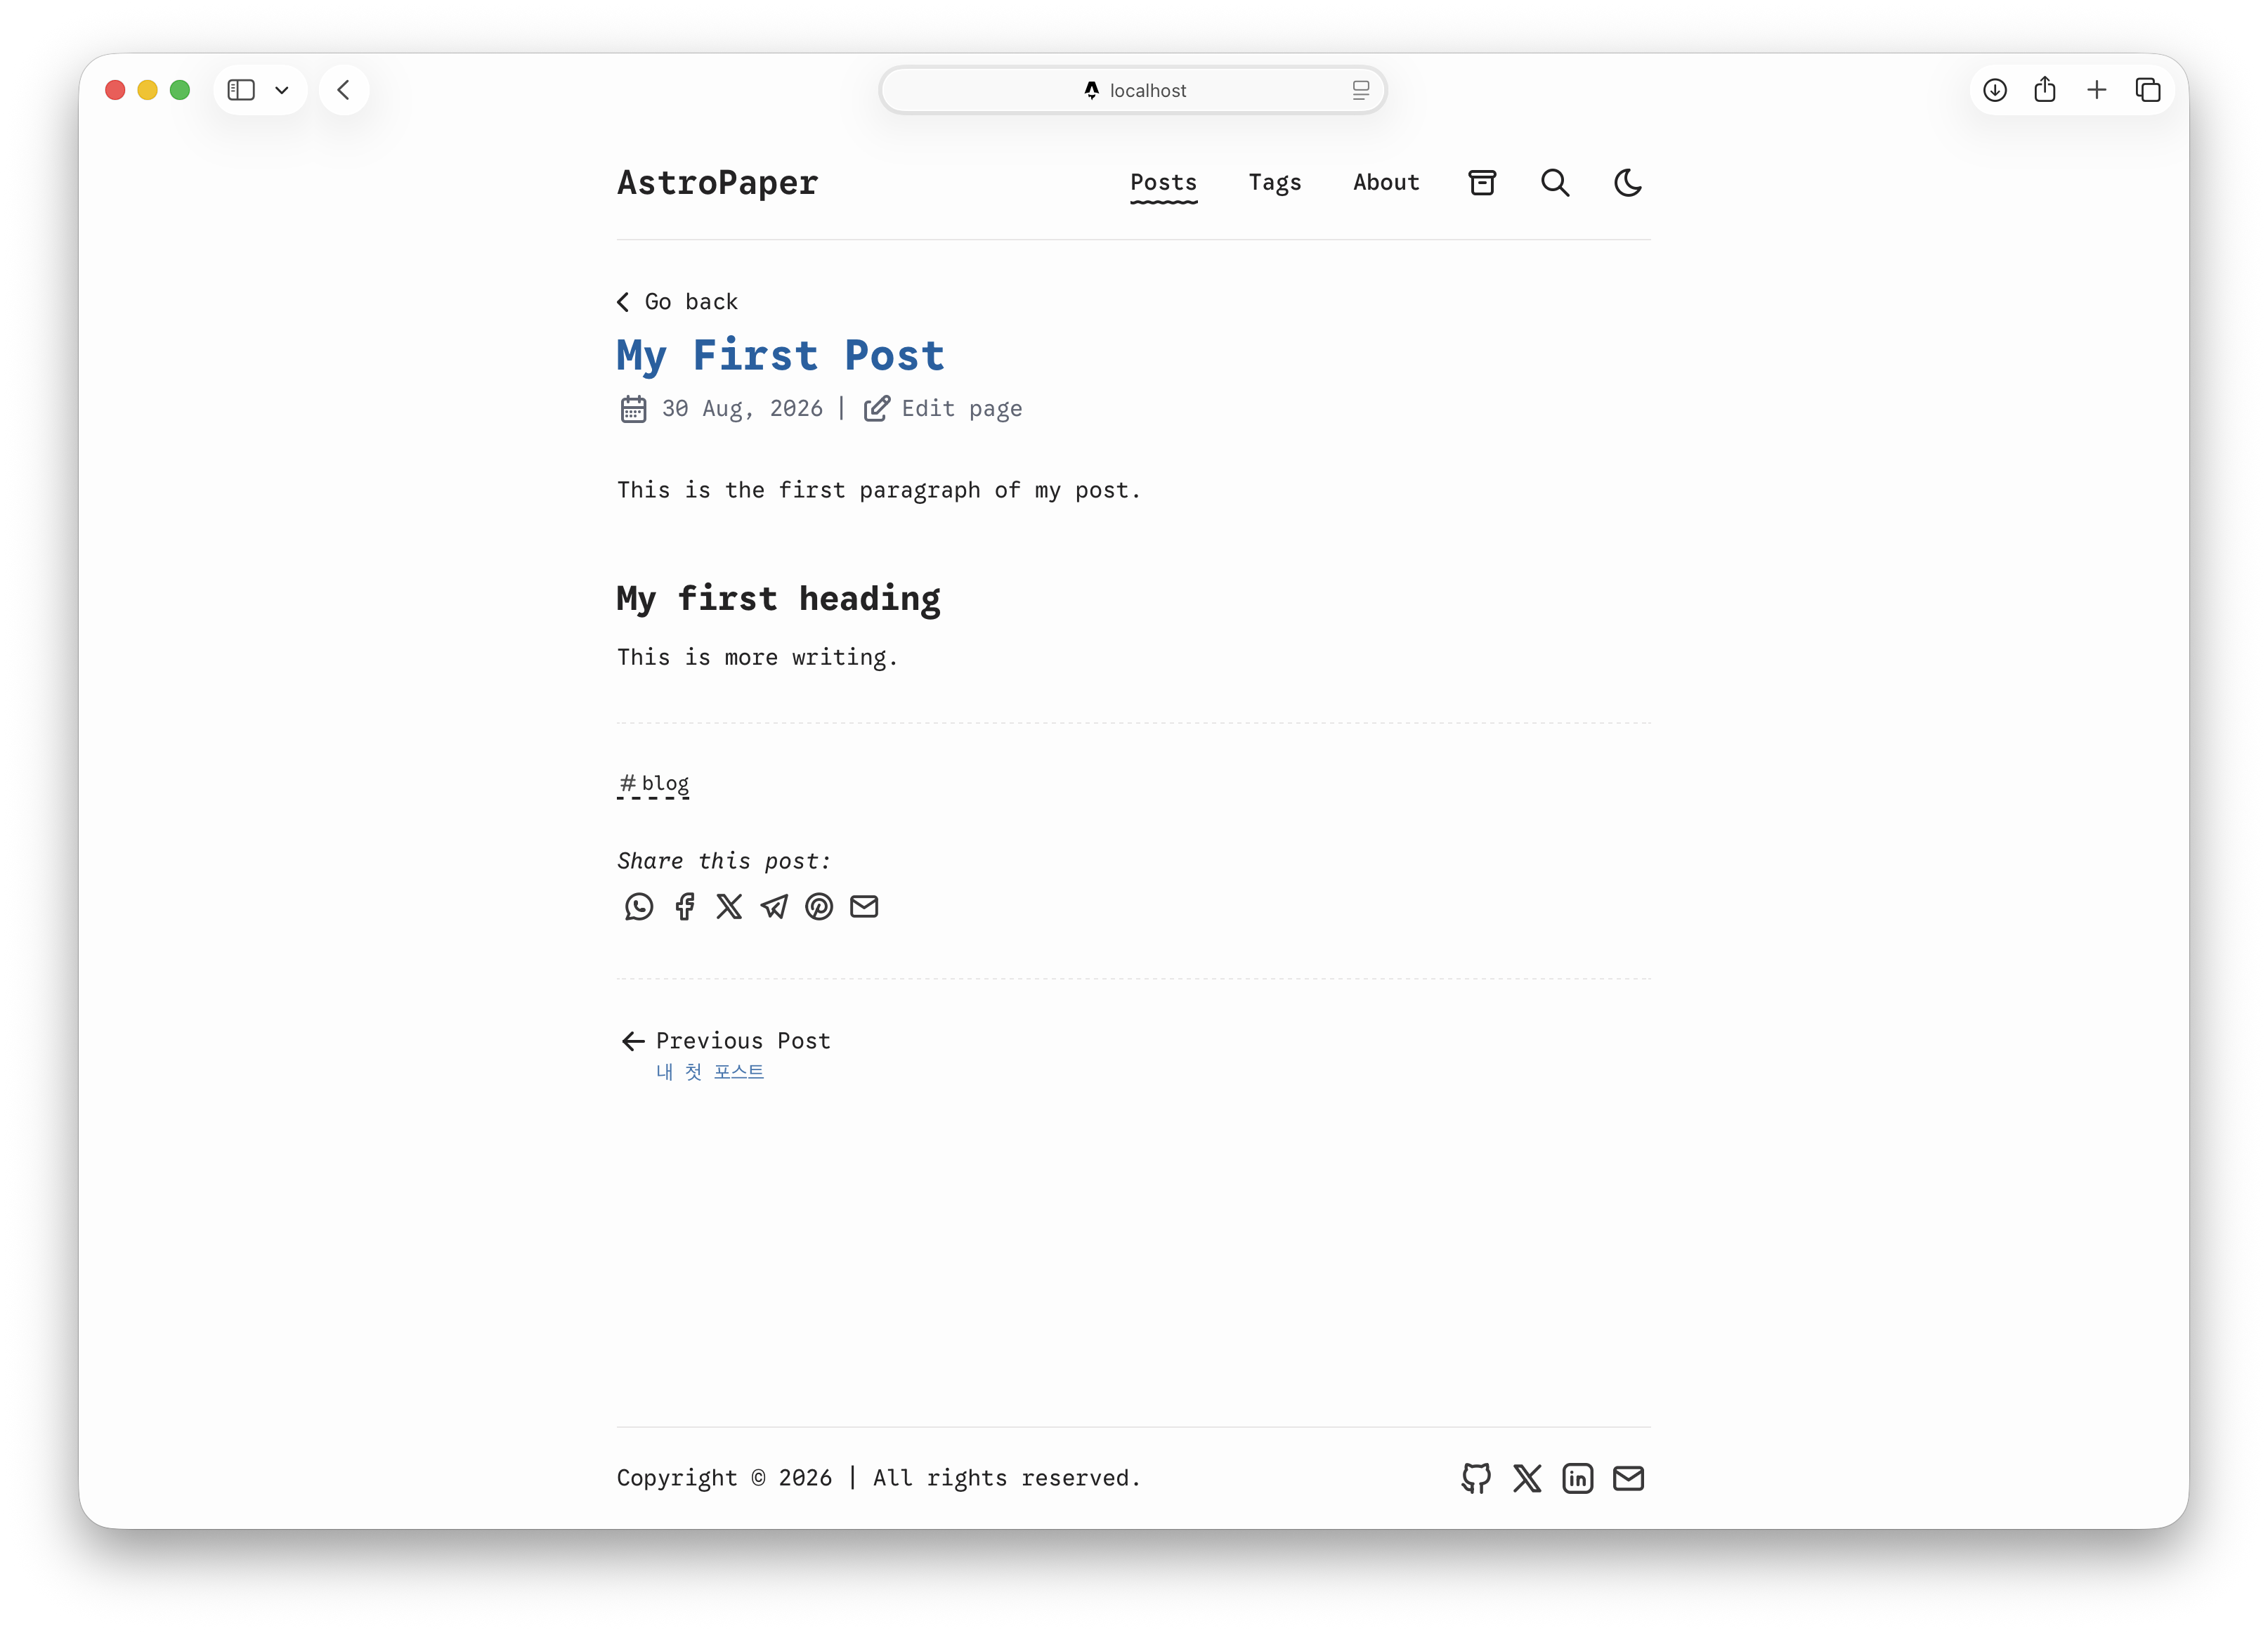
The preview is still only on your computer, but it is closer to the version Vercel will publish. Important: npm run preview does not build the project. It only serves the files that already exist in dist/. After changing a post, run npm run build before running npm run preview, or you may see an older version without your new post.
If the build fails, look at the first error. Usual problems include:
- a spelling mistake in frontmatter;
- wrong spaces in frontmatter;
- a picture path that does not exist;
- a Markdown code block that was not closed;
- an old Node.js version.
Put the project in GitHub
Now we will save the project online.
Git is the program that remembers changes. GitHub is the website that stores those memories and files.
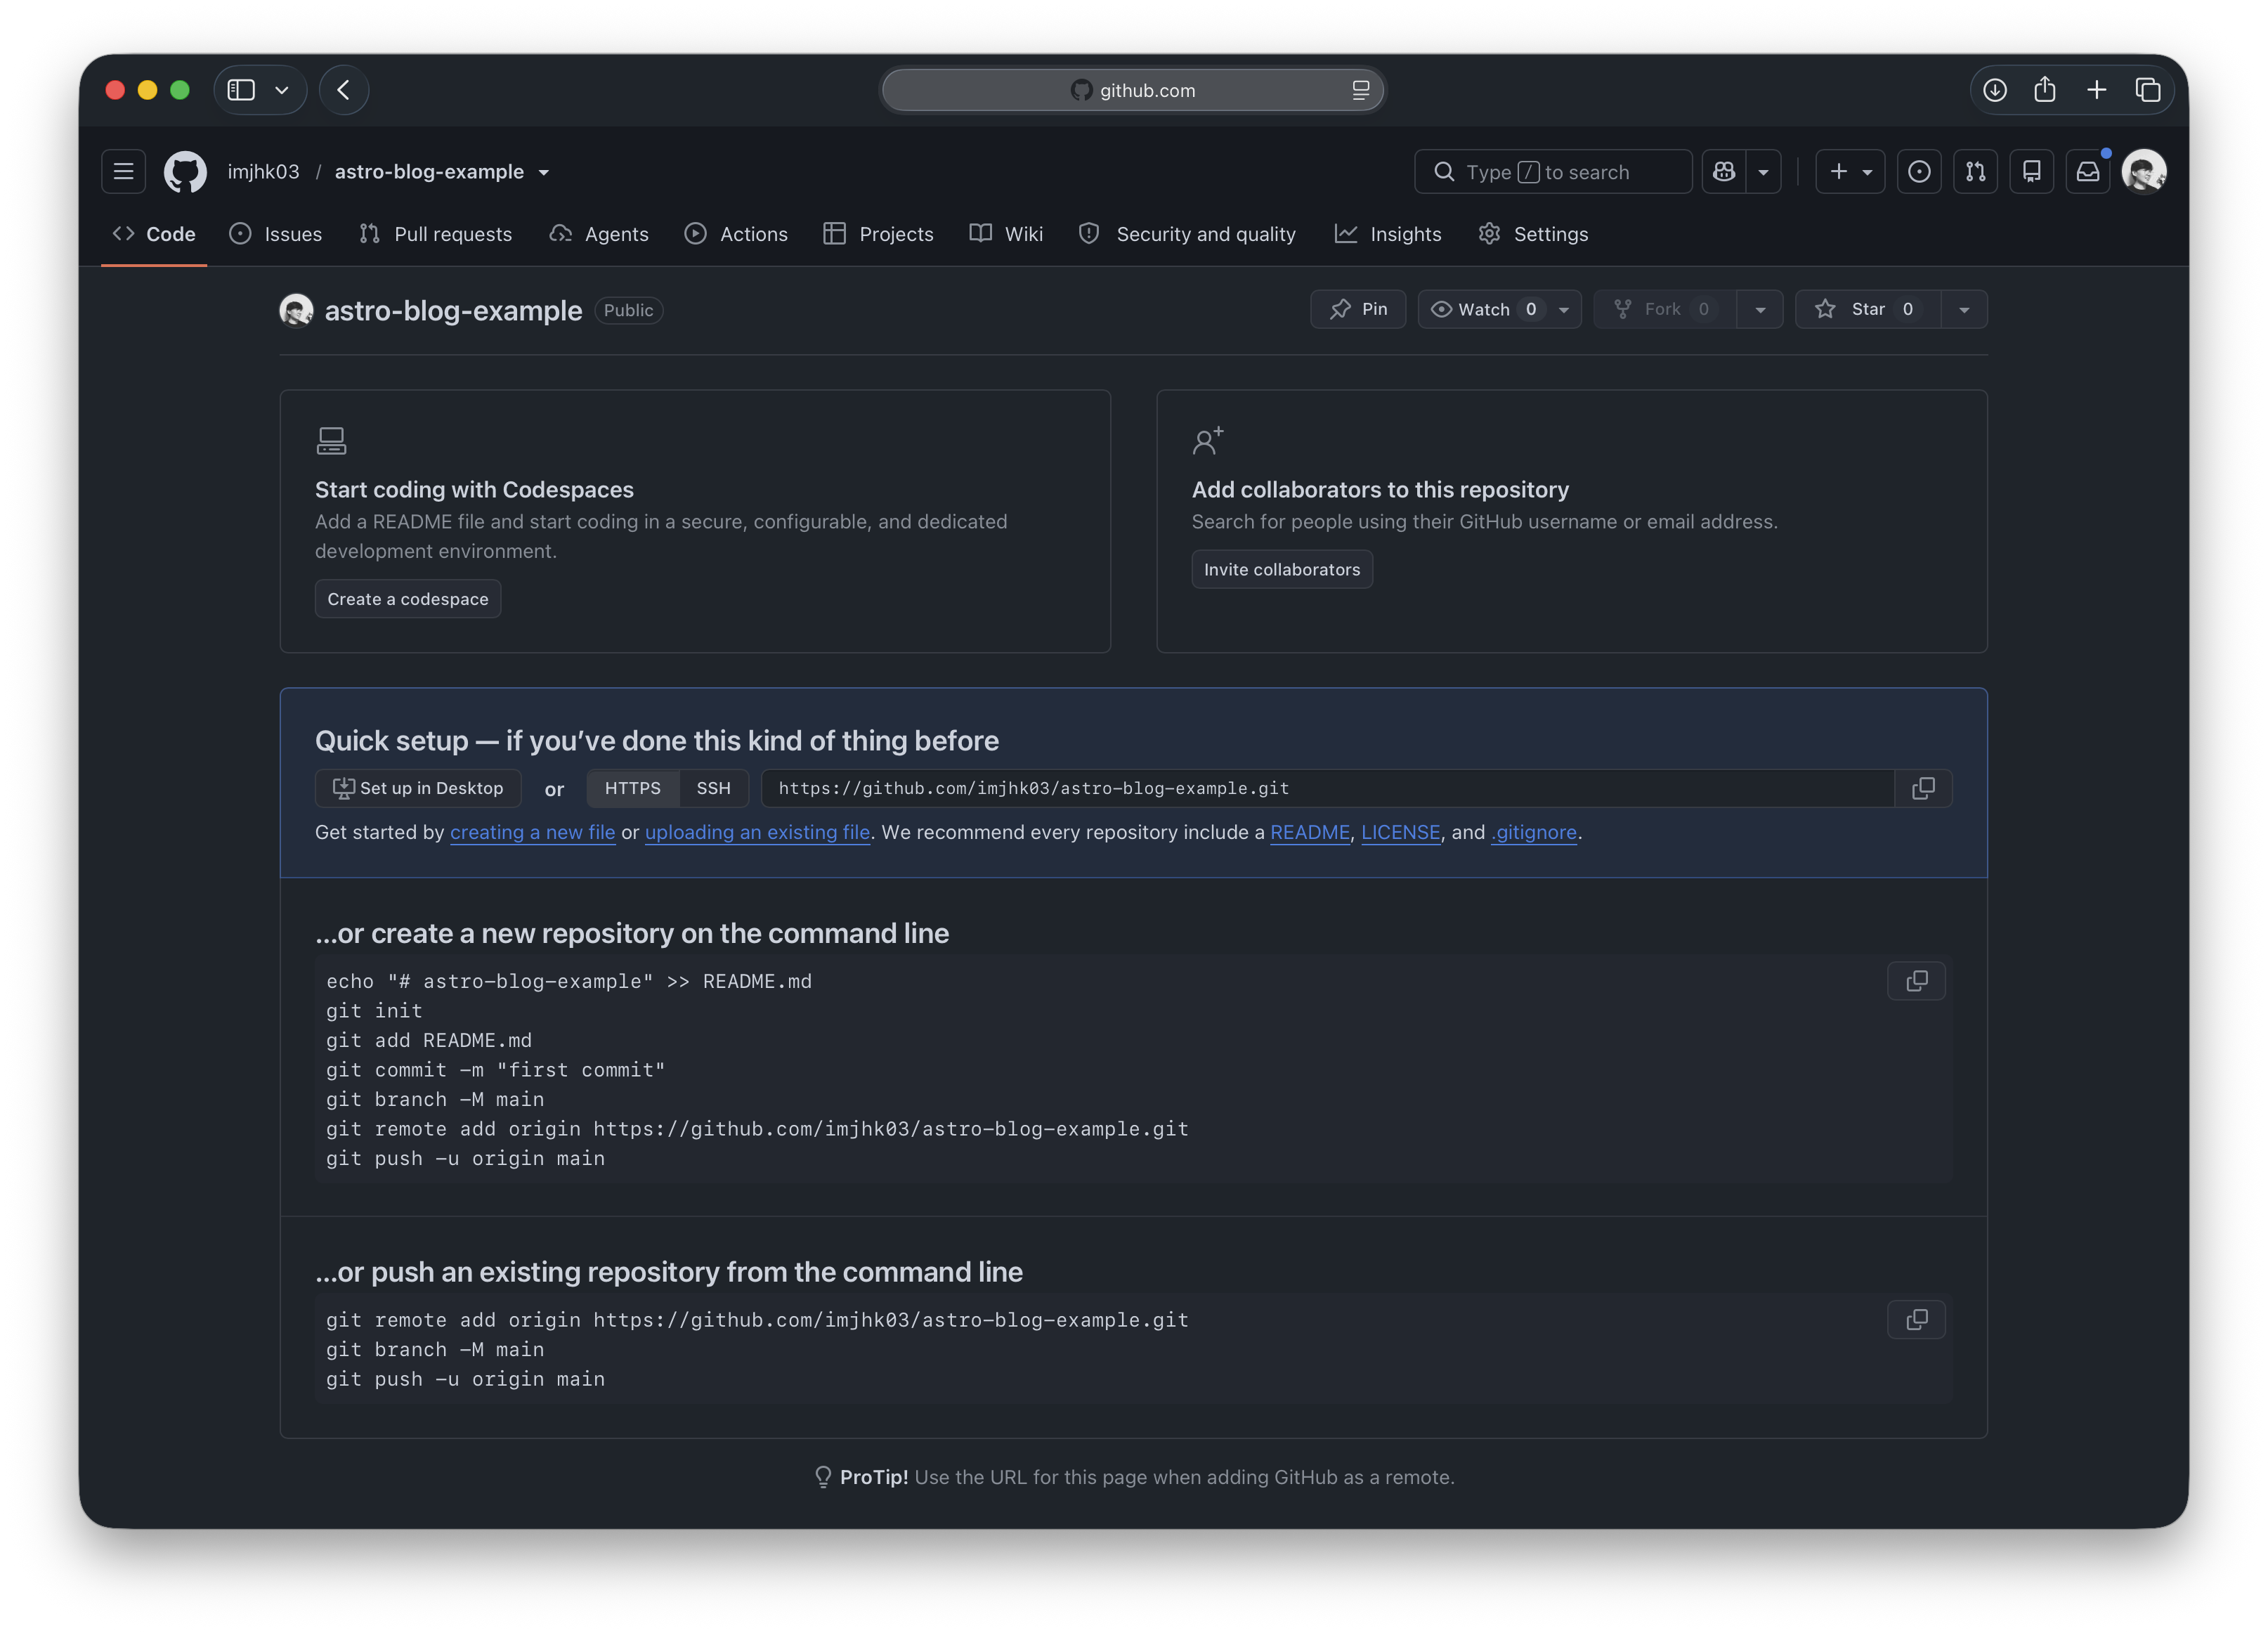
First, make an empty repository on your GitHub account. If the project already exists on your computer, do not add another README, license, or .gitignore during this step.
For a sample project that goes with this post, a clear repository name is astro-blog-example. A repository name is just the label on the project box. For my personal blog, I use jooheekim.me, the custom domain I bought.
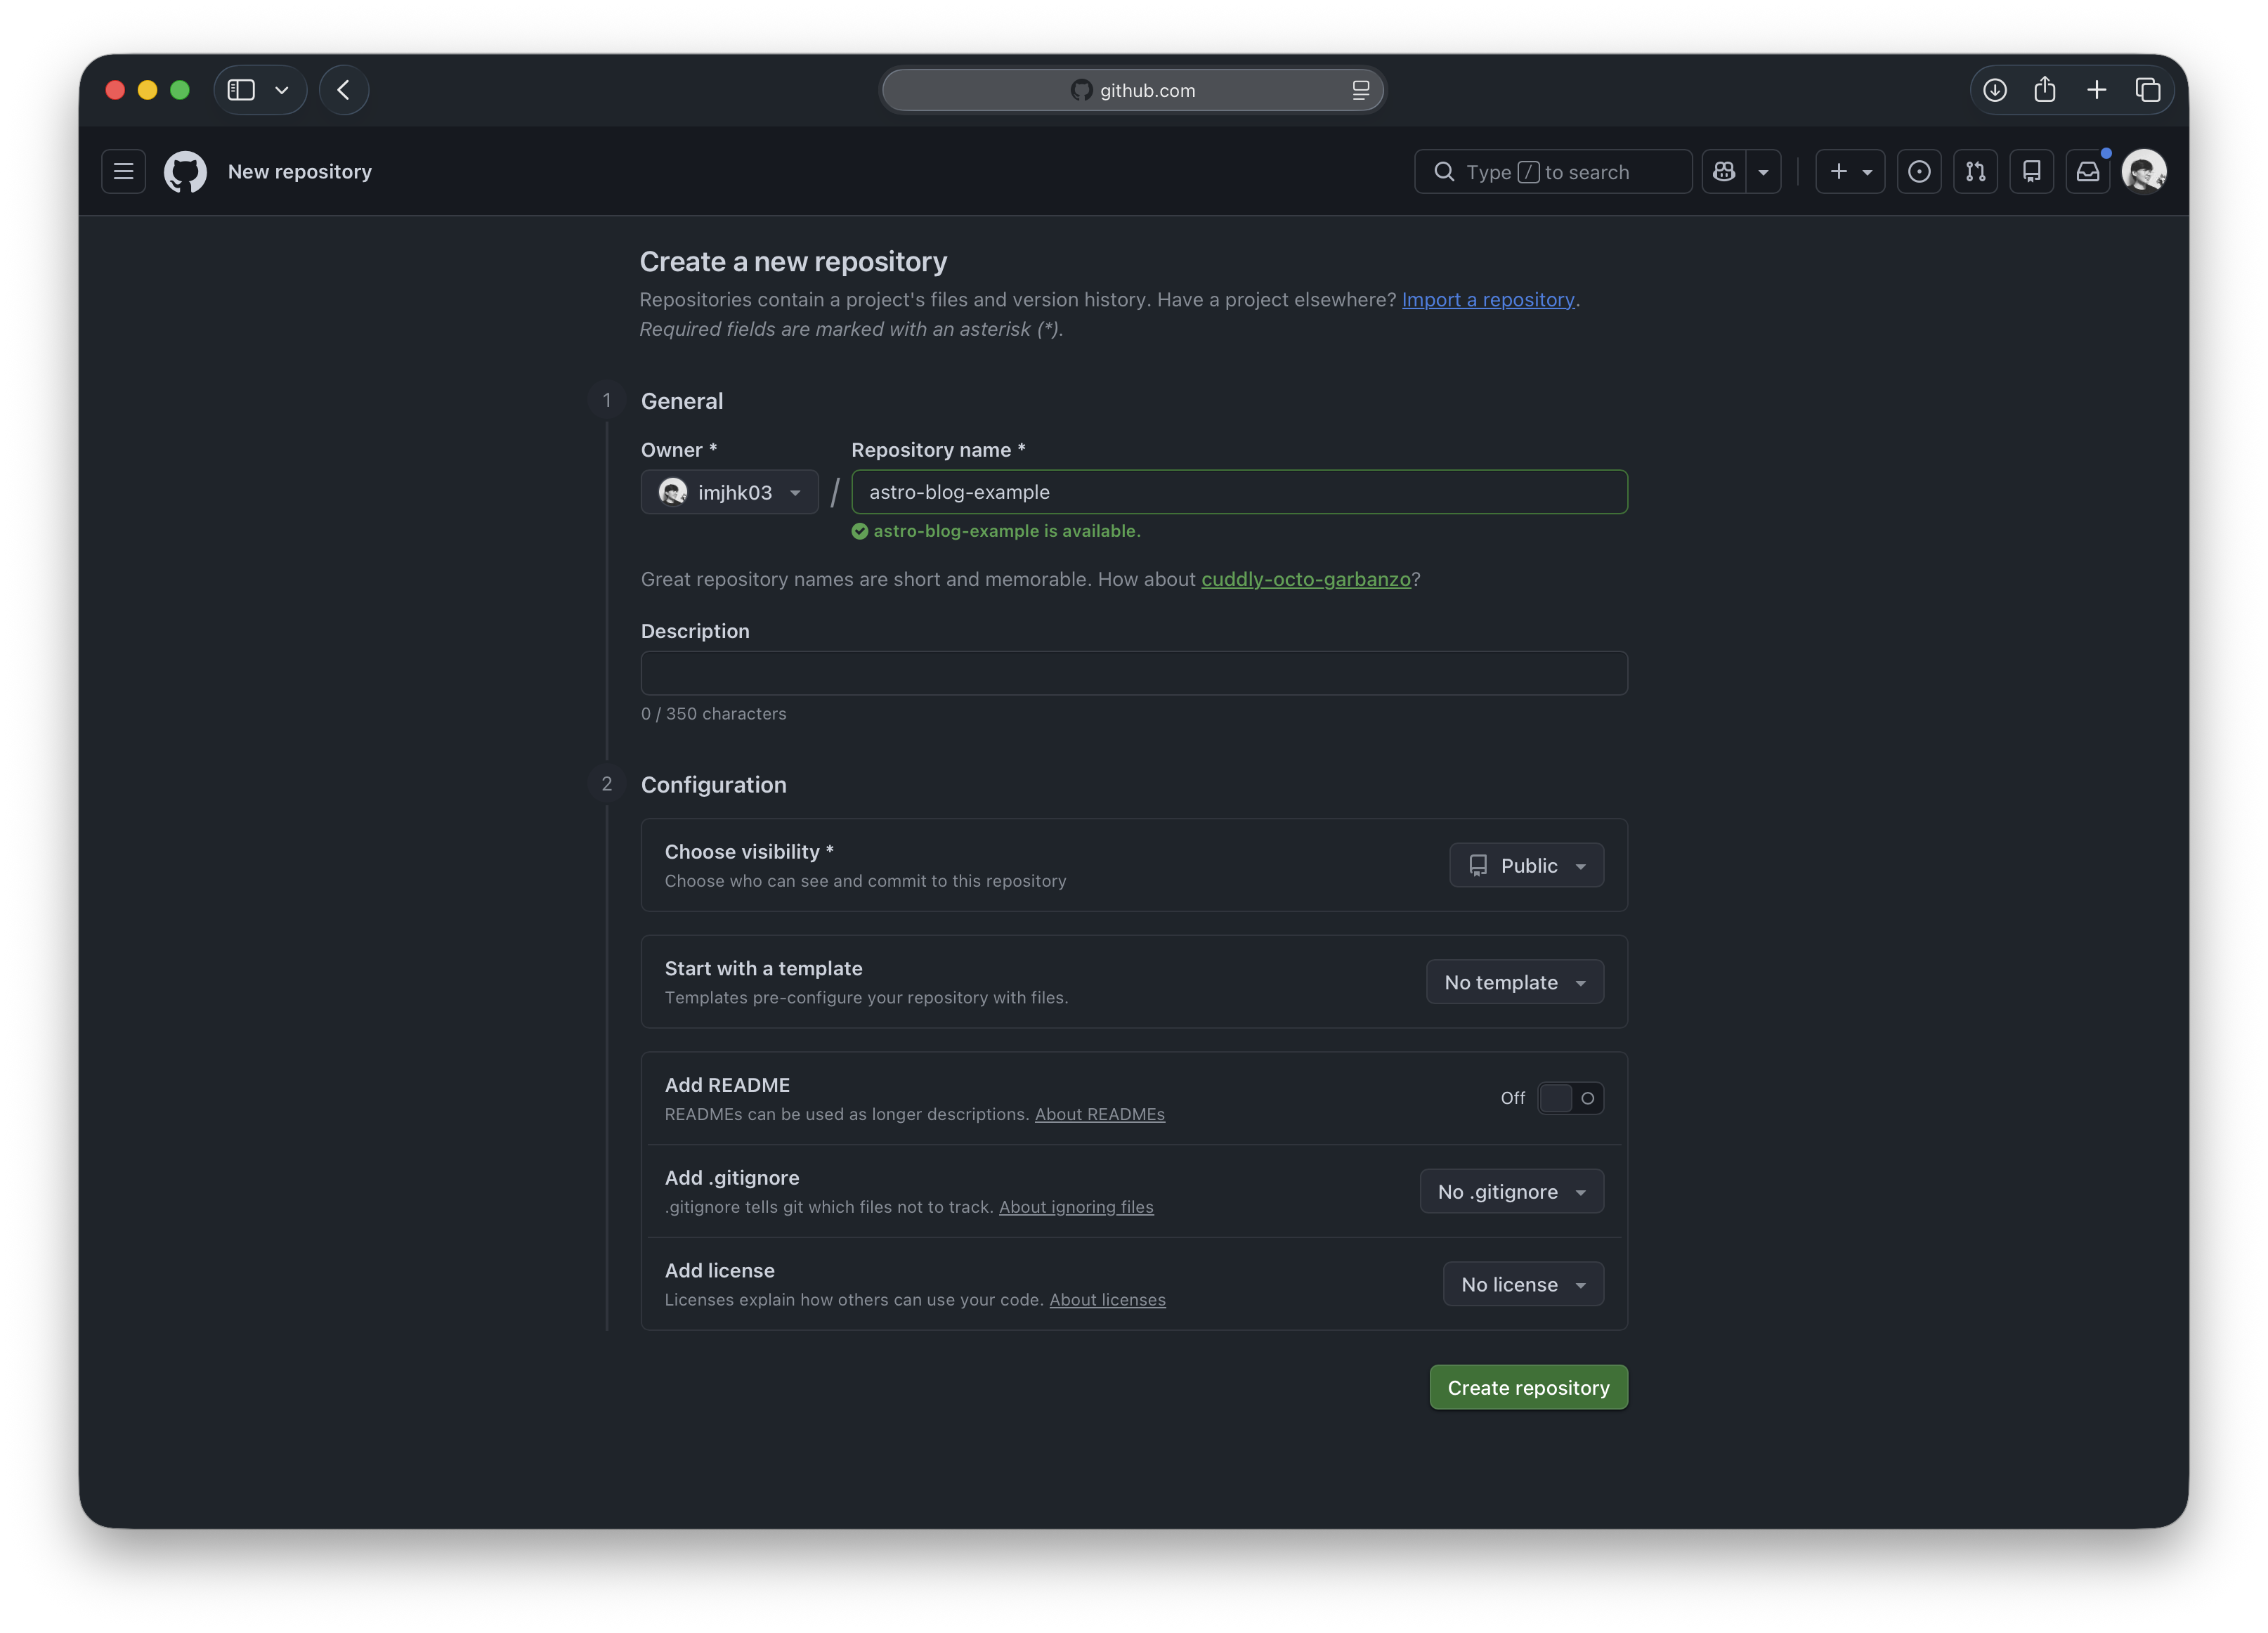
Open a terminal in the folder where you created the blog, then run:
git init
git branch -M main
The word main is the name of the main line of the project.
Save the files:
git add .
git status --short
git diff --cached --name-only
git commit -m "Initialize Astro blog"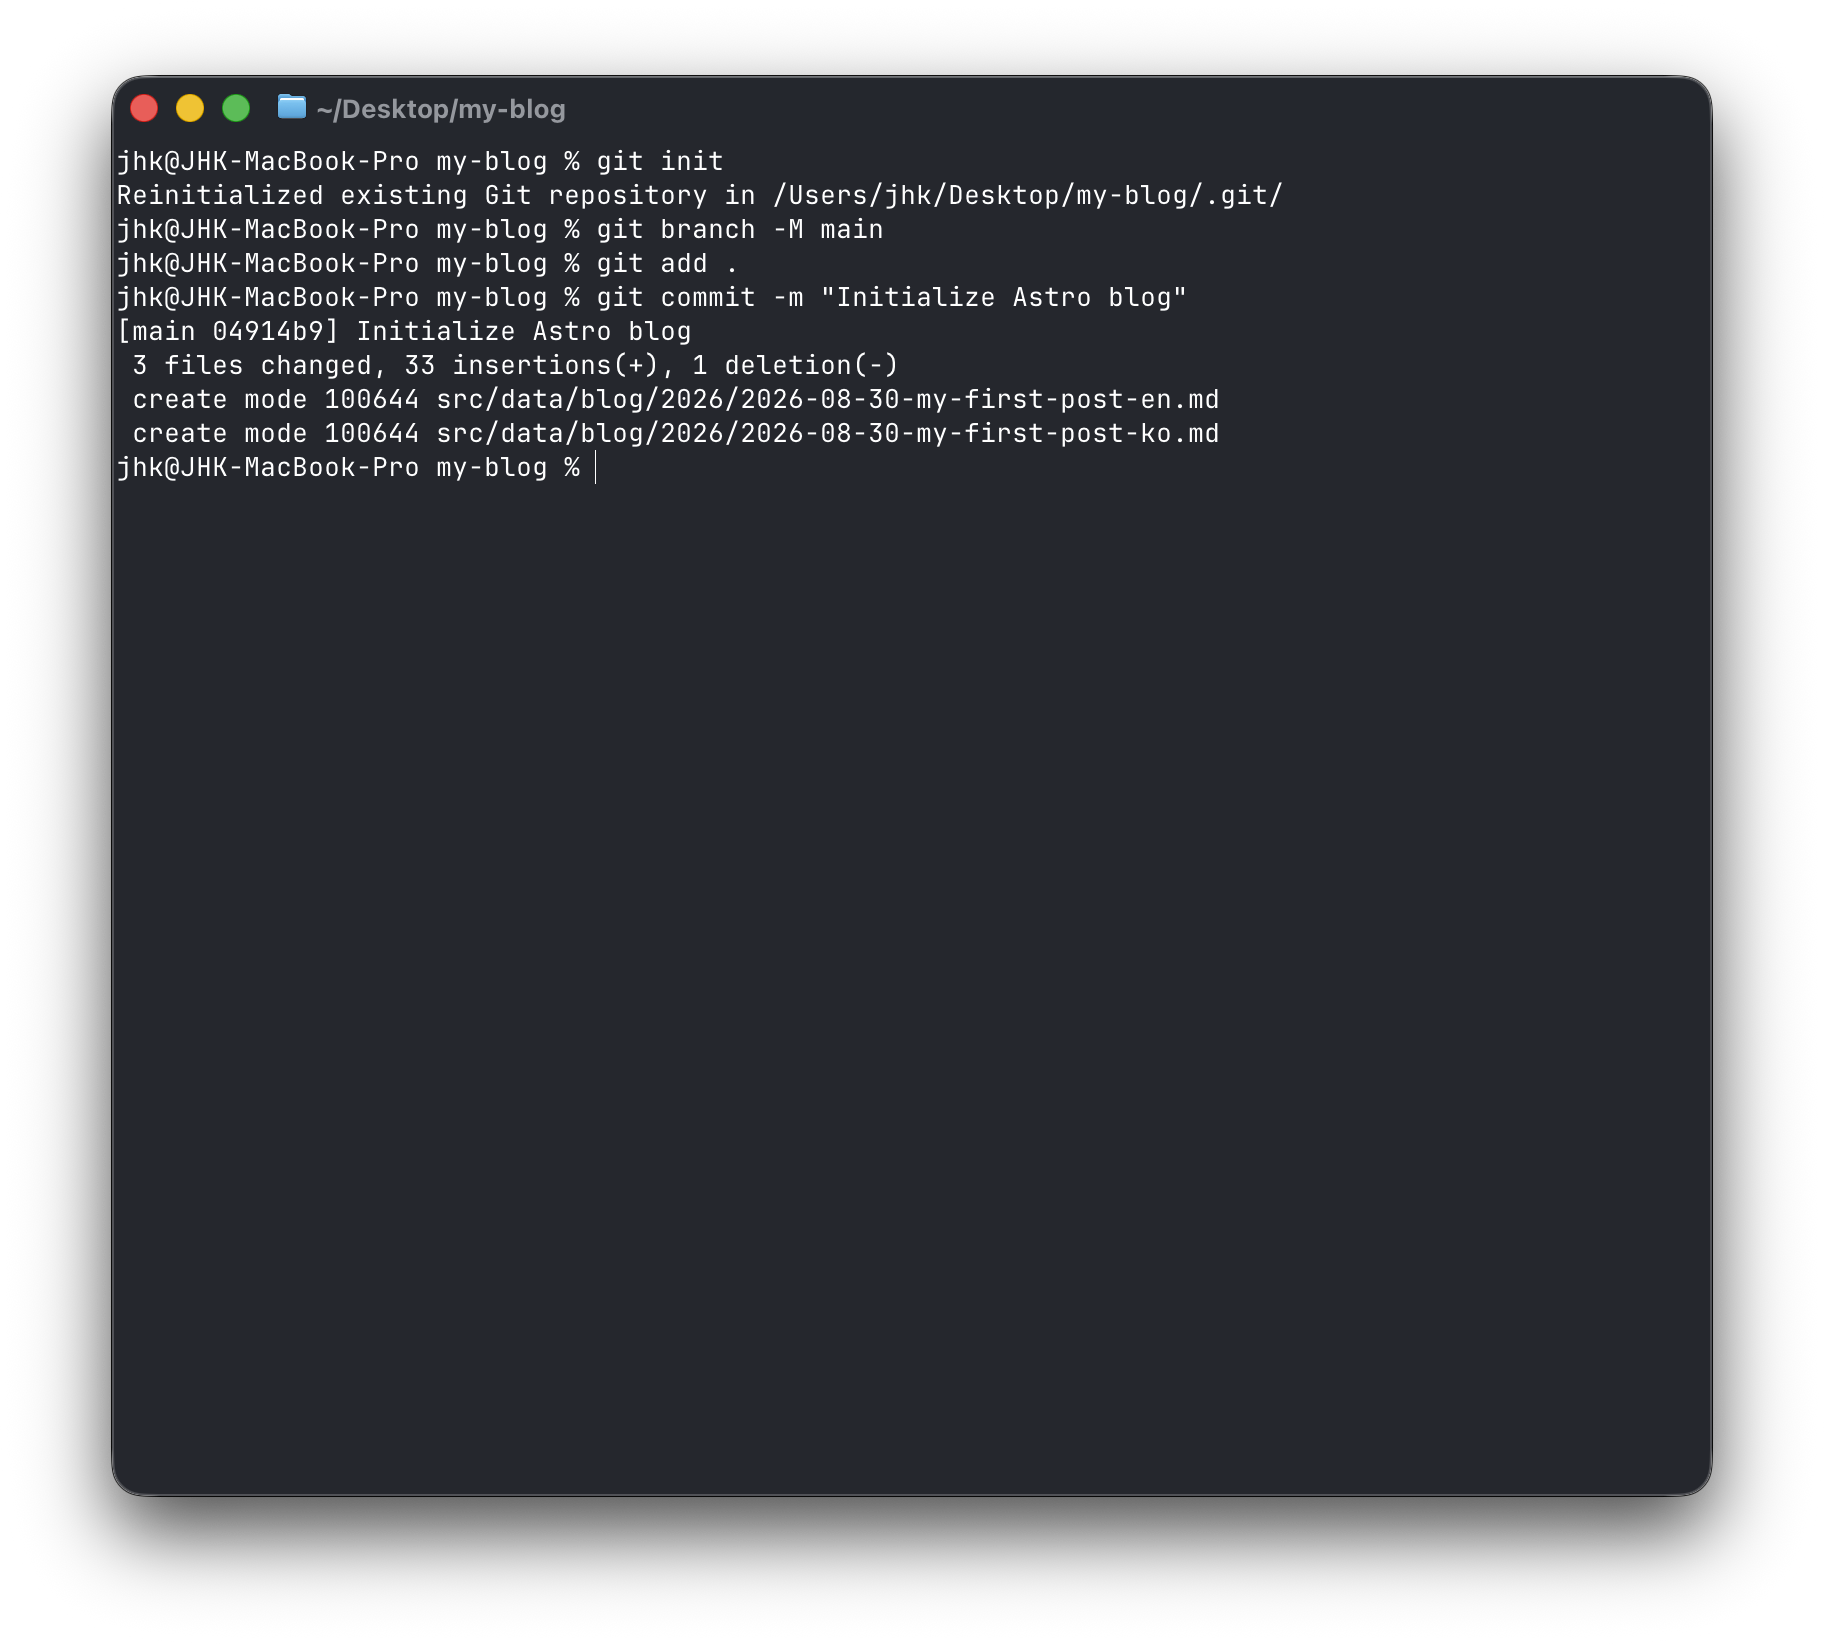 A commit is a saved snapshot. The words after
 -m explain what was saved.
Before committing, look at the files listed by the two checking commands. Continue only if they are files you meant to share. Do not commit .env files, passwords, access tokens, private keys, or personal files. If you find one, stop and remove it from the staged list before continuing.
Connect the computer folder to the GitHub repository. Before running this command, replace YOUR-USERNAME/YOUR-REPOSITORY with your own GitHub username and repository name. These are placeholders, so do not run the command unchanged:
GITHUB_REPO="YOUR-USERNAME/YOUR-REPOSITORY"
git remote add origin "https://github.com/${GITHUB_REPO}.git"
git remote -v
For this sample post, the GitHub repository address is:
https://github.com/imjhk03/astro-blog-example.gitSign in to GitHub with GitHub CLI
For this guide, use GitHub CLI (gh) to sign in. It is a small helper program for GitHub. Its normal login opens a browser, so you do not need to create or renew a personal access token by hand.
Check whether it is installed:
gh --versionIf the computer cannot find gh, install GitHub CLI and open a new terminal.
Start the sign-in flow:
gh auth loginWhen the questions appear, choose:
- GitHub.com.
- HTTPS for Git operations.
- Authenticate Git with your GitHub credentials? No
- Login with a web browser.
GitHub will show a one-time code and open a browser. Sign in there, enter the code, and approve the request. The CLI stores the login in the computer’s credential store.
Make sure Git knows how to use that login:
gh auth setup-git
gh auth status
Now push the project:
git push -u origin main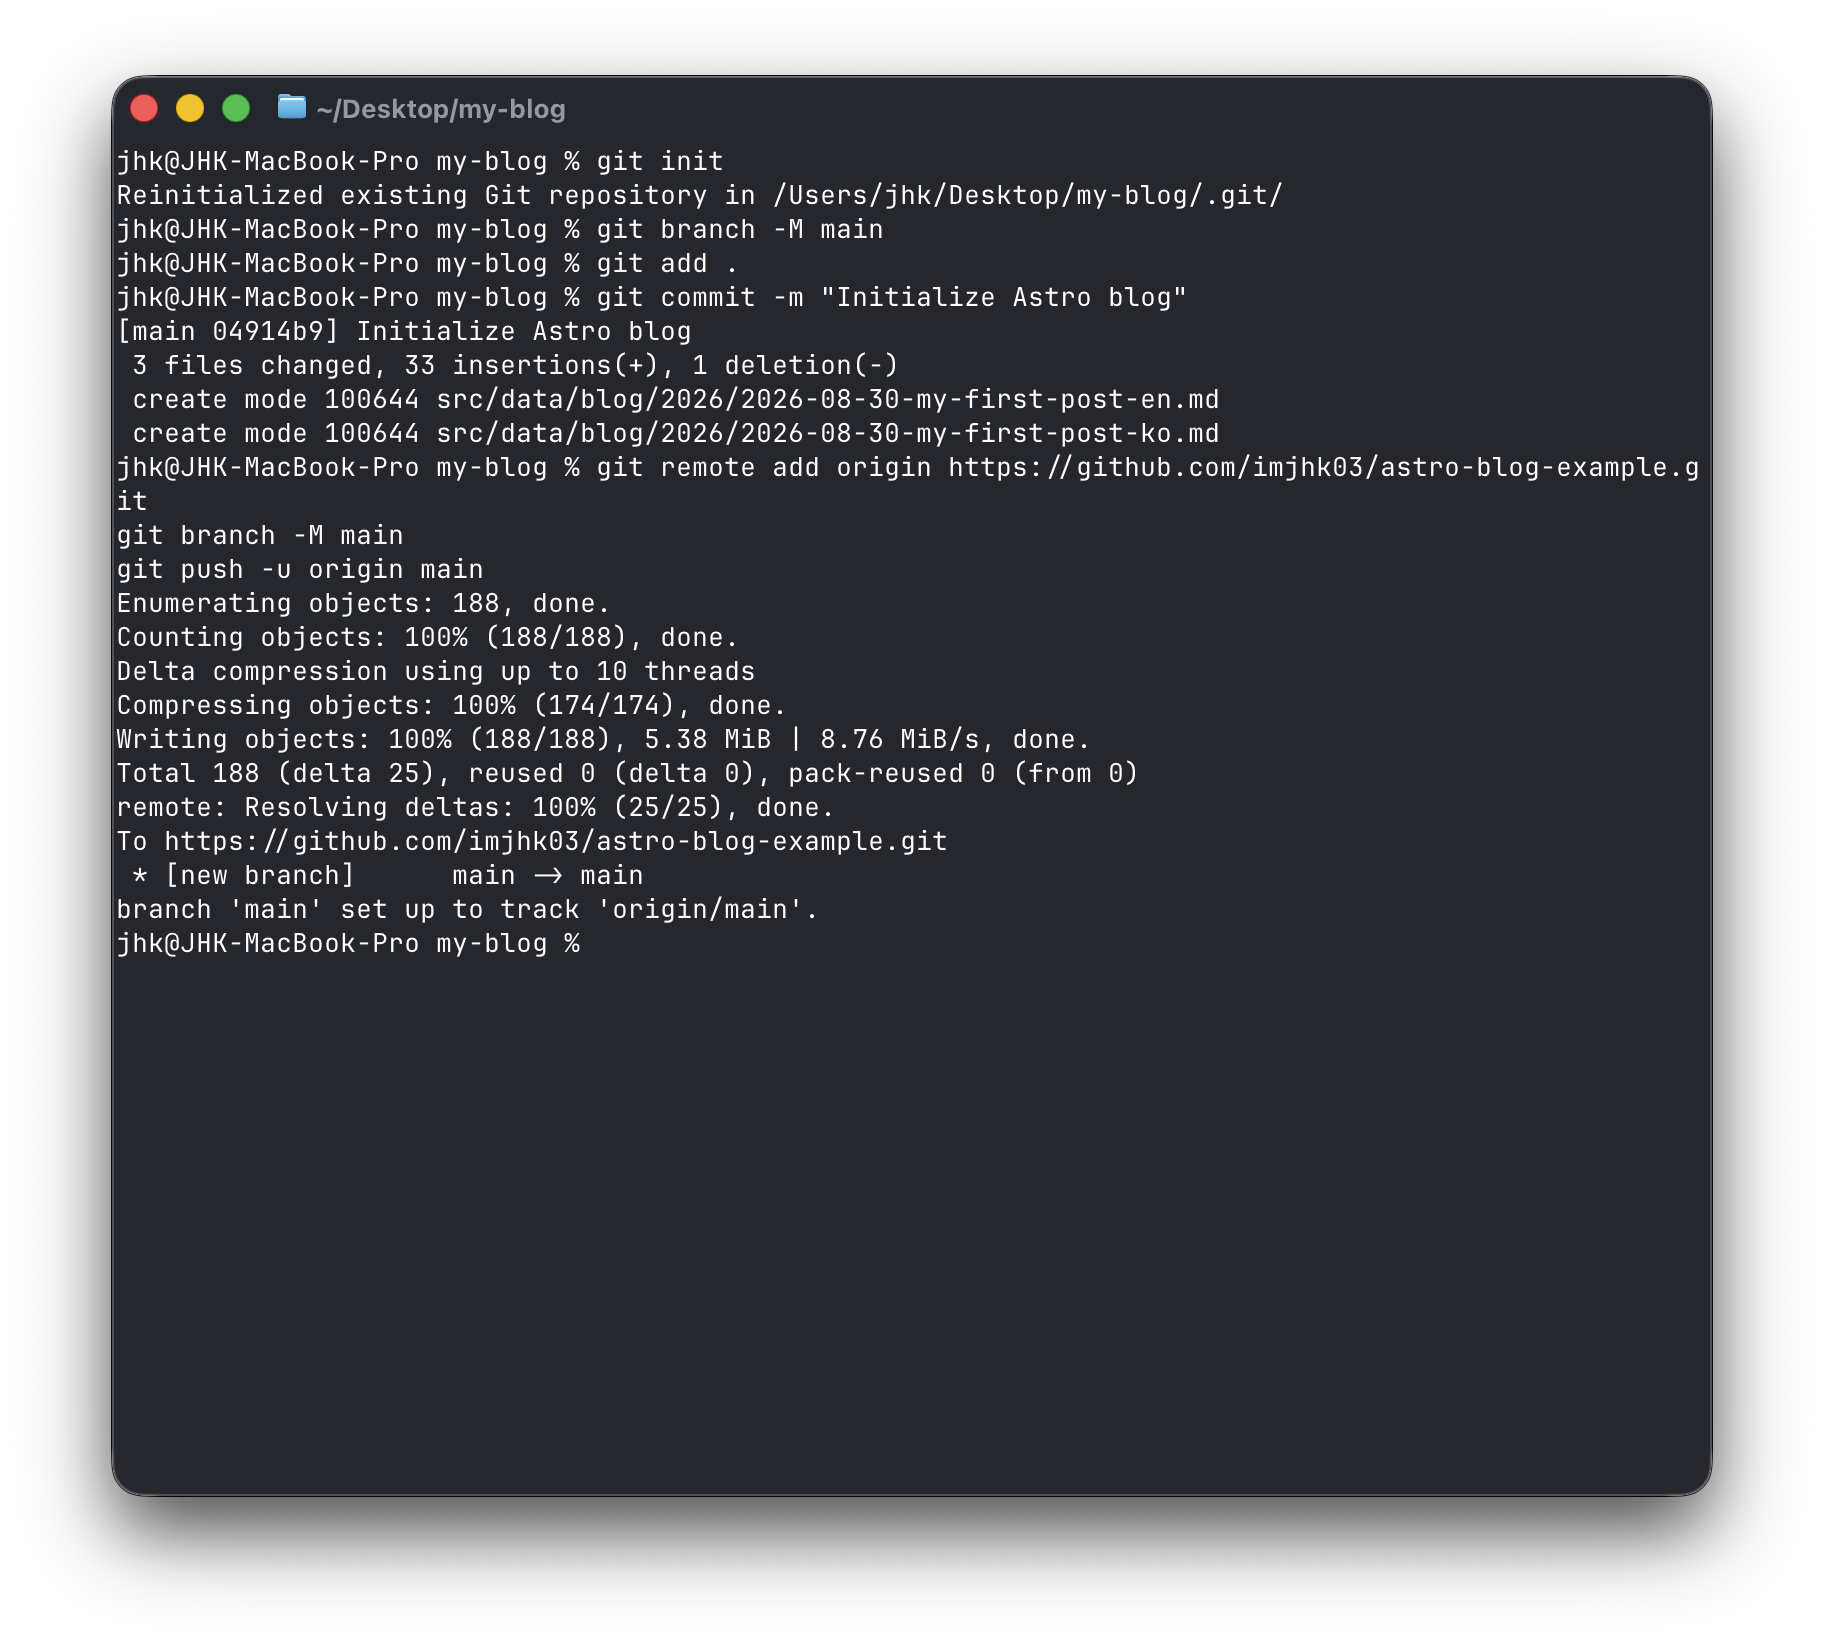
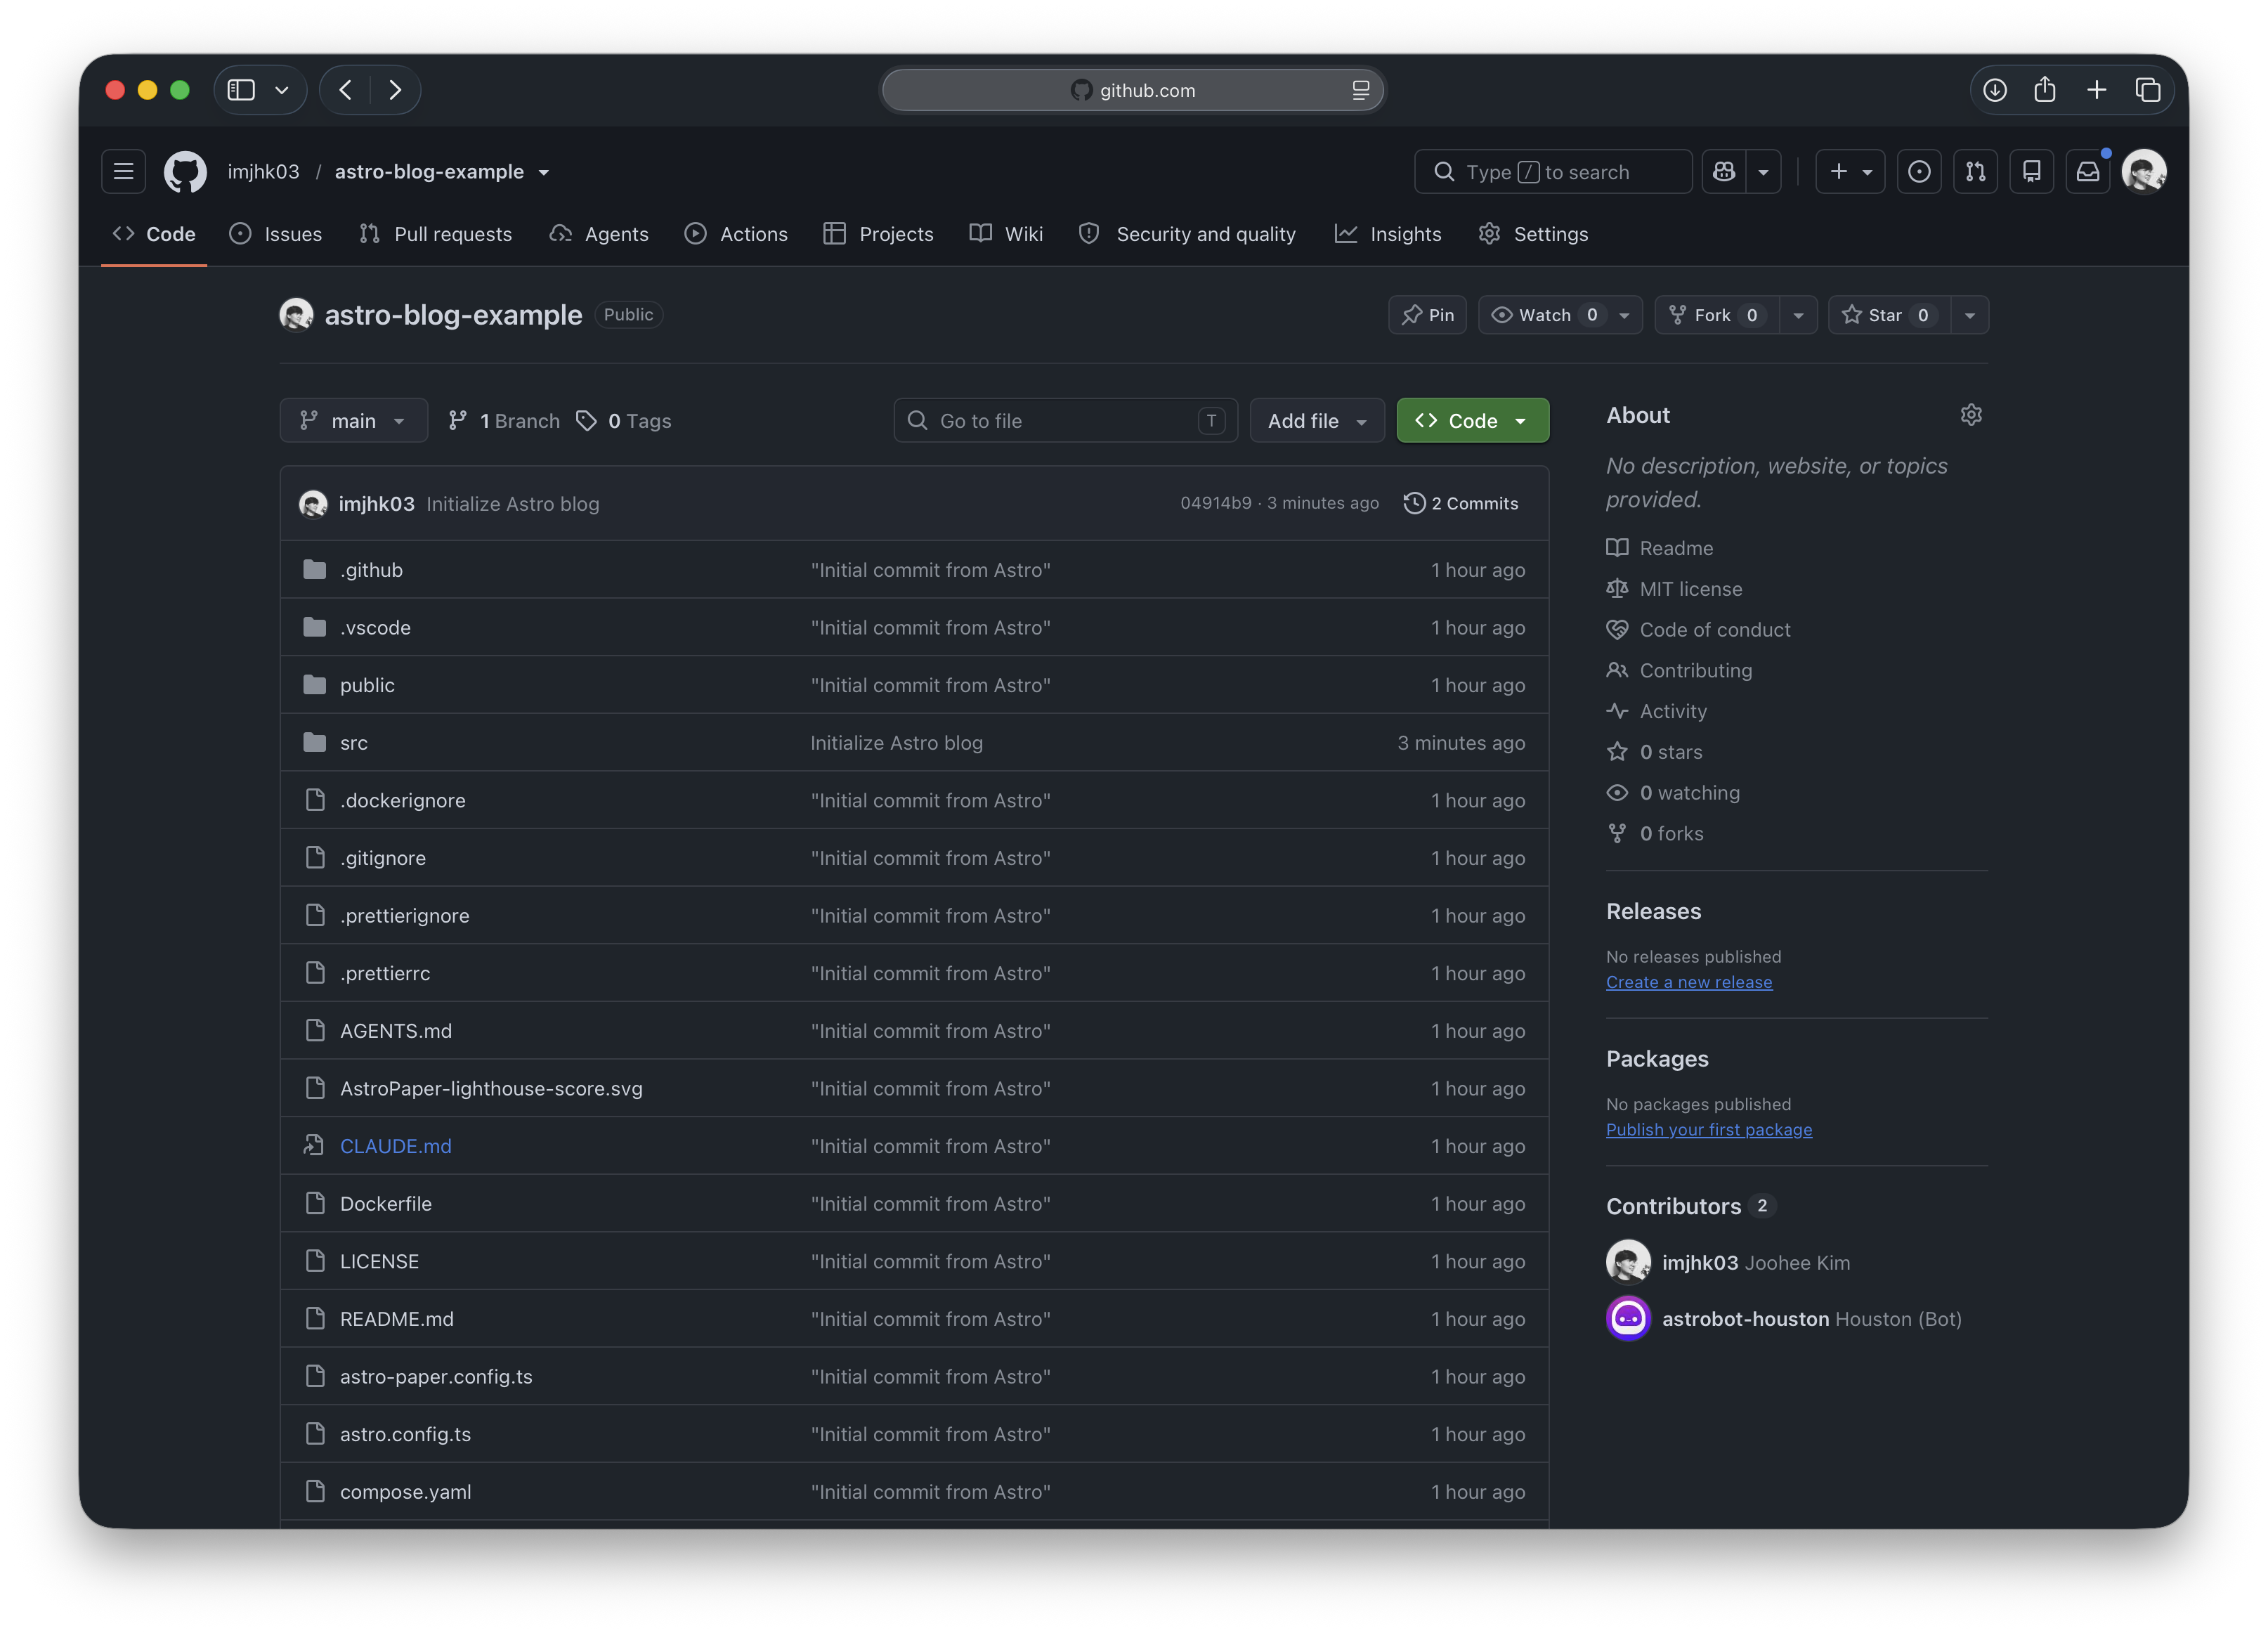 The command
 git push sends the saved snapshot from your computer to GitHub.
You should not need to paste a GitHub password or token. Read the GitHub CLI login guide or the gh auth setup-git guide if the questions look different.
If the computer cannot open a browser, use GitHub Desktop or follow GitHub’s personal access token instructions. A person should enter any secret themselves. Never paste a password, access token, or private key into an AI chat, a Markdown file, a Git remote URL, or the project.
Here are the four Git words you will use most often:
git addchooses changes for the next snapshot.git commitsaves the snapshot on your computer.git pushsends it to GitHub.git pullgets newer changes from GitHub.
Put the project online with Vercel
Vercel is the worker that turns the GitHub files into a public website.
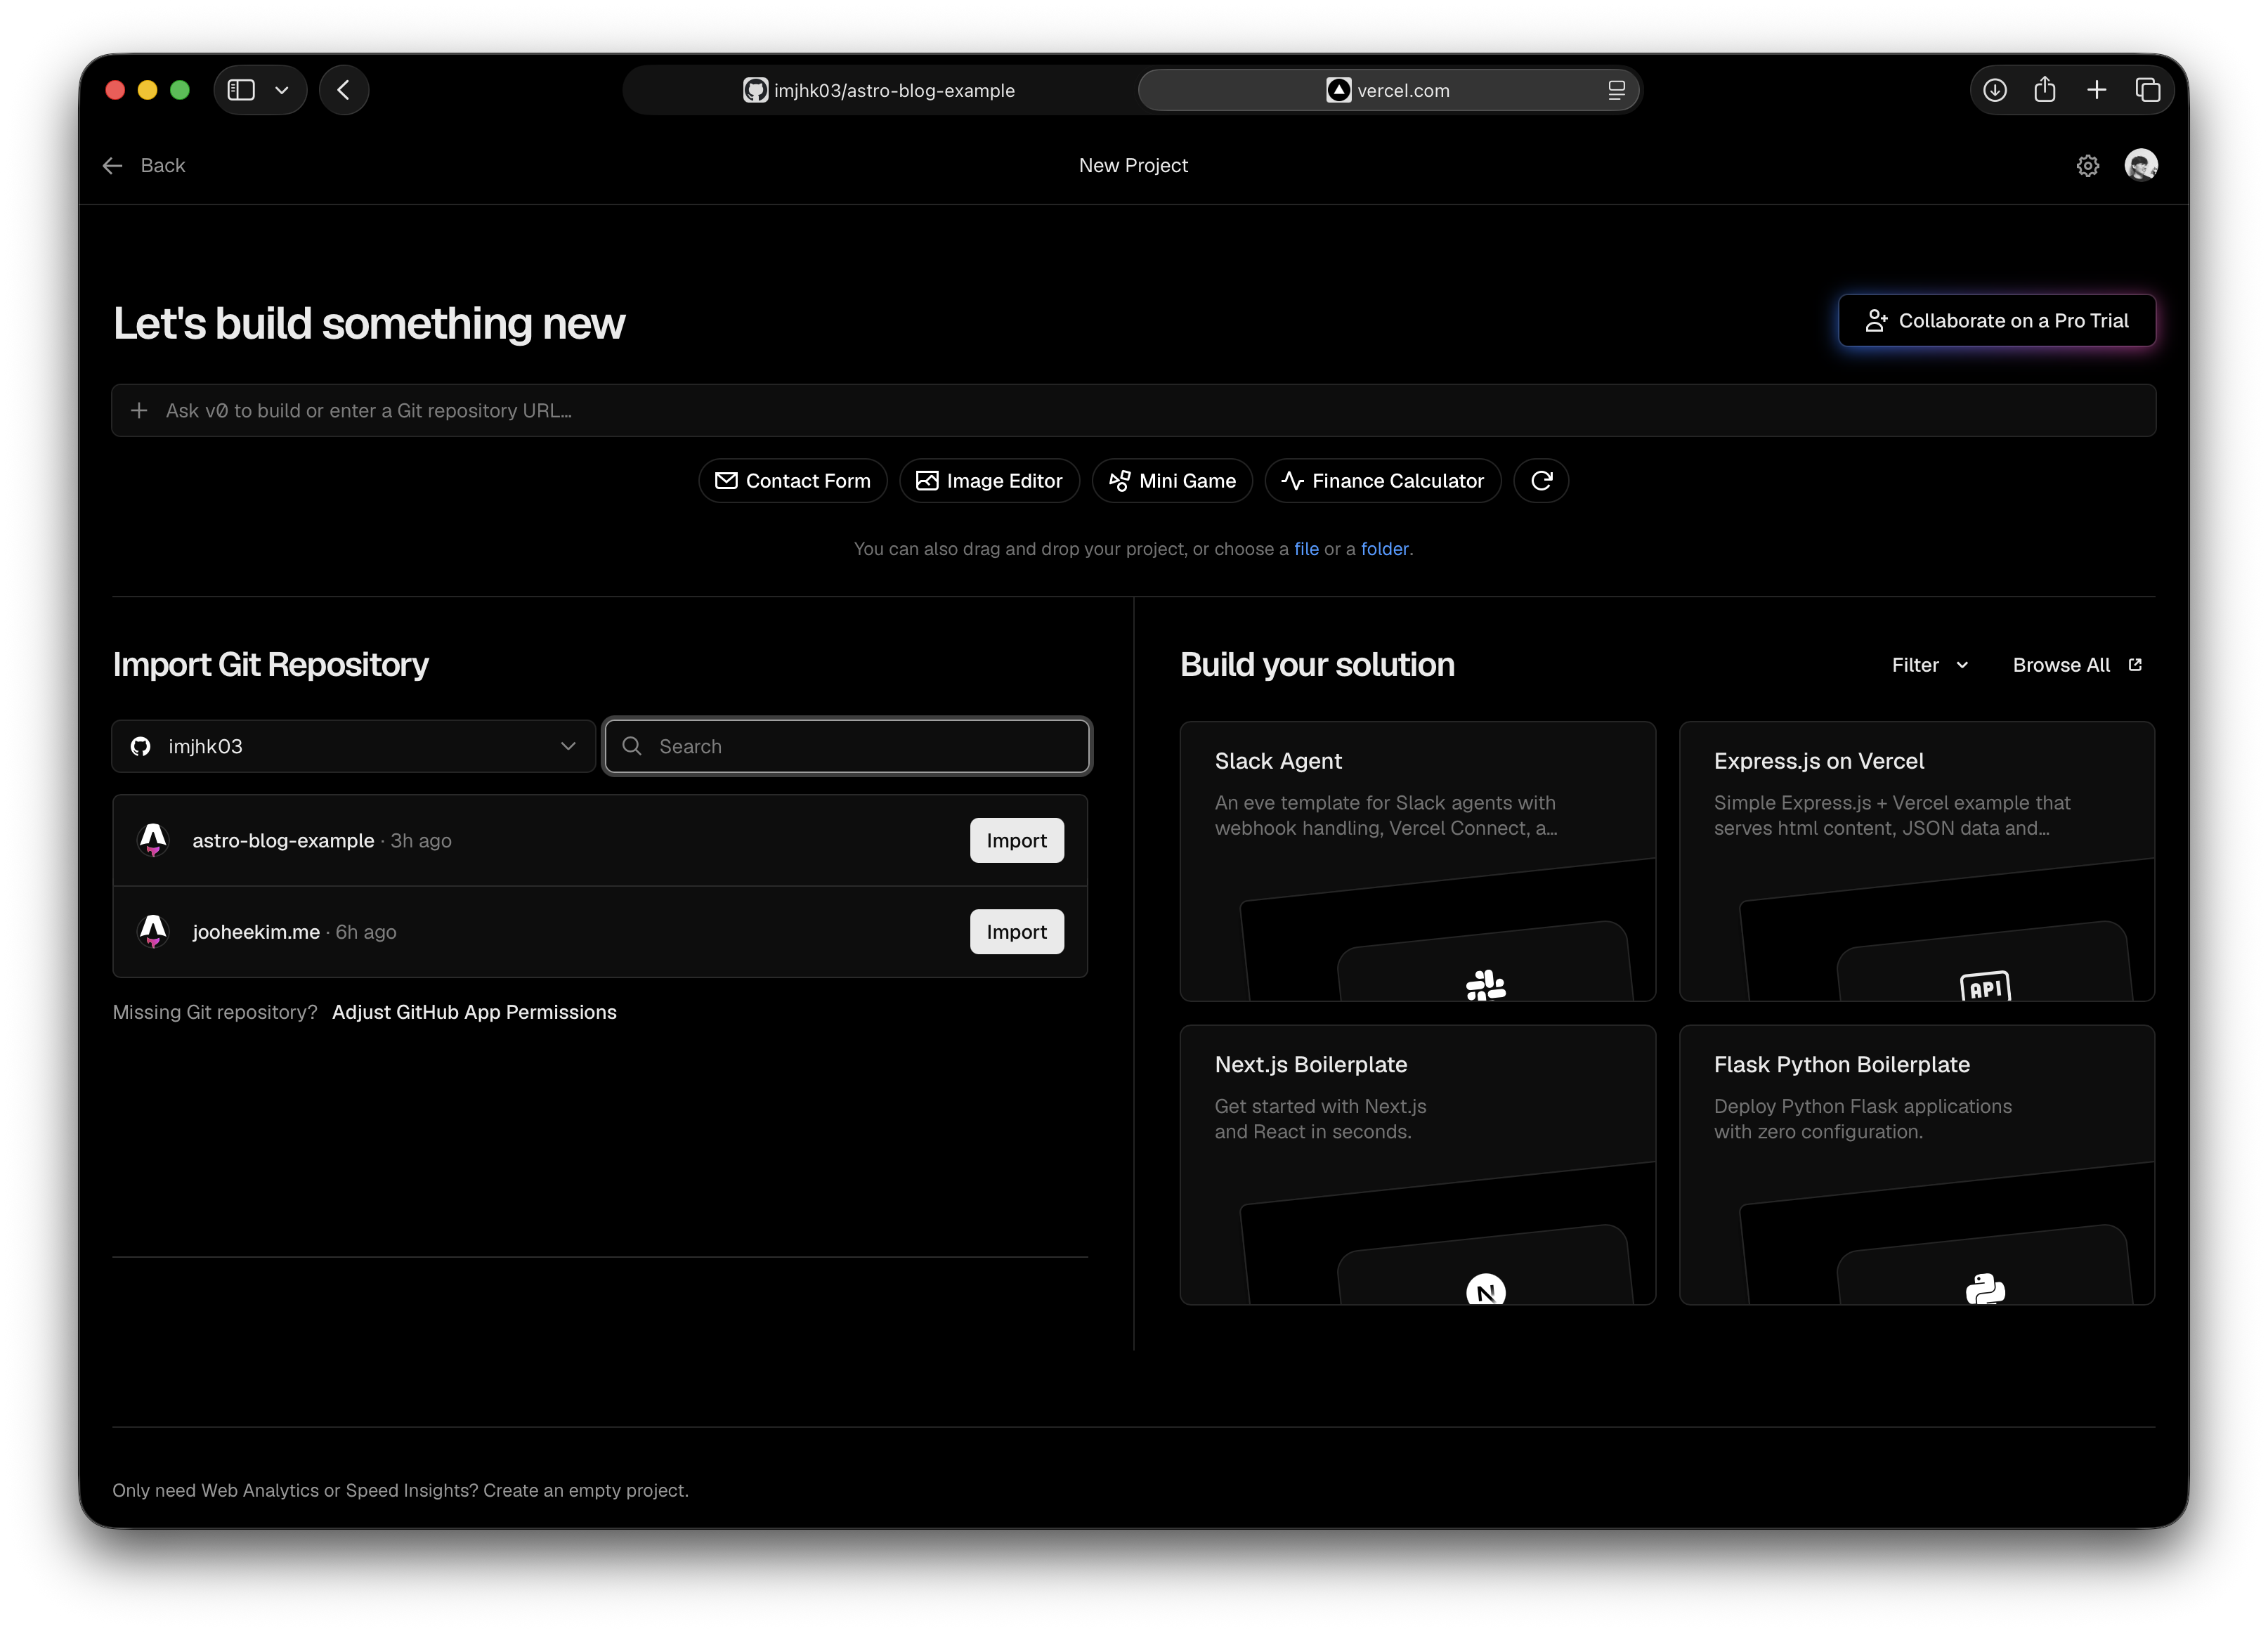
- Sign in to Vercel with GitHub.
- Choose Add New Project.
- Choose Import next to your GitHub repository.
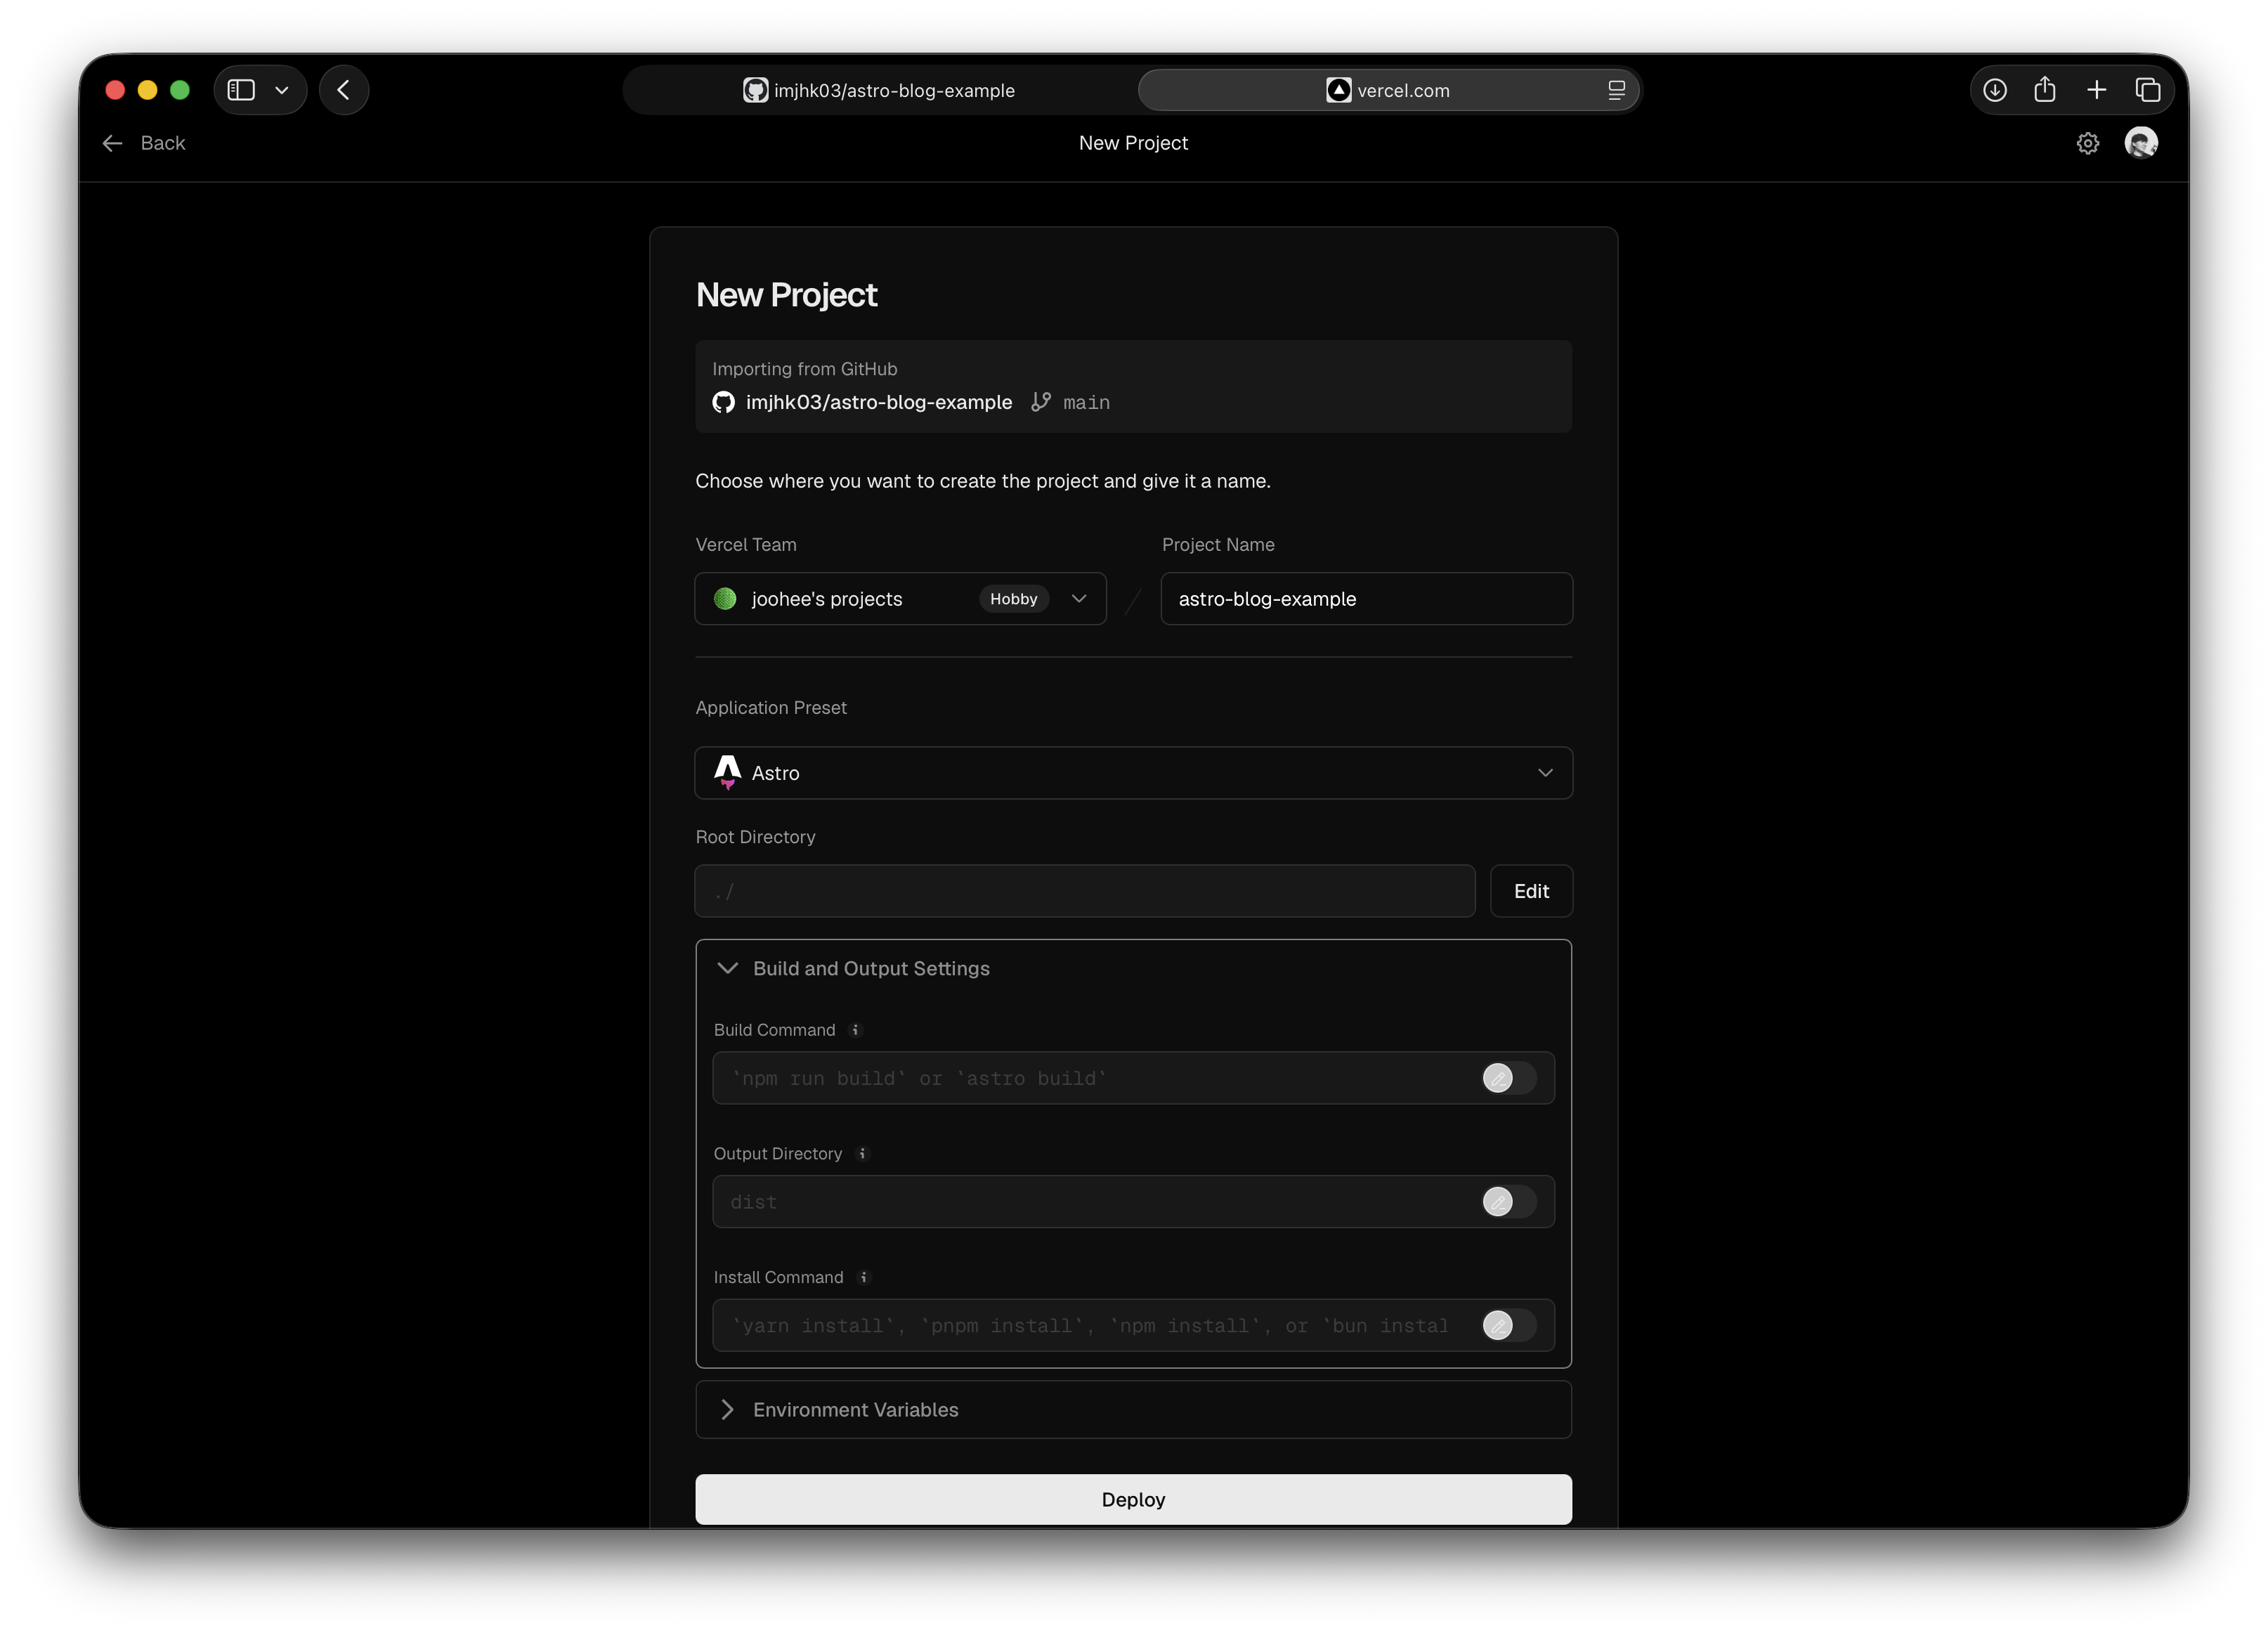
- Use the repository root as the root directory.
- Let Vercel choose Astro as the framework.
- Check that the build command is
npm run build. - If Vercel asks for an output directory, write
dist. - Click Deploy.
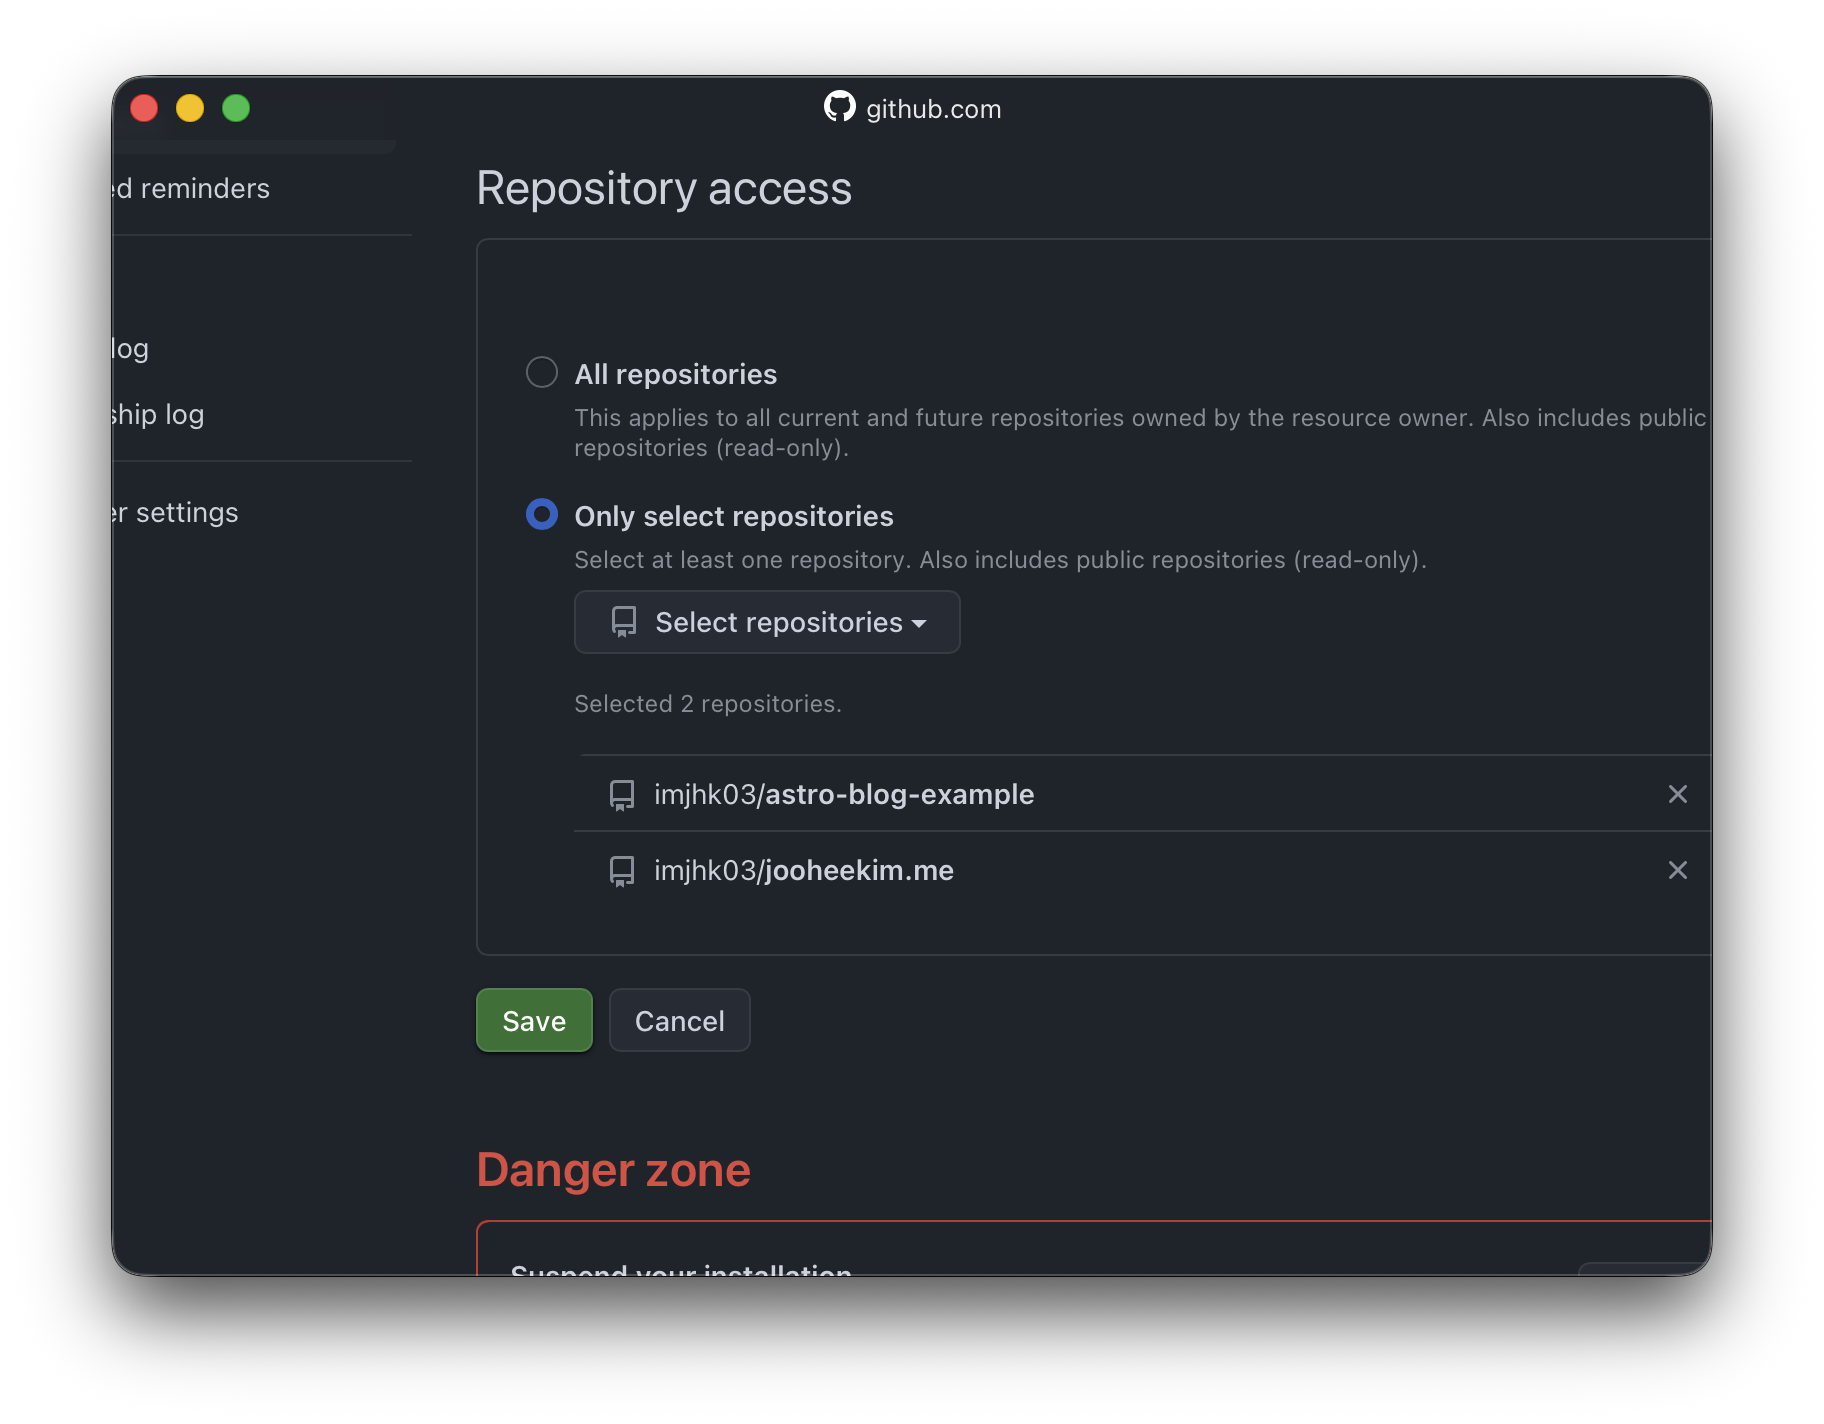
If you cannot see your repository in Vercel, you may need to change the repository access in your GitHub settings.
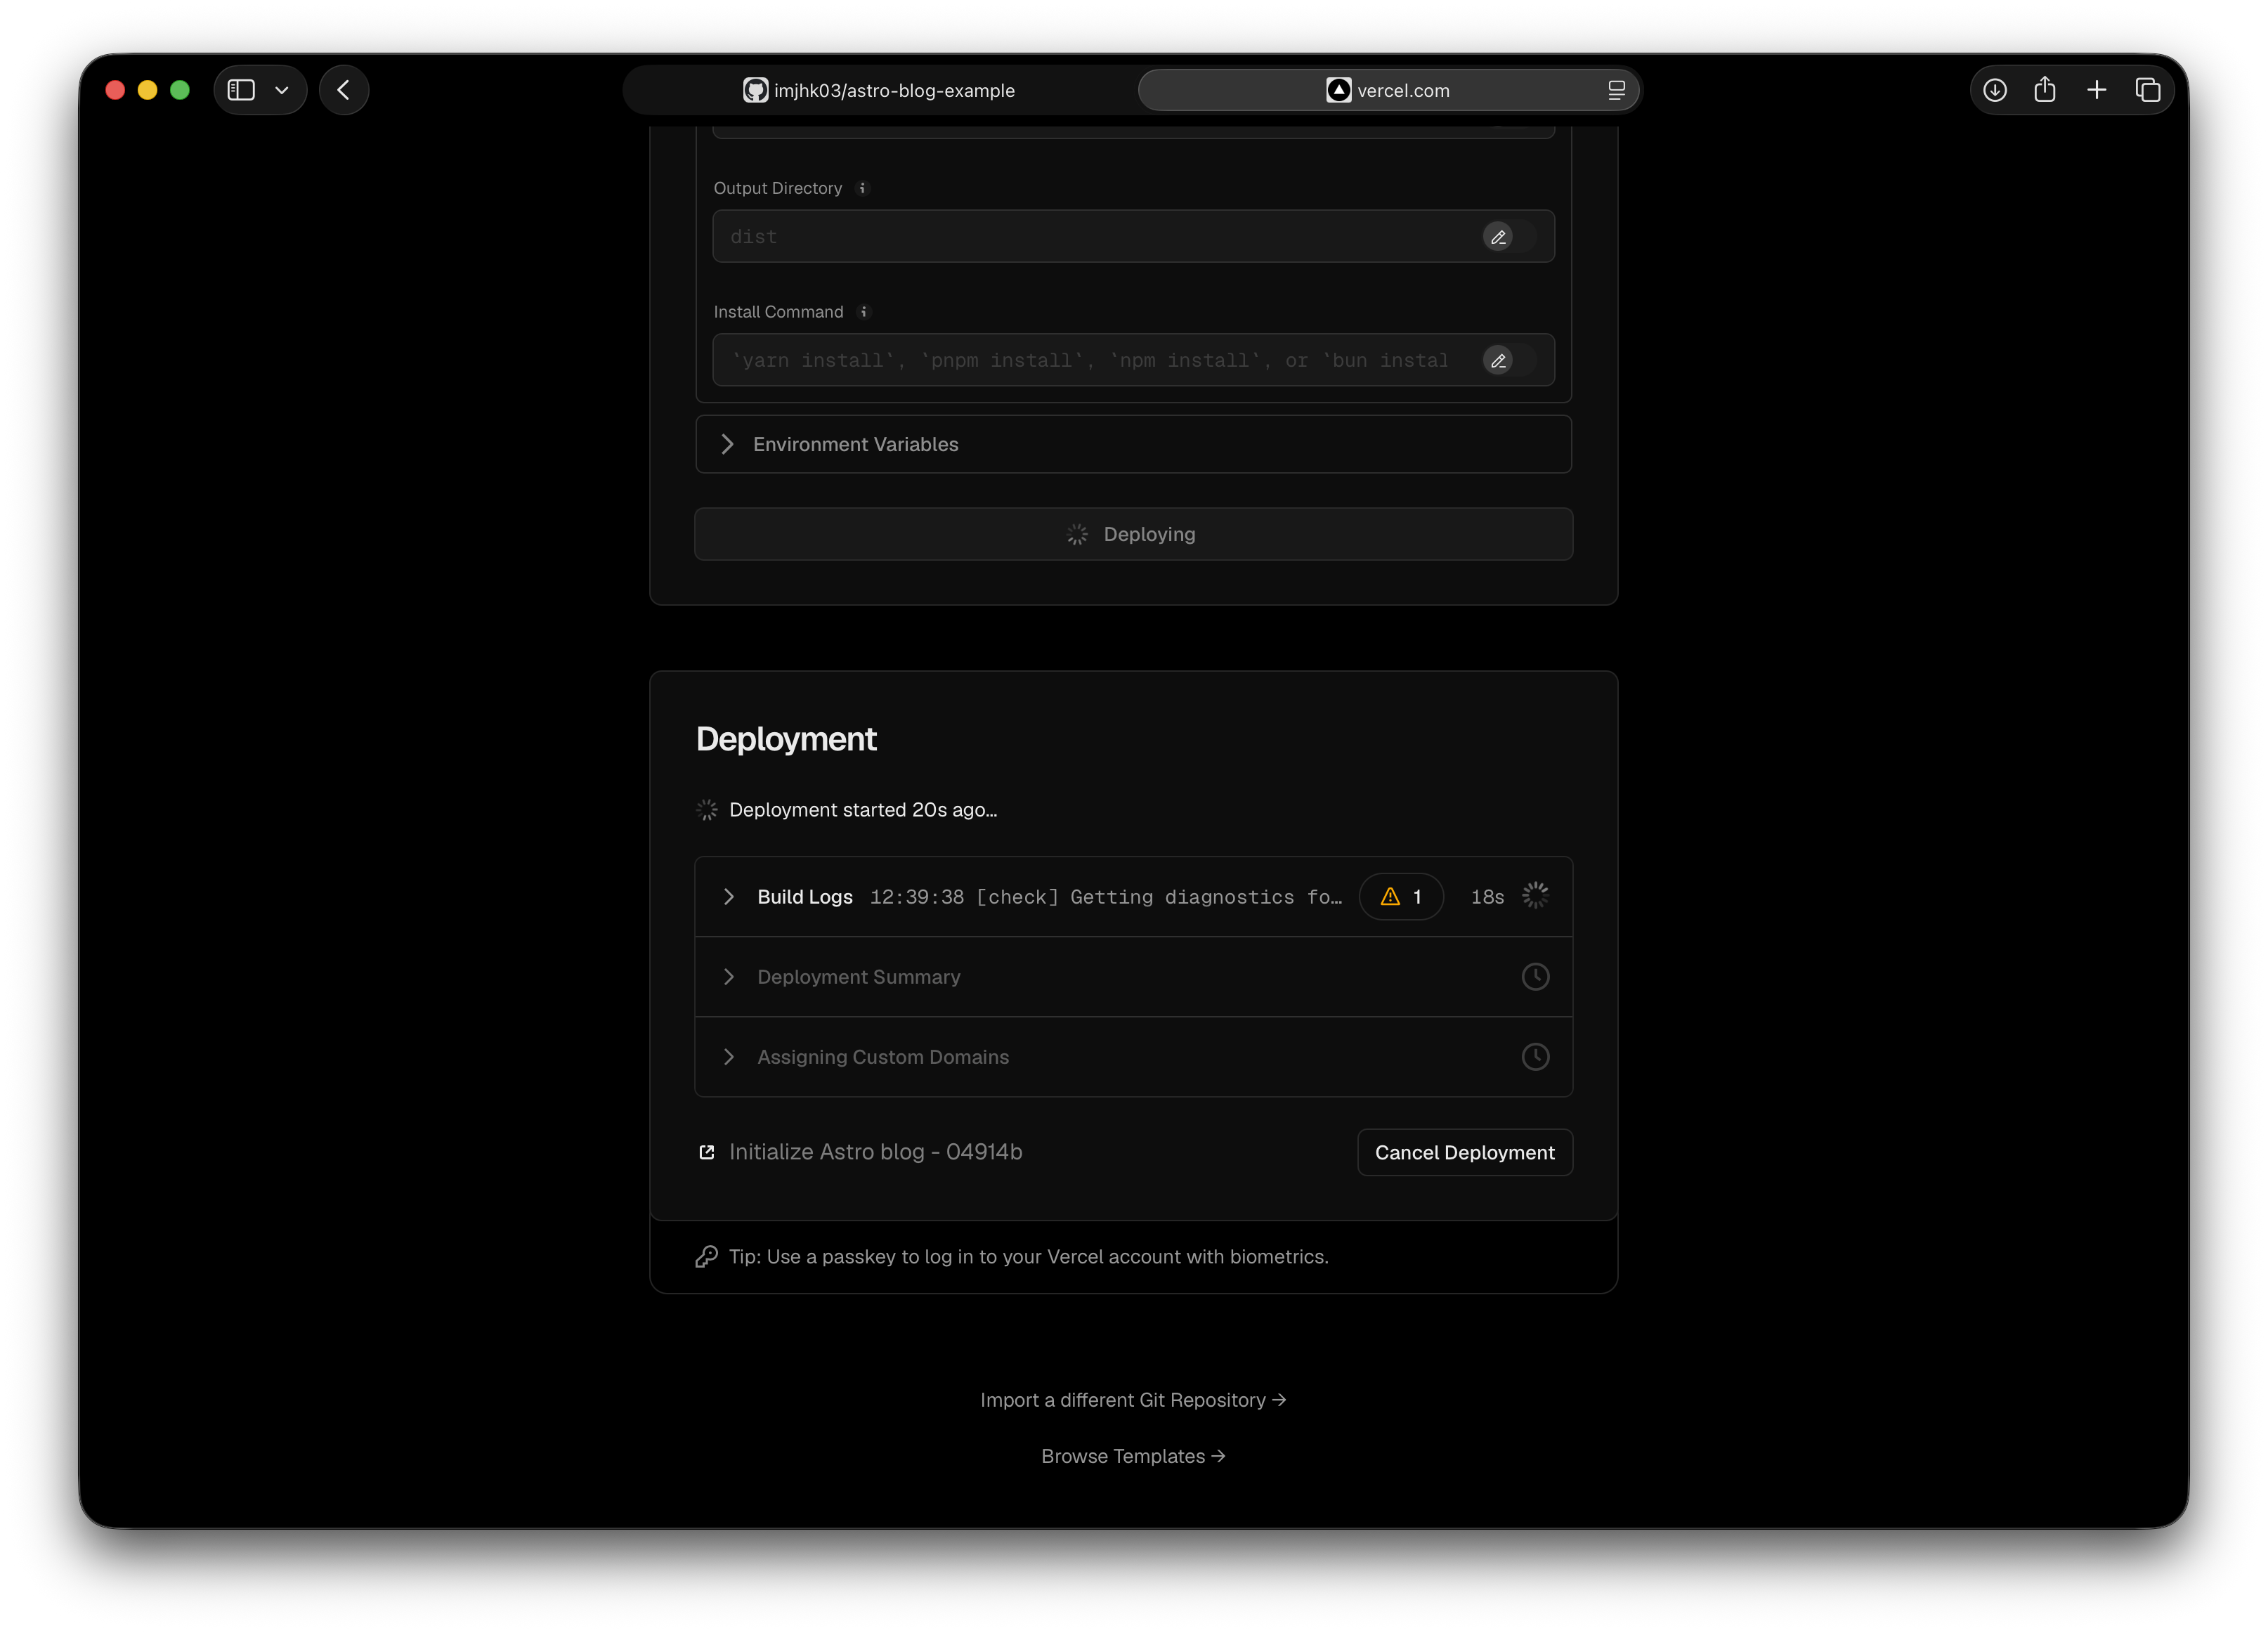
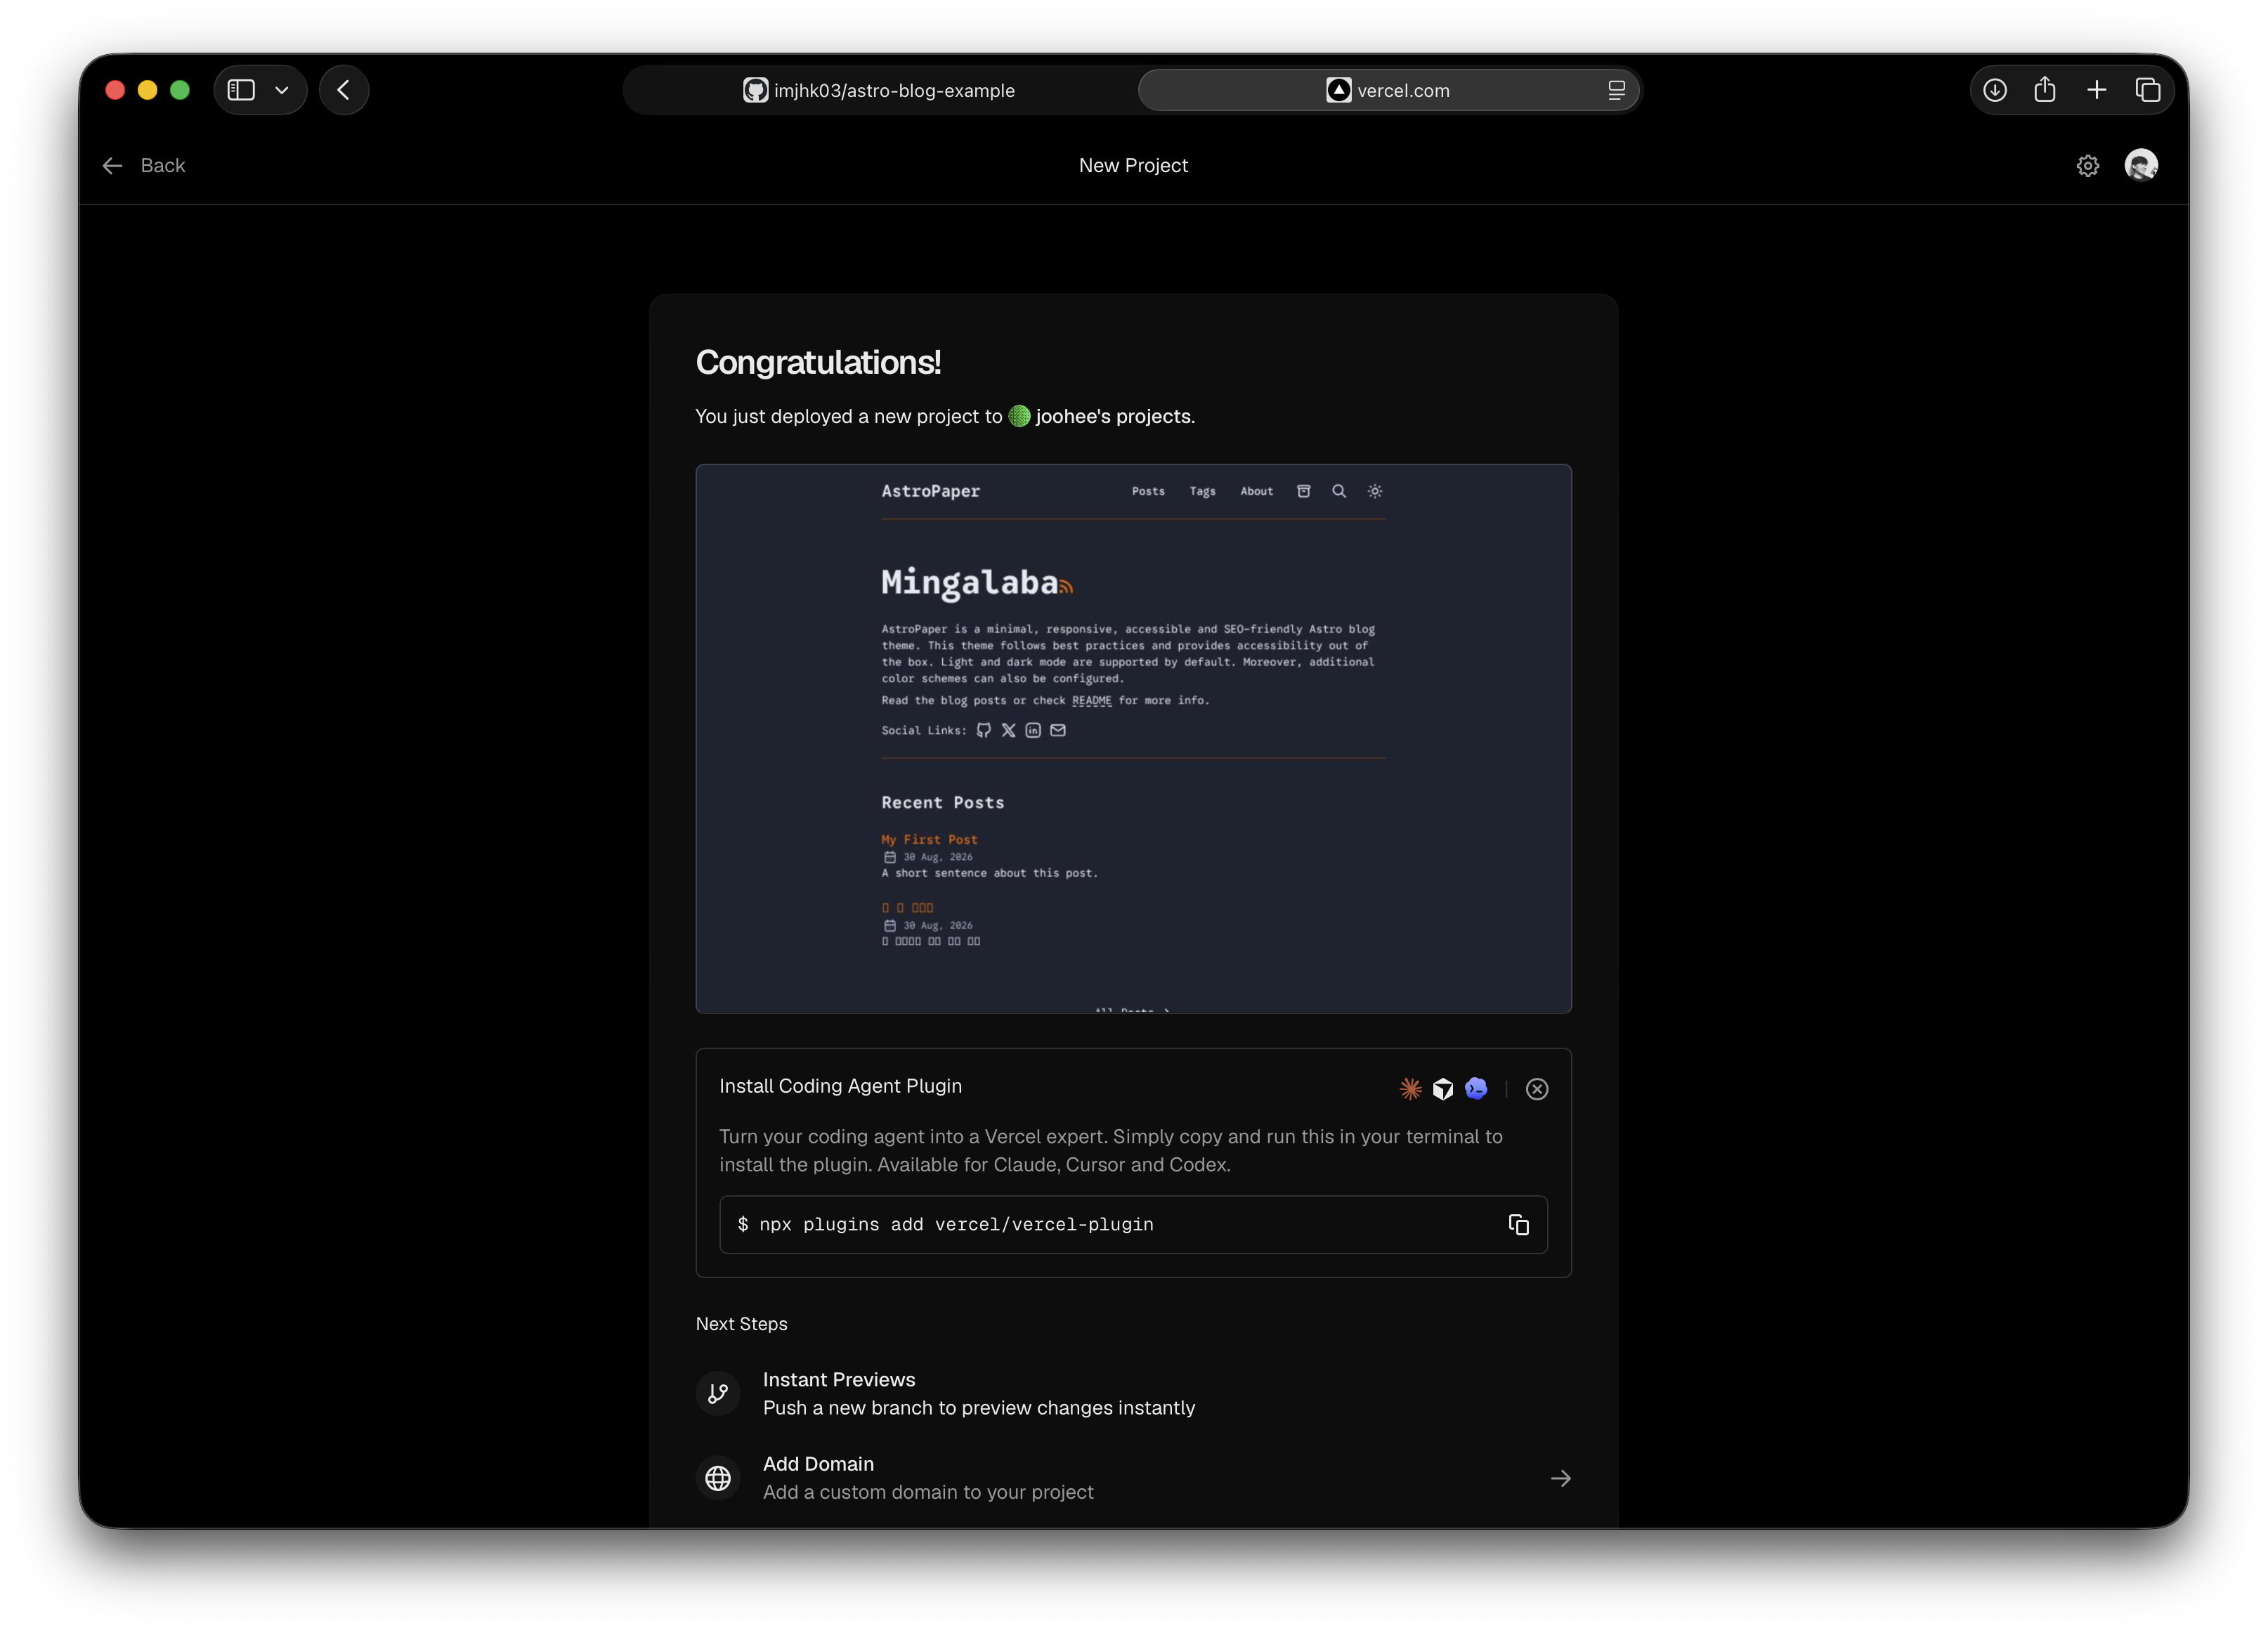 For this static blog, you do not need a special Vercel adapter. Astro makes ordinary files, and Vercel can serve them.
The first deployment gives you a temporary Vercel address. Open it and check the home page, a post, pictures, and search.
For the sample project, it is astro-blog-example-three.vercel.app.
After GitHub and Vercel are connected, the normal trip is automatic:
push to GitHub
    ↓
Vercel notices the change
    ↓
Vercel runs npm run build
    ↓
Vercel publishes the new files
Give the site its own address
The temporary Vercel address is enough for testing. To use an address such as myname.com:
- Open the Vercel project.
- Open Settings.
- Open Domains.
- Add your domain.
- Vercel will show DNS records.
- Copy those exact records to the company where you bought the domain.
- Wait for Vercel to check the domain.
- Change
site.urlinastro-paper.config.tsto the final HTTPS address. - Build and deploy again.
DNS is the address book that helps a domain find the correct server. Do not guess DNS numbers from an old tutorial. Use the values shown by your current Vercel project. For more information, check Vercel’s guide How do I add a custom domain to my Vercel project?.
The everyday routine
After the first setup, publishing a post is small:
git pull origin main

# write or edit a Markdown file under src/data/blog/

npm run build
git add src/data/blog/2026/2026-08-30-my-second-post.md
git commit -m "Add second blog post"
git push origin main
The important idea is this: the GitHub project is the source of truth. Do not edit the website directly inside Vercel. The next GitHub deployment can replace direct changes.
A recipe for an AI coding agent
An AI coding agent is a computer helper that can read files, change files, run commands, and explain what it did.
The agent can do most of the computer work. A person still needs to approve account sign-ins, GitHub access, Vercel access, payments, and DNS changes.
Give the agent these details:
SITE_TITLE       The name of the blog
AUTHOR           The author's name
DESCRIPTION      A short description
DOMAIN           The final HTTPS address, if there is one
GITHUB_REPO     The user's GitHub account and repository
TIMEZONE        An IANA timezone such as Asia/Seoul
Then follow this recipe:
-
Check that the computer is in the intended empty parent folder.
-
If the folder has an unrelated project or unsaved changes, stop and ask the person first.
-
Check
node --version,npm --version, Git, andgh --version. Use Node.js22.12.0or newer. Ifghis missing, ask the person to install GitHub CLI. -
From the empty parent folder, run
npm create astro@latest -- --template satnaing/astro-paperand create the project in a new folder such asmy-blog. -
Change into the new folder with
cd my-blog. Runnpm install, then startnpm run dev. Make sure the starter opens locally, and stop the development server withControl + Cbefore continuing. -
Open
src/content.config.tsand changeBLOG_PATHfromsrc/content/poststosrc/data/blog. Make sure the loader still usesBLOG_PATHas its base. -
Update
astro-paper.config.tswith the person’s title, name, description, profile URL,site.url,site.lang: "en", and timezone. If there is no custom domain yet, keep a temporary URL and replace it with the Vercel URL after the first deployment. -
Check
astro.config.ts. Make sure itssitevalue isconfig.site.url. -
Add one example post under
src/data/blog/<year>/. Setdraft: trueuntil the person says it is ready. To check a public route, use an existing published post or ask permission to temporarily usedraft: false; this project hides draft posts from the generated public routes. -
Run
npm run build. Fix the real error if it is caused by the new files. Do not hide an error by turning off checks. -
Run
npm run previewonly after the build succeeds. Remember that preview serves the existingdist/folder and does not rebuild it. -
Check the output under
dist/and confirm that Pagefind finished. -
Check
git status,git log, andgit remote -v. If this is not yet a Git repository, rungit initandgit branch -M main. Stop if existing history is unclear; never overwrite it. -
Authenticate with
gh auth login, choose HTTPS and browser login, then rungh auth setup-git. If browser sign-in is unavailable, stop and ask the person to complete an approved authentication method. Never ask the person to paste a token into the agent chat, and never save it in the project. -
If the person has asked for GitHub setup, verify that
GITHUB_REPOis an empty repository. If it does not exist, ask the person to create it or explicitly authorize creating it; never guess its visibility. Add the remote only when there is no existingorigin:Set
GITHUB_REPOto the person’s actual GitHub username and repository name. Do not run the command while it still contains placeholder text such asYOUR-USERNAMEorYOUR-REPOSITORY:GITHUB_REPO="YOUR-USERNAME/YOUR-REPOSITORY" git remote add origin "https://github.com/${GITHUB_REPO}.git" git remote -v -
Only commit or push when the person has asked for that Git action. For a new project, run
git add ., inspectgit status --shortandgit diff --cached --name-only, stop if.envfiles, credentials, private keys, or personal files are staged, then rungit commit -m "Initialize Astro blog"andgit push -u origin main. -
Import the repository into Vercel with the Astro framework,
npm run build, anddist. -
Ask the person to complete any sign-in, permission, or DNS step that the agent cannot safely complete.
-
After deployment, check the Vercel address, the custom domain if one was configured, one post,
/rss.xml,/sitemap-index.xml, and/search.
The agent must stop instead of guessing when:
- the folder contains a different project;
- the GitHub repo is not empty and its history is unclear;
- the user cannot prove they own the domain;
- GitHub or Vercel sign-in is not available;
- the build fails because of unrelated code;
- somebody asks to copy private passwords, keys, or personal content without permission;
- deleting files or rewriting Git history seems necessary.
The setup is finished when:
npm run buildworks;- the site works with
npm run preview; - a published sample post has a valid route;
- the correct GitHub repo contains the project;
- Vercel has a successful deployment;
- the site uses the correct domain and title;
- the person knows that future publishing means writing Markdown, building, committing, and pushing.
Small dictionary
- Website: pages people can visit in a browser.
- Browser: an app that shows websites.
- File: saved information.
- Folder: a box that holds files.
- Terminal: a text box for giving commands to a computer.
- Command: an instruction typed into a terminal.
- Local: working only on your computer.
- Build: turning project files into finished website files.
- Deploy: putting the finished files online.
- Repository: a project folder saved by Git.
- Commit: a saved snapshot of a project.
- Push: sending commits to GitHub.
- Domain: the website’s human-friendly address.
- DNS: the address book that points a domain to a server.
The main idea
The website may look like one thing, but it is really a simple chain:
- I write in Markdown.
- Astro turns the writing into pages.
- GitHub keeps the project safe.
- Vercel publishes the pages.
- A domain gives the pages an easy address.
After the first setup, I do not need to build a server or upload each page by hand. I write a file, check the build, save the change, and push it to GitHub. I hope this guide makes it easier for you to start your first blog.
Useful references:
- Astro installation and setup
- Astro’s first blog tutorial
- AstroPaper on GitHub
- AstroPaper customization notes
- GitHub: add locally hosted code to GitHub
- Astro on Vercel
- Vercel for GitHub
Thanks for reading!